

HowTo configure Pi-hole, possibly the best ad blocker and privacy protector
Pi-hole is possibly the best ad-blocker and privacy protector, requiring minimal resources to run, while being very efficient.


In our last post we learned how to install Pi-hole in a Proxmox VE Container.
In this post we will configure Pi-hole for DNS server and DHCP server roles.
PiH = Pi-hole
WAC = Web Admin Console (the web browser GUI to administer server applications)
Let's visit the PiH WAC: 192.168.0.123/admin.
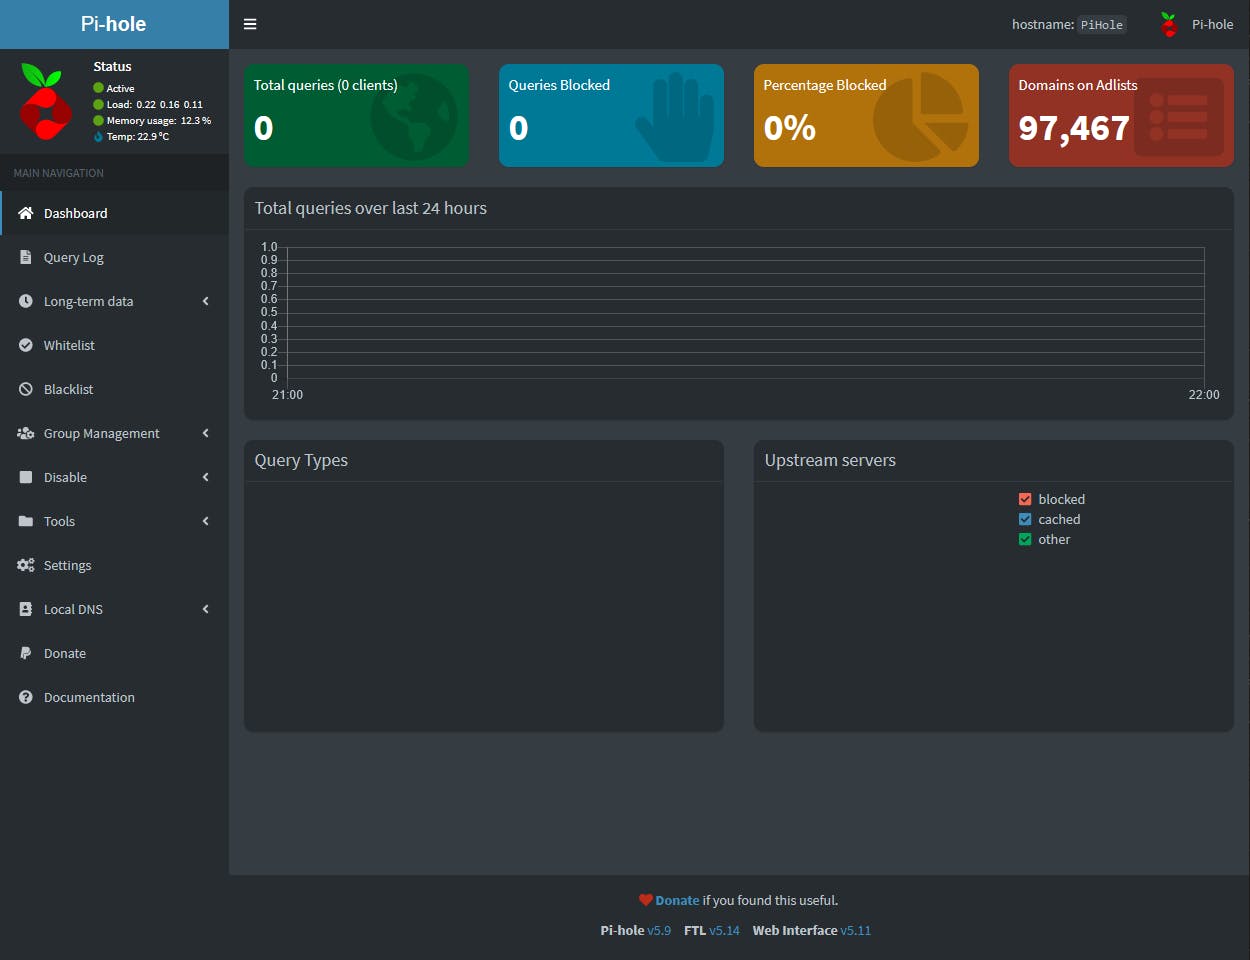
On the left of the Dashboard is the sidebar with all available options, while on the right we have the statistics, which are real time.
Let's configure the DNS options first. Select Settings.

FTL is the component which provides DNS and DHCP services to PiH.
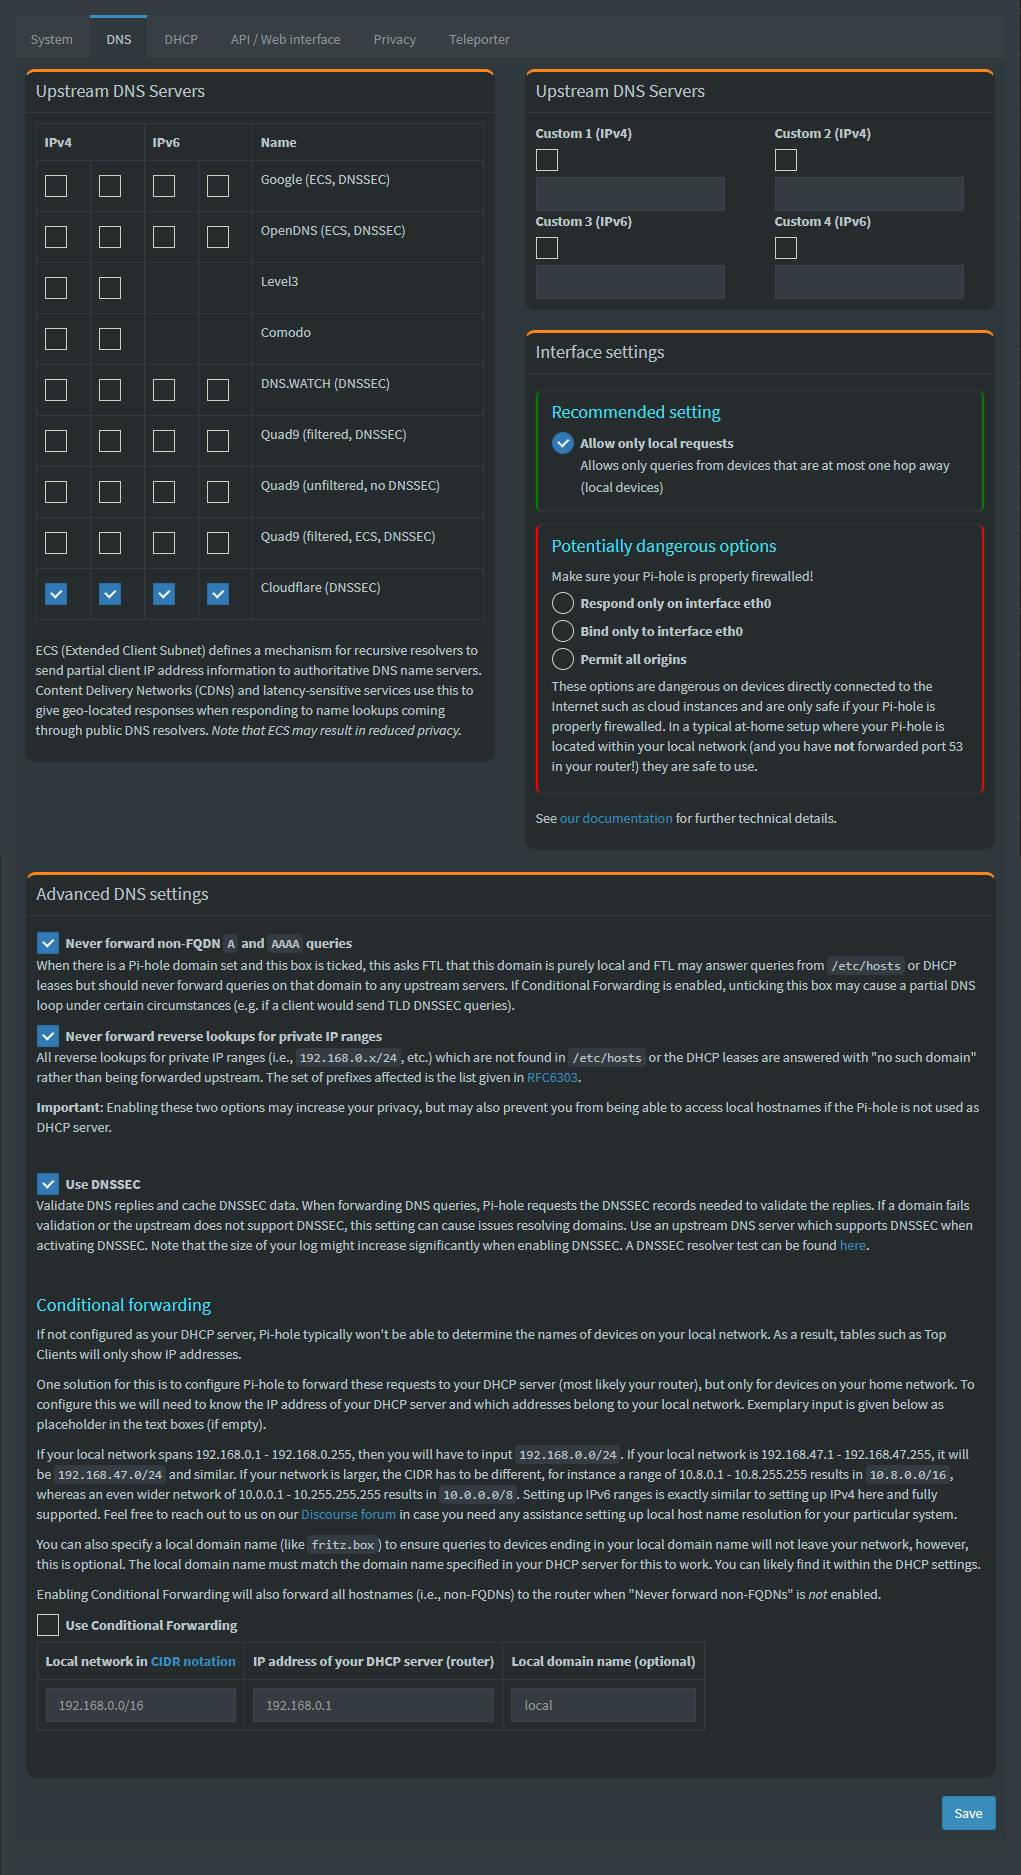
Select the DNS tab.
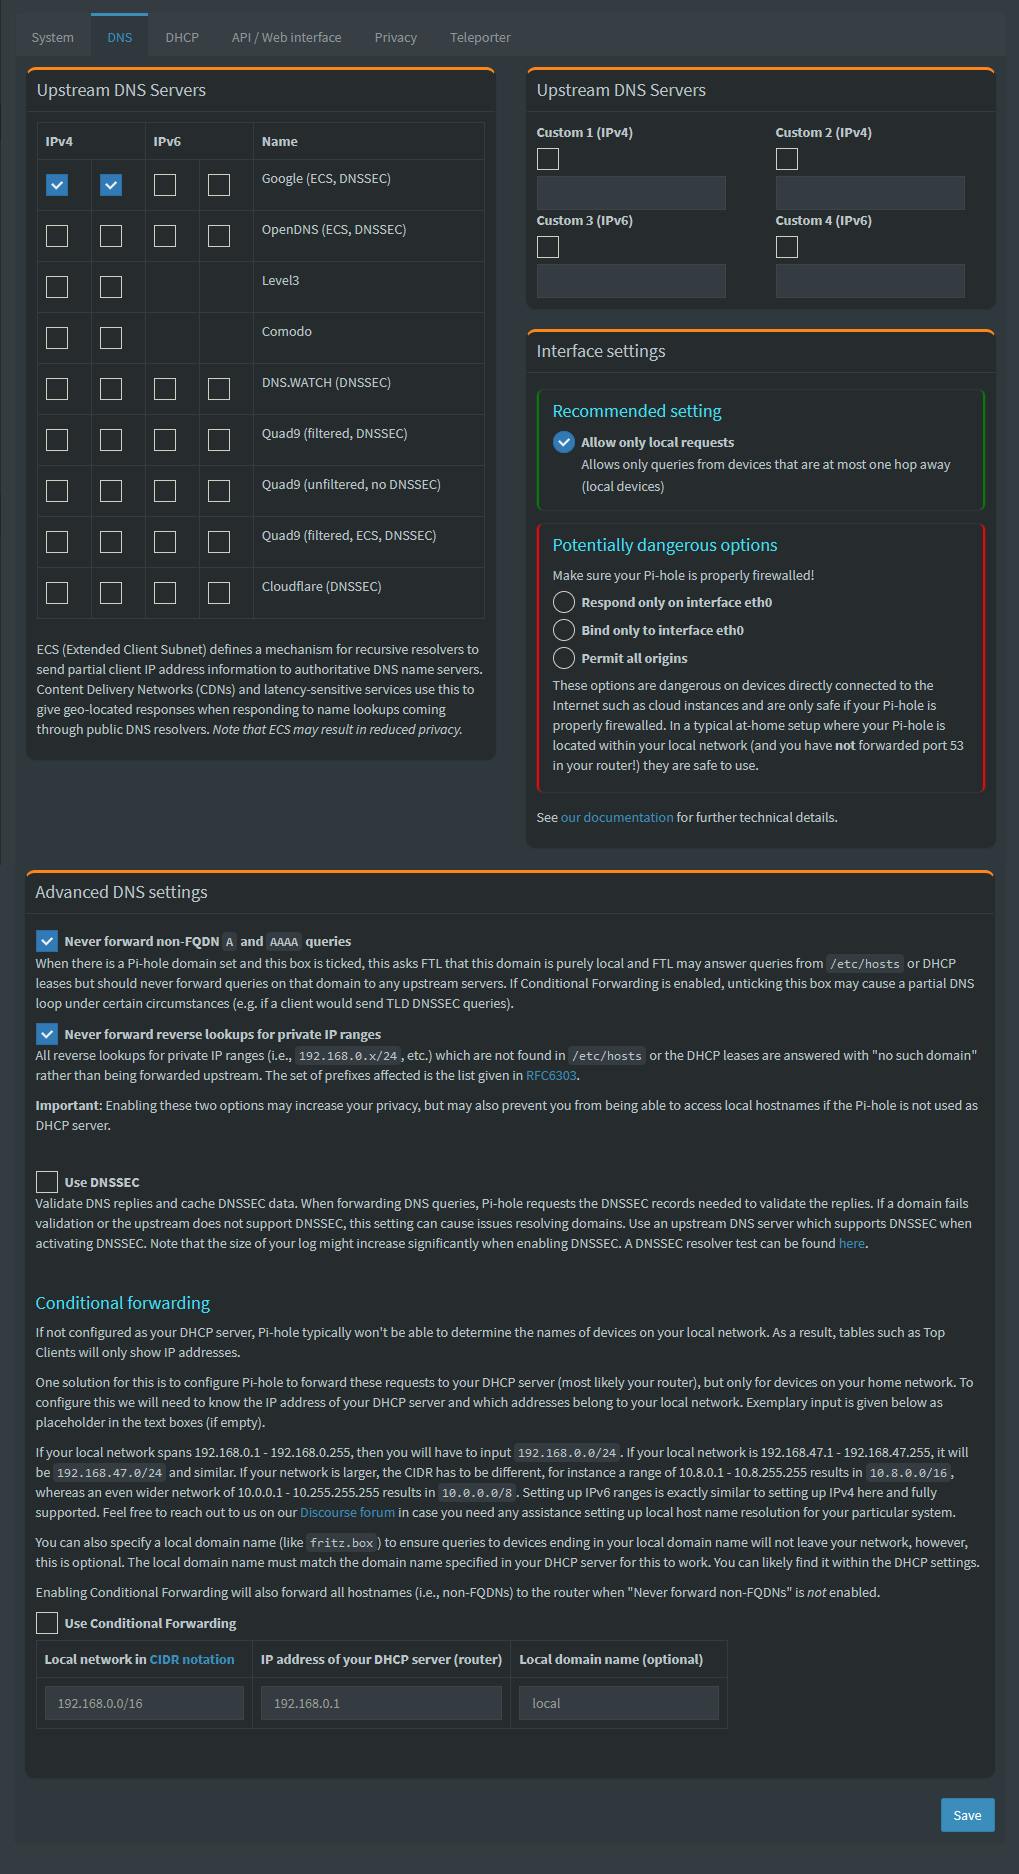
The left side of Upstream DNS Servers lists all the public DNS servers PiH can use to find any host. When we installed PiH we selected Google DNS, which is why we see the two tick marks. Why two tick marks? For IPv4 DNS services Google offers two public DNS servers (8.8.8.8 and 8.8.4.4), therefore two tick marks. For more detail read this official guide Upstream DNS Providers.
The right side is useful if you want to use PiH as a recursive DNS server. This official guide Pi-hole as All-Around DNS Solution describes the process. Additionally the right side can be used to setup DNS over HTTPS (DoH) using Cloudflare. This official guide DoH explains it all.
For most of us the default settings Google DNS will do the trick. Cloudflare DNS is also a good option to select, although for my region I found it is slightly slower than Google, but you can tick it for failover purposes. If you are using IPv6 you can also enable the tick marks for IPv6. If you want maximum privacy select the Cloudflare servers only.
If you opt for DNSSEC you will also have to enable the option Use DNSSEC.
Leave Use Conditional Forwarding disabled as we will use PiH as our DHCP server.
Click Save once satisfied with your selections.
Using DNSSEC might break Internet access for some devices, especially ones relying on Internet firmware updates. Test prior to making a long term DNSSEC commitment.
If you will not enable DHCP server functionality on the PiH, make sure the DNS server IP address of your Internet Gateway/Router, in the DHCP server section, points to the PiH IP address (in our example 192.168.0.123).
Let's configure PiH as a DHCP server.
Most likely your DHCP server right now is in your Internet Gateway/Router. Prior to enabling PiH DHCP server functionality you need to disable your Internet Gateway/Router from serving DHCP. Very important you do this prior to saving the DHCP configuration below.
Select the DHCP tab.
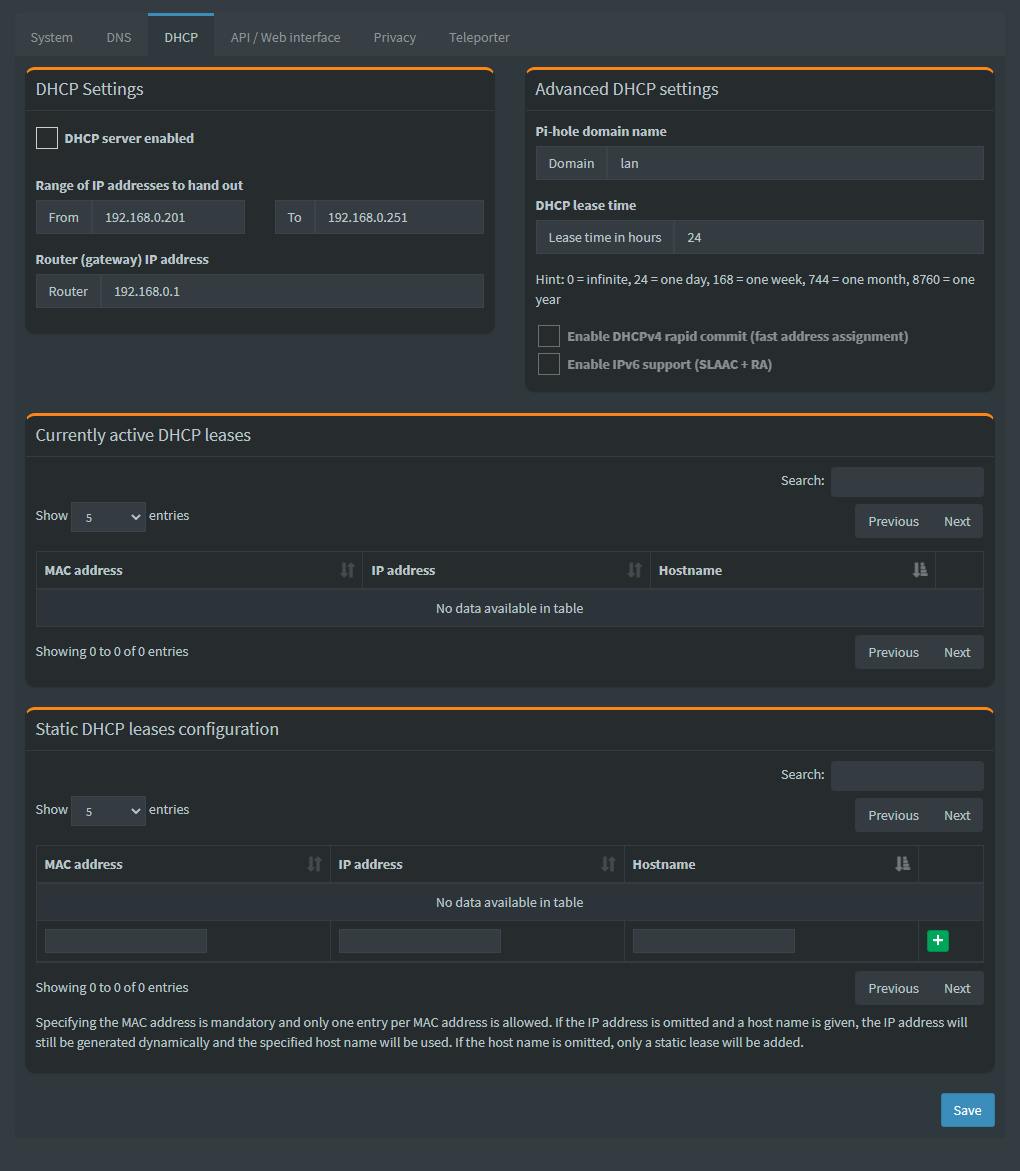
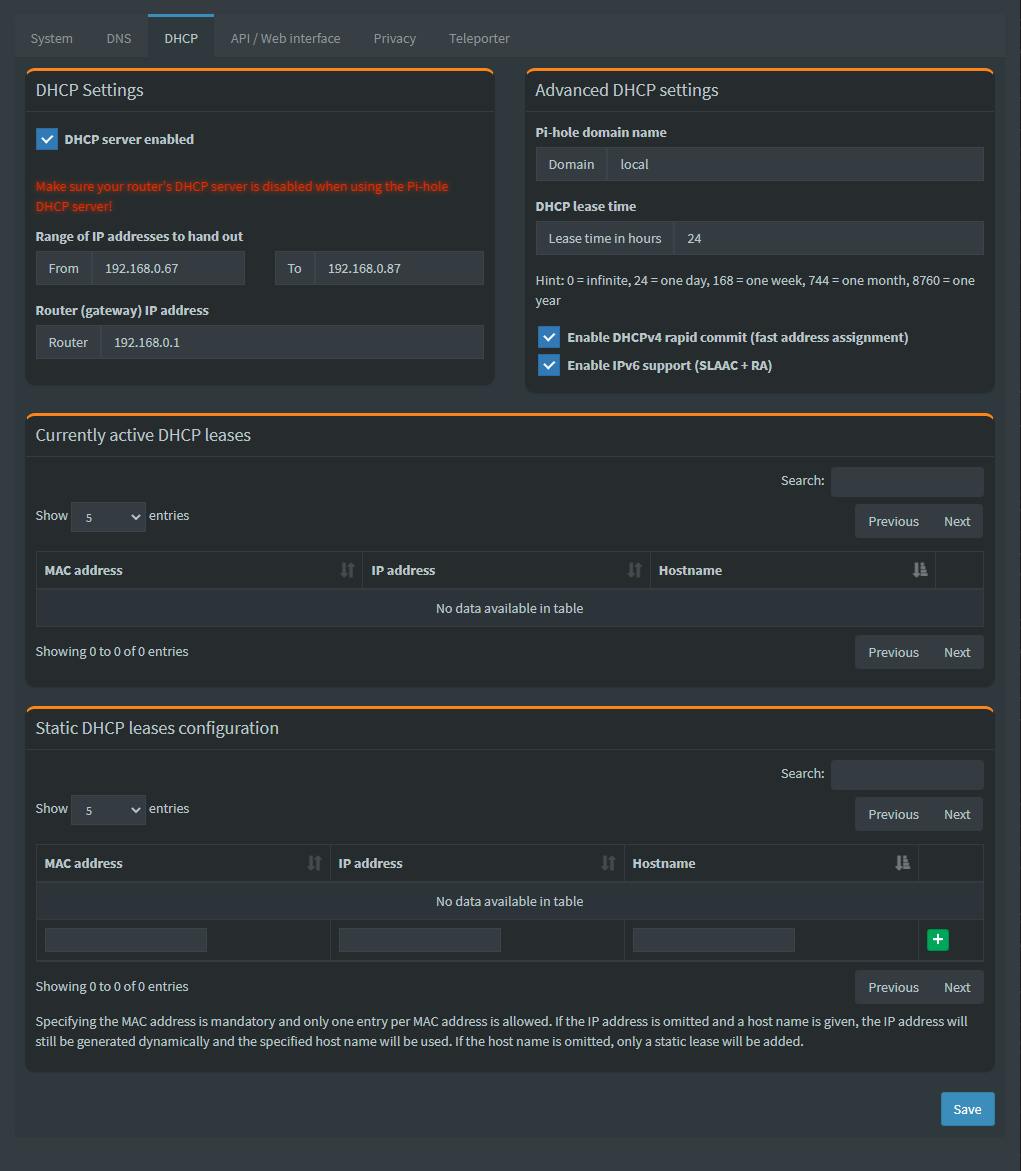
Enable DHCP server. Change Pi-hole Domain name to local (make it the same as mDNS, used by Linux appliances like for example Home Assistant). You can increase the DHCP lease time to more than 24 hrs, if you wish to provide long leases to network clients. Specify the range of IPv4 DHCP addresses to be served to network clients. The range size depends on how you run your network. Do you use a lot of static IP addresses or mainly DHCP with lease reservations. Also if you have a lot of devices/people on your network (permanent and/or visiting) you might want to have a large range of DHCP addresses available. It is very important you specify the correct IP address for your Internet Gateway/Router.
I suggest you enable rapid commit as well as IPv6 support.
The Currently active DHCP leases section is filled automatically by PiH as DHCP clients are discovered on the network.
The Static DHCP leases configuration are DHCP clients you manually assign to always get the same IP address, instead of using a static IP address. The benefit of using leases to assign fixed IP addresses to devices has to do with the DNS server assignment. If a device requires Internet access a valid DNS server must be assigned. If you decide to provide a static IP address to your device you also need to specify a fixed DNS server IP address (as you can imagine not the most flexible thing to do, especially if at some point in time you want to change the DNS server). This is where lease reservation has the advantage. Make the DNS server change in your PiH and you are good to go; nothing else to change.
When you enable PiH to become a DHCP server, your DNS server is the PiH IP address, which in our case is the IP address of our Debian server installed in a Proxmox VE Container (CT). As a reminder, here is how PiH has been installed.
Proxmox VE Node (pve253) -> LXC Container 106 (PiHole) -> Debian 11 -> Pi-hole
Click Save once satisfied with your selections.
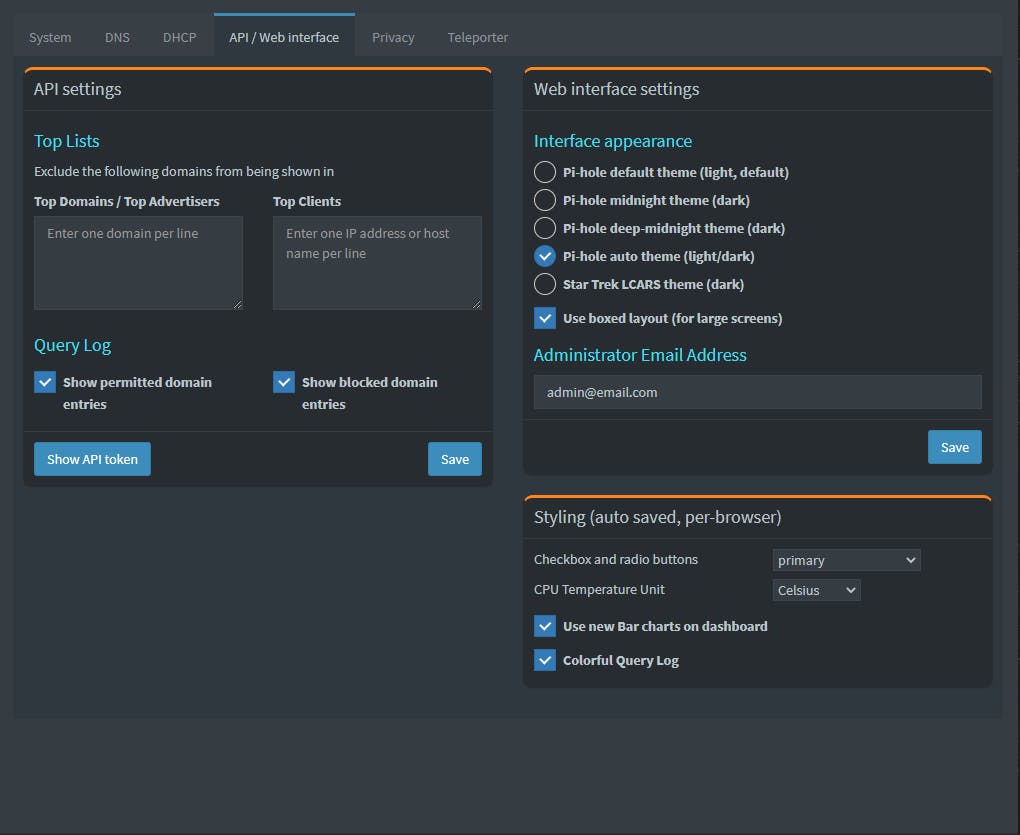
Select the API / Web interface tab.
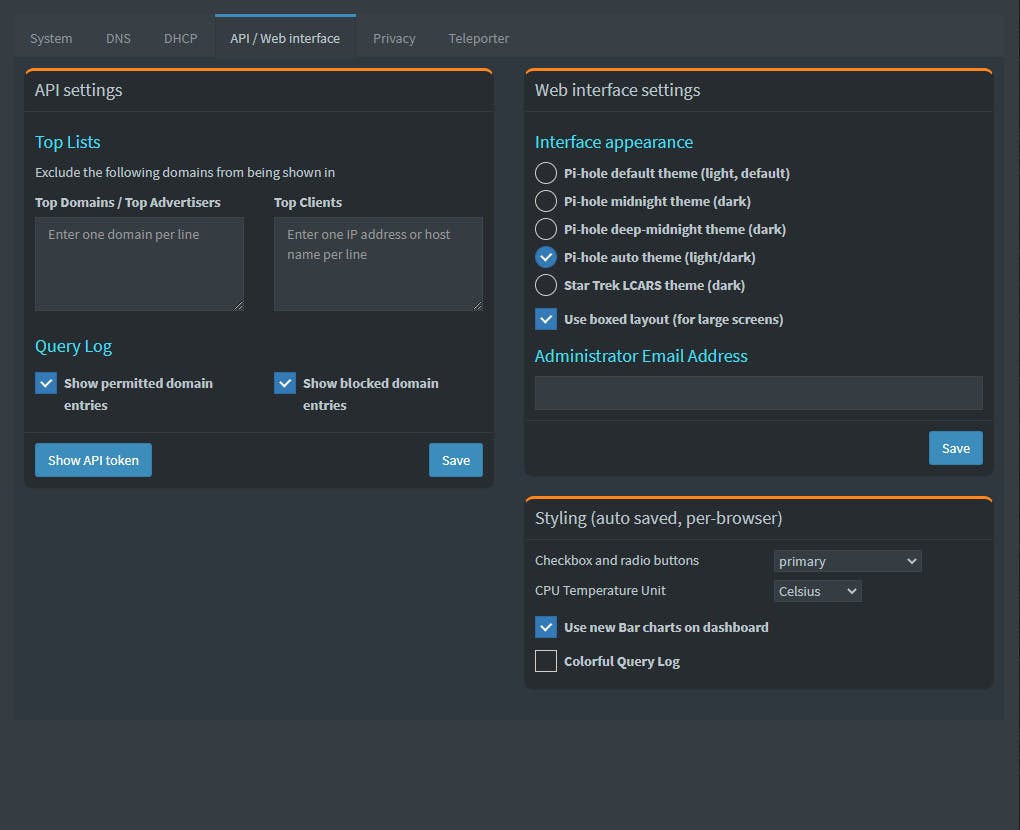
You can change the Web interface setting to suit your aesthetics. One setting I suggest you enable is the Colorful Query Log.
I also strongly suggest you supply a valid admin email address so you can receive alerts from PiH.
Click Save once satisfied with your selections.
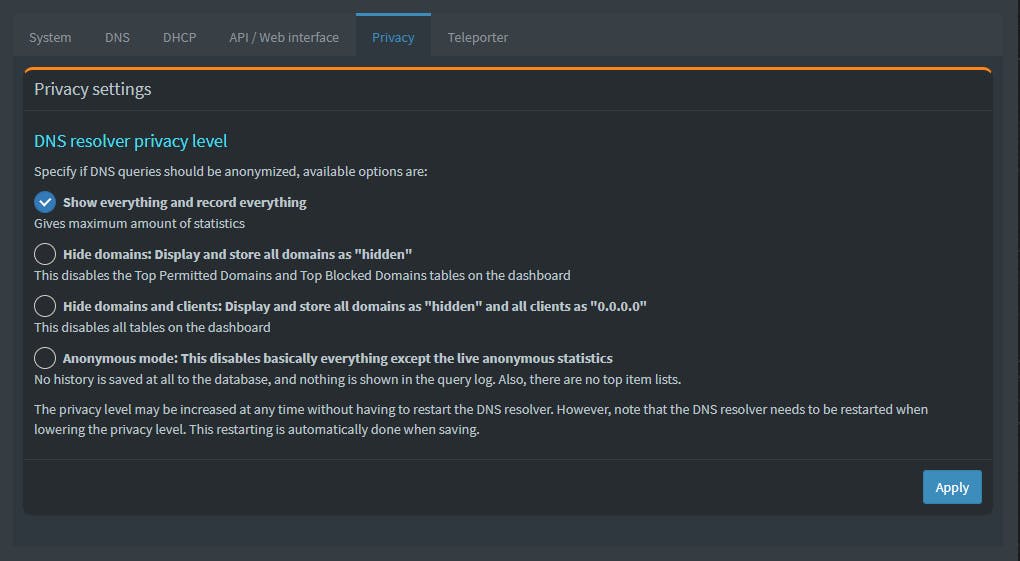
Select the Privacy tab and make any changes to suit your environment.
Select the Teleporter tab, which is used for backup and restore.

At the top line of the Dashboard you will find a Domains on Adlists number. It shows the number of websites (domain names) PiH actively monitors. When you issue any Internet query from any device on your network, if PiH finds a domain name match in the adlist it will block the query.

PiH is not perfect and it will not block everything. PiH is as good as the quality of the adlists. Please bear in mind this is like an arms race; it never stops and you need to update the lists at least every month to keep current and also fix inaccurate entries.
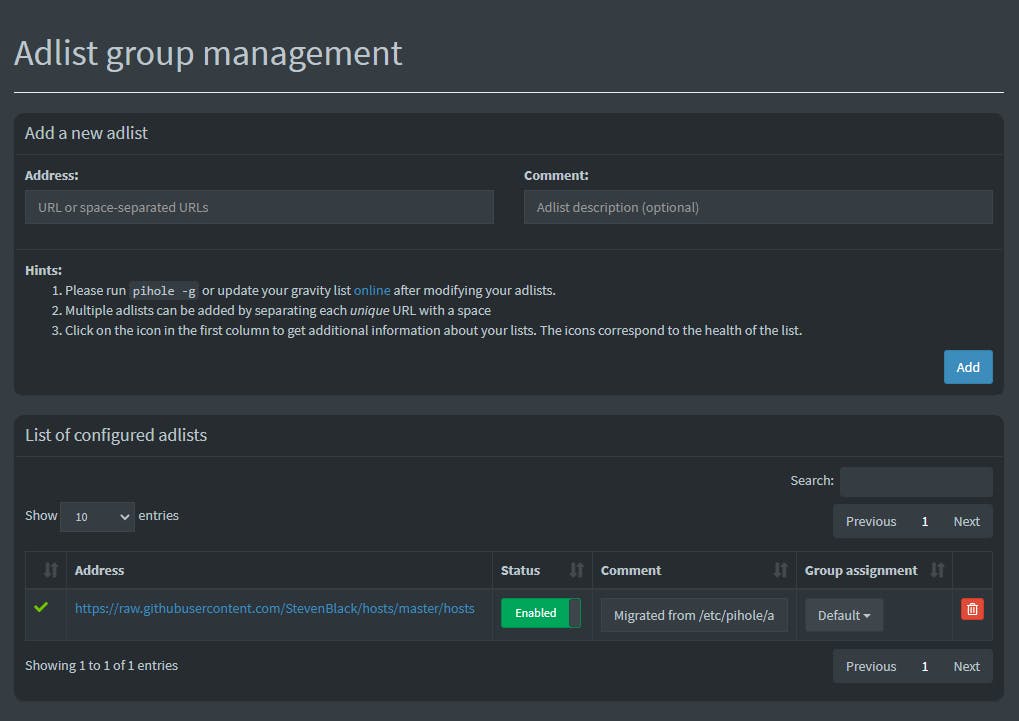
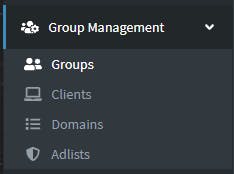
So how do we manage adlists. Select Group Management, then Adlists. You will see the adlist we selected when we installed PiH.
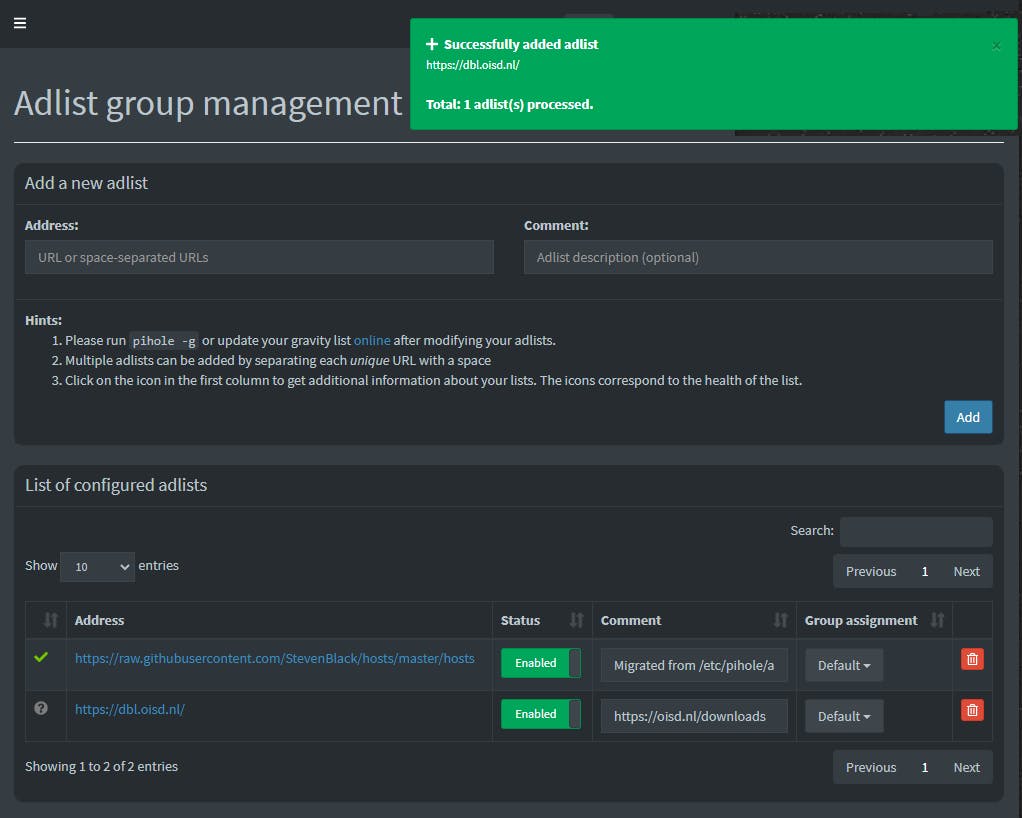
Let's add our first adlist. This list is massive and the person who maintains it is a master. Visit his website to see what this list is all about. Fill in the address and comment as per screenshot below.
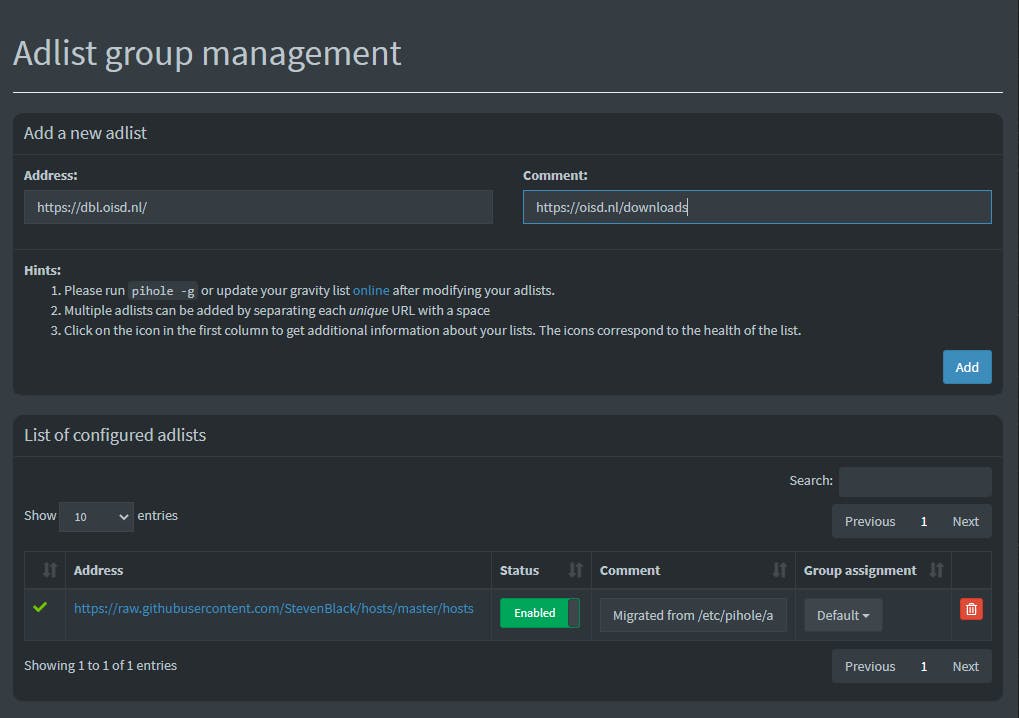
Click Add once satisfied with your entries. As you can see the adlist has been added but with a question mark.
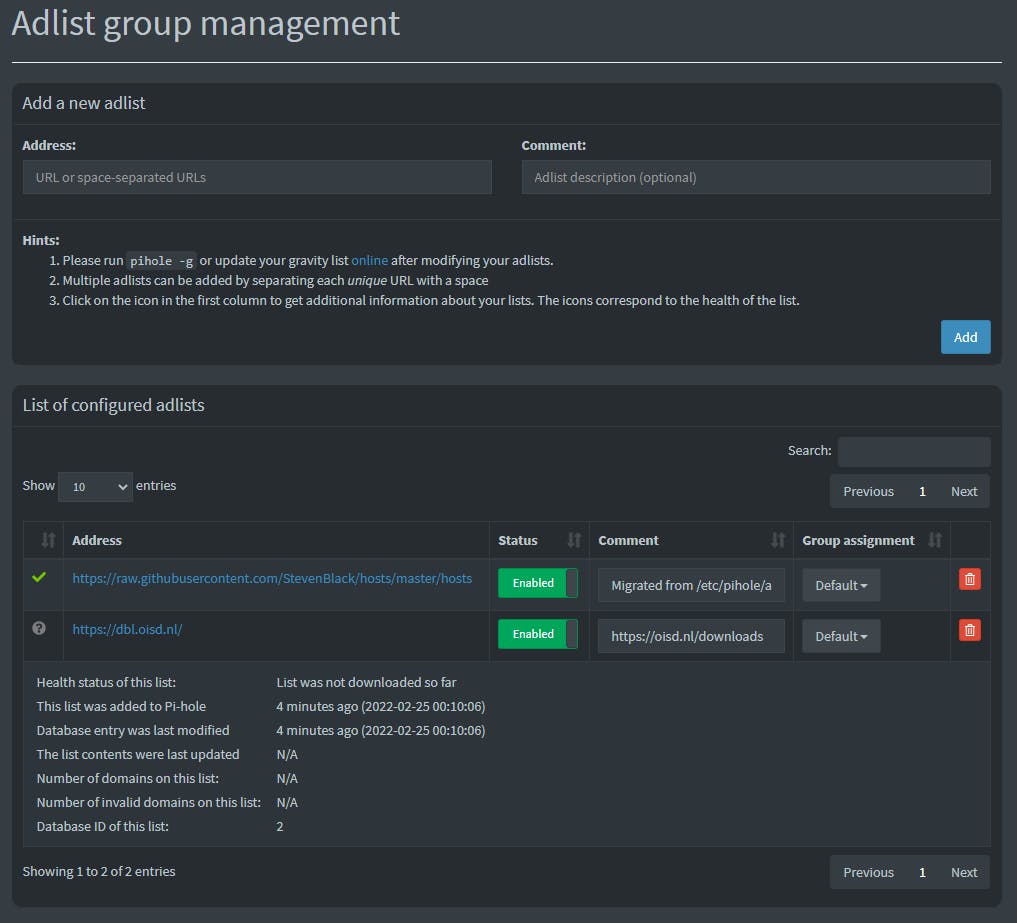
Click on the question mark to see the status of this adlist. As you can see the adlist has been added but not downloaded yet, meaning it is enabled but not active.
To activate the adlist we now need to select Tools then Update Gravity.
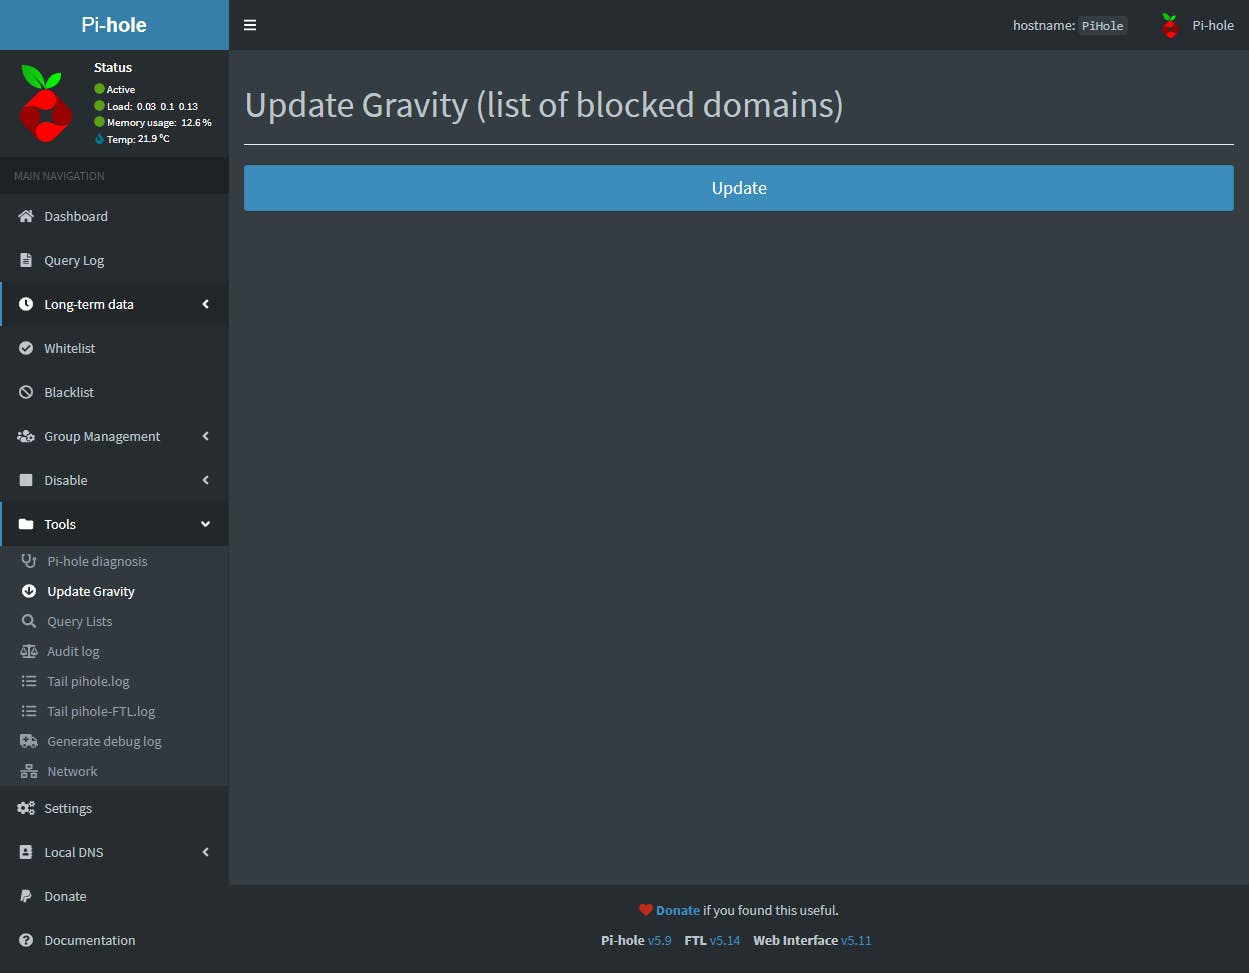
By clicking on the Update button, all enabled adlists will update from their download locations. This update should be done at least monthly to keep the adlists "fresh" .

Once the update completed with Success, all enabled adlists are now up to date.
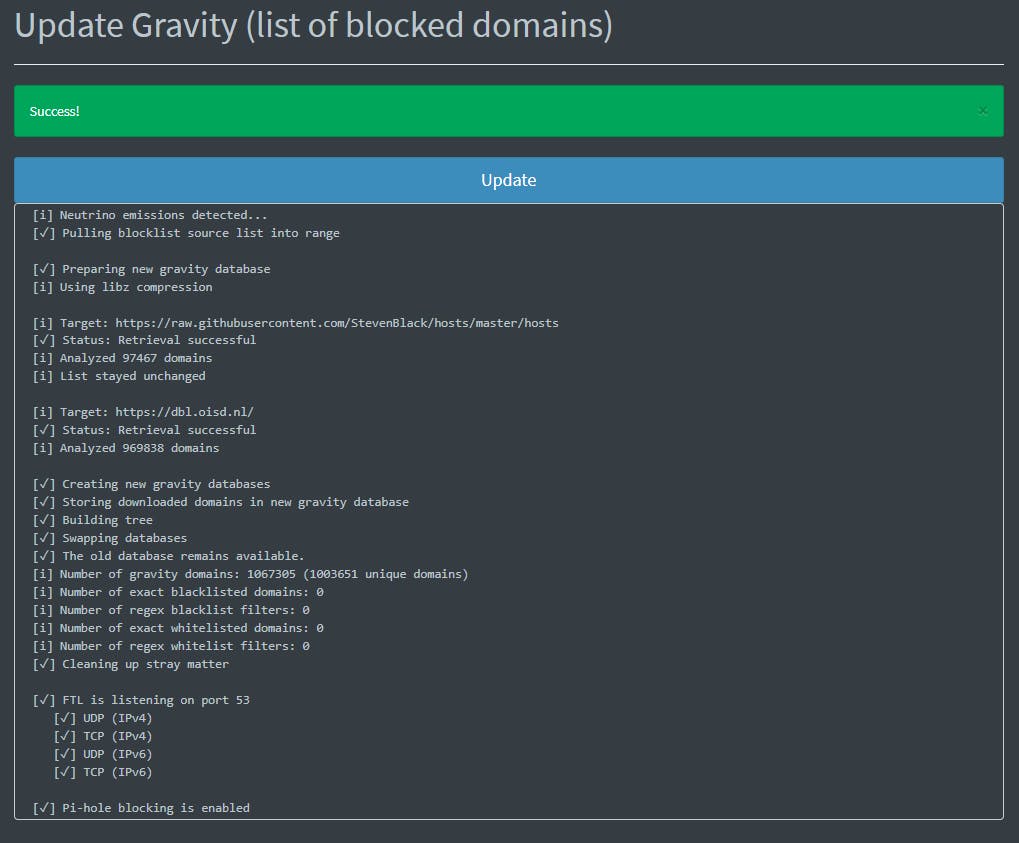
To see the changes you only have to check the number of Domains on Adlists in the Dashboard.

If you want to experiment with adlists visit any or all of the below websites. You will find a plethora of lists to experiment with.
To manually add a domain in a blacklist (block) or whitelist (allow), select
Group Management -> Domains.
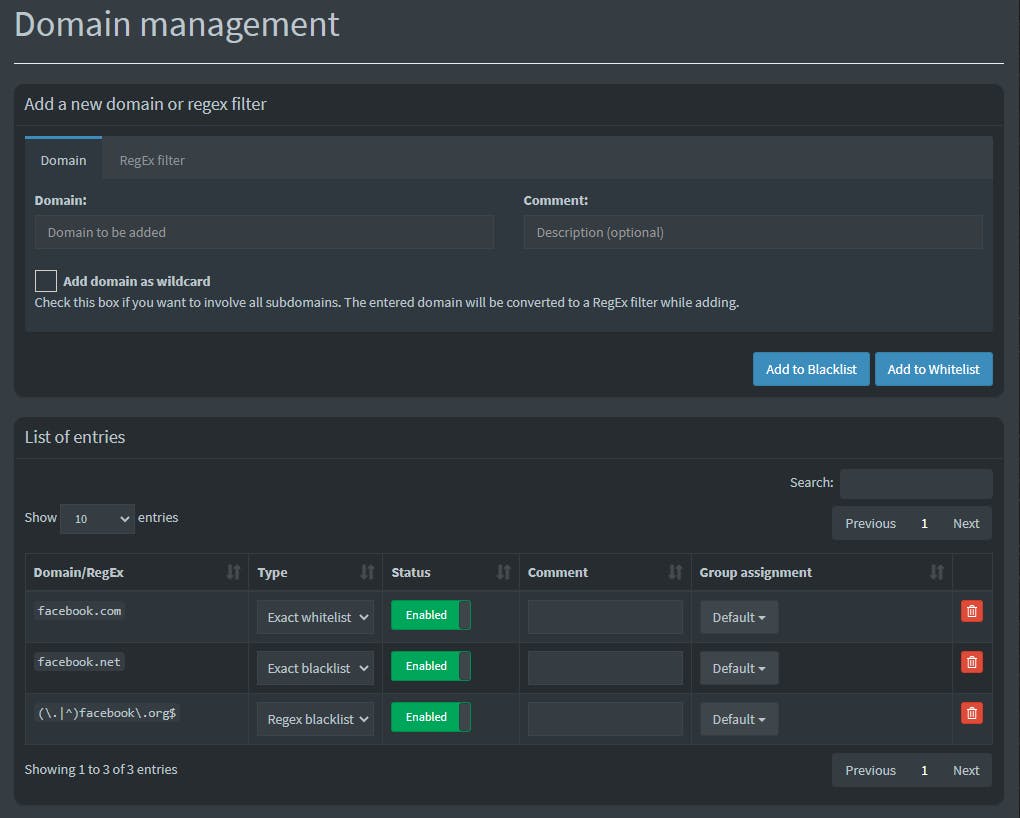
Type the domain name and click Add to Blacklist/Whitelist.
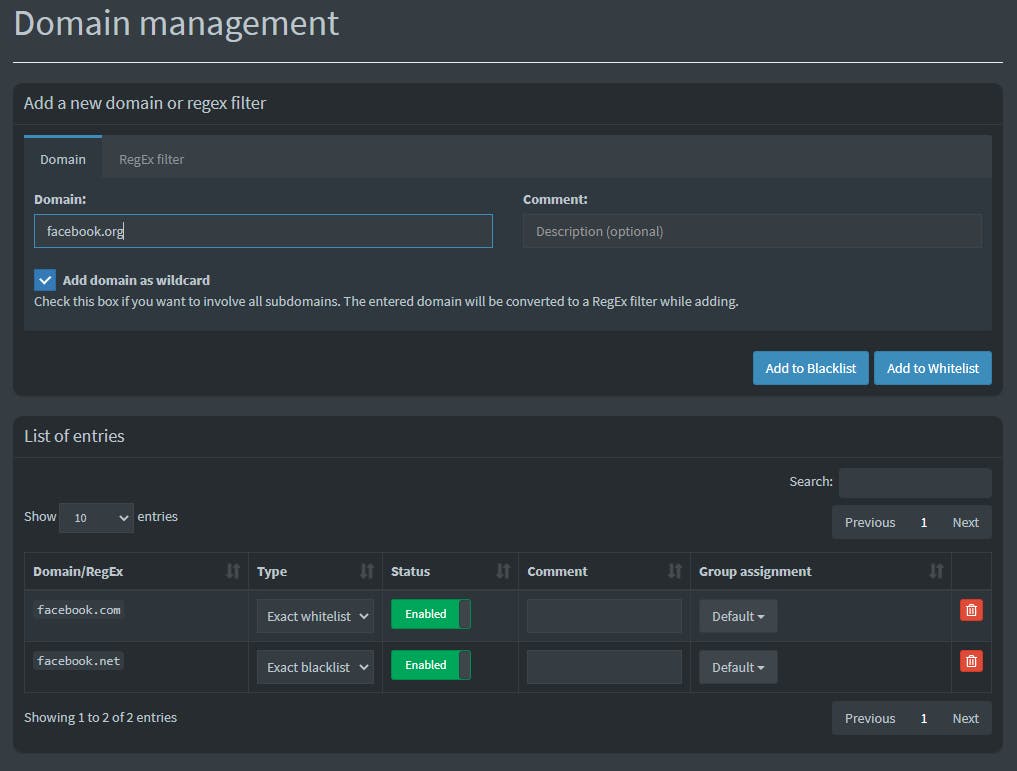
If you select Add domain as wildcard, PiH will create a RegEx filter, instead of just adding the domain by name only.
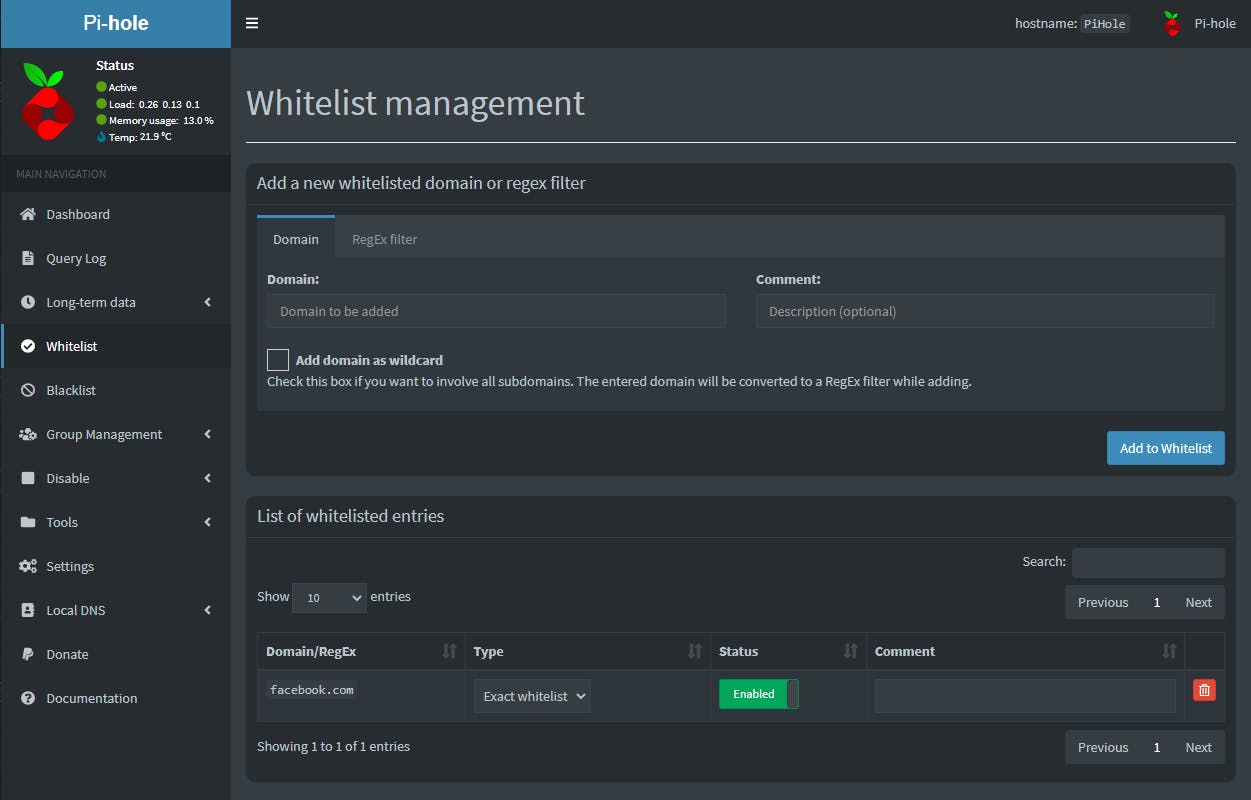
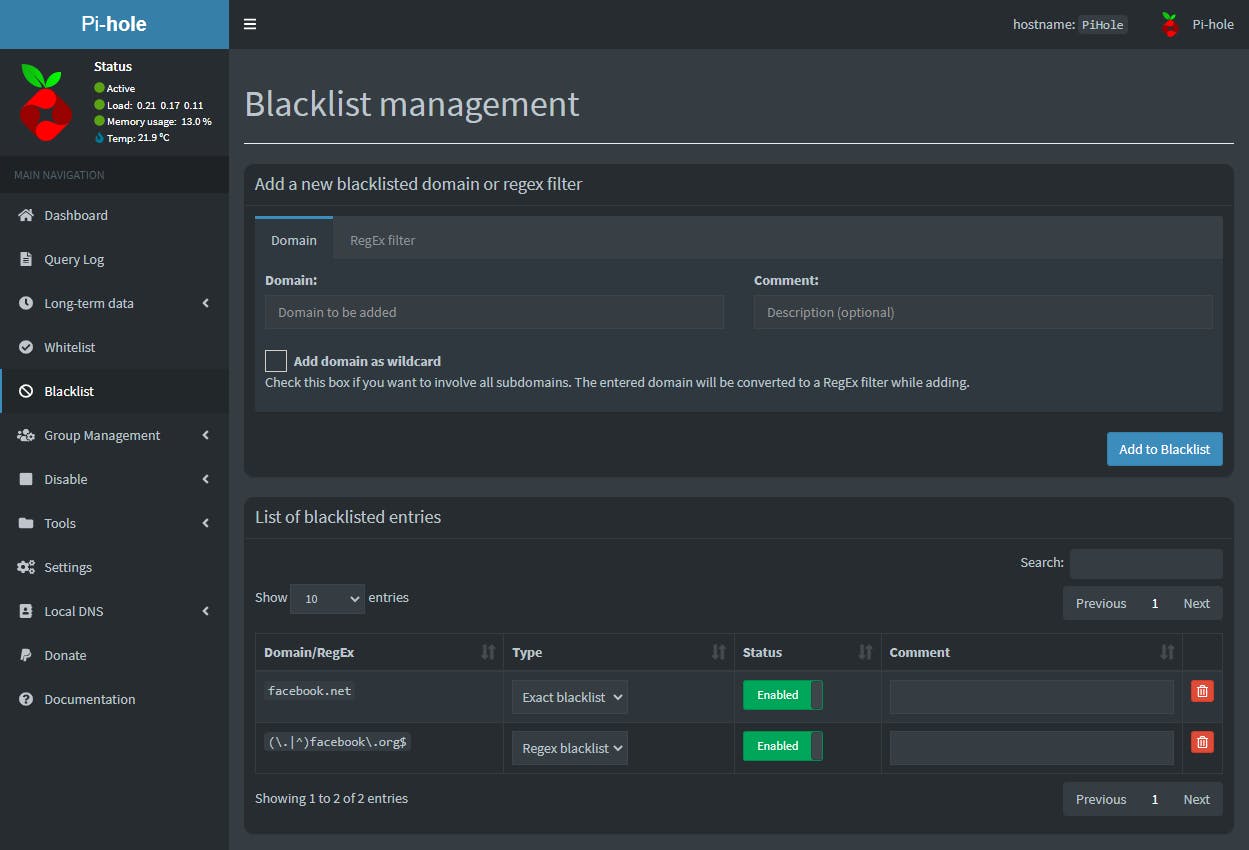
You can also access the above two lists (black/white) by just clicking on the sidebar selection.
You can go deeper by creating groups and then assigning network clients to those groups. You can then assign those groups to adlists and domains to allow or block their traffic to certain sites of site lists.
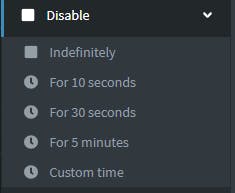
You can disable adlist blocking by selecting Disable in the Sidebar and then select the amount of time.
Last but not least, you can disable all adlists, from the Group Management in the Sidebar, and PiH will still provide minimum blocking. I found this to work with some clients who for some reason were complaining of unwanted blocking, even if we tried several blocklists - they all failed to meet customer expectations in terms of blocking. This is why I implied earlier adlists are an imperfect solution, but better than nothing. Whatever you do, you will still see some minimal ads in YouTube for example. The only true way to block YouTube ads is by installing uBlockOrigin on all the browsers you use. But then the YouTube app is not covered, only by PiH.
In a future post I will provide a browser perspective you might have never seen covered by anyone.
How do you update PiH. The bottom line of the WAC, usually displays the PiH version number your system is on. When an update is available you will see a flashing selection at the bottom you can click to update your system to a new version. The power of Proxmox comes from the ability to quickly clone your entire PiH Container (CT), update, check if everything OK, and if not OK stop the CT and activate the earlier created clone.

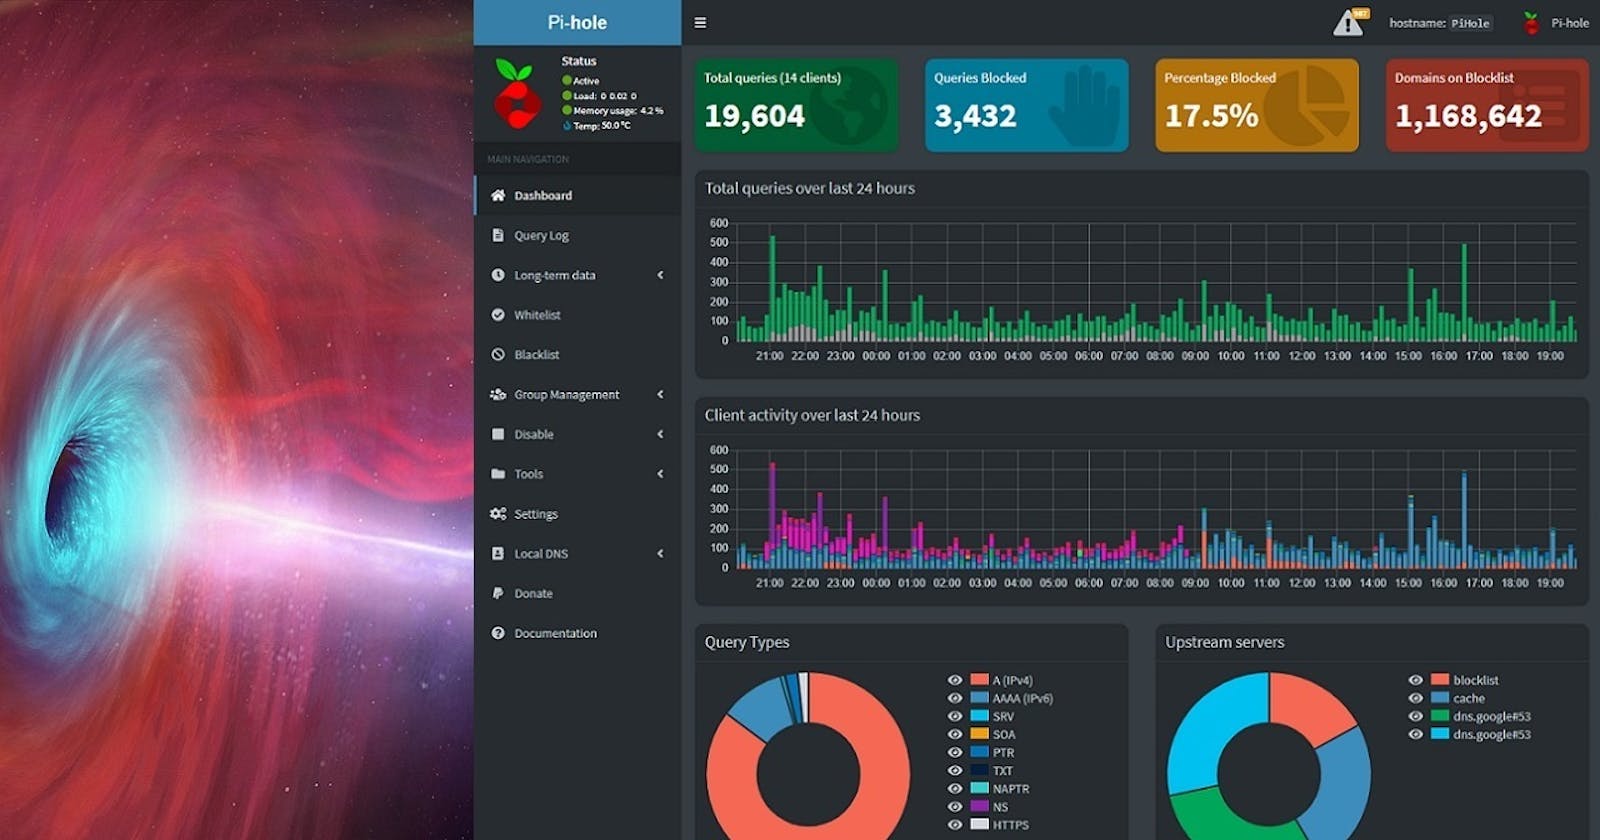
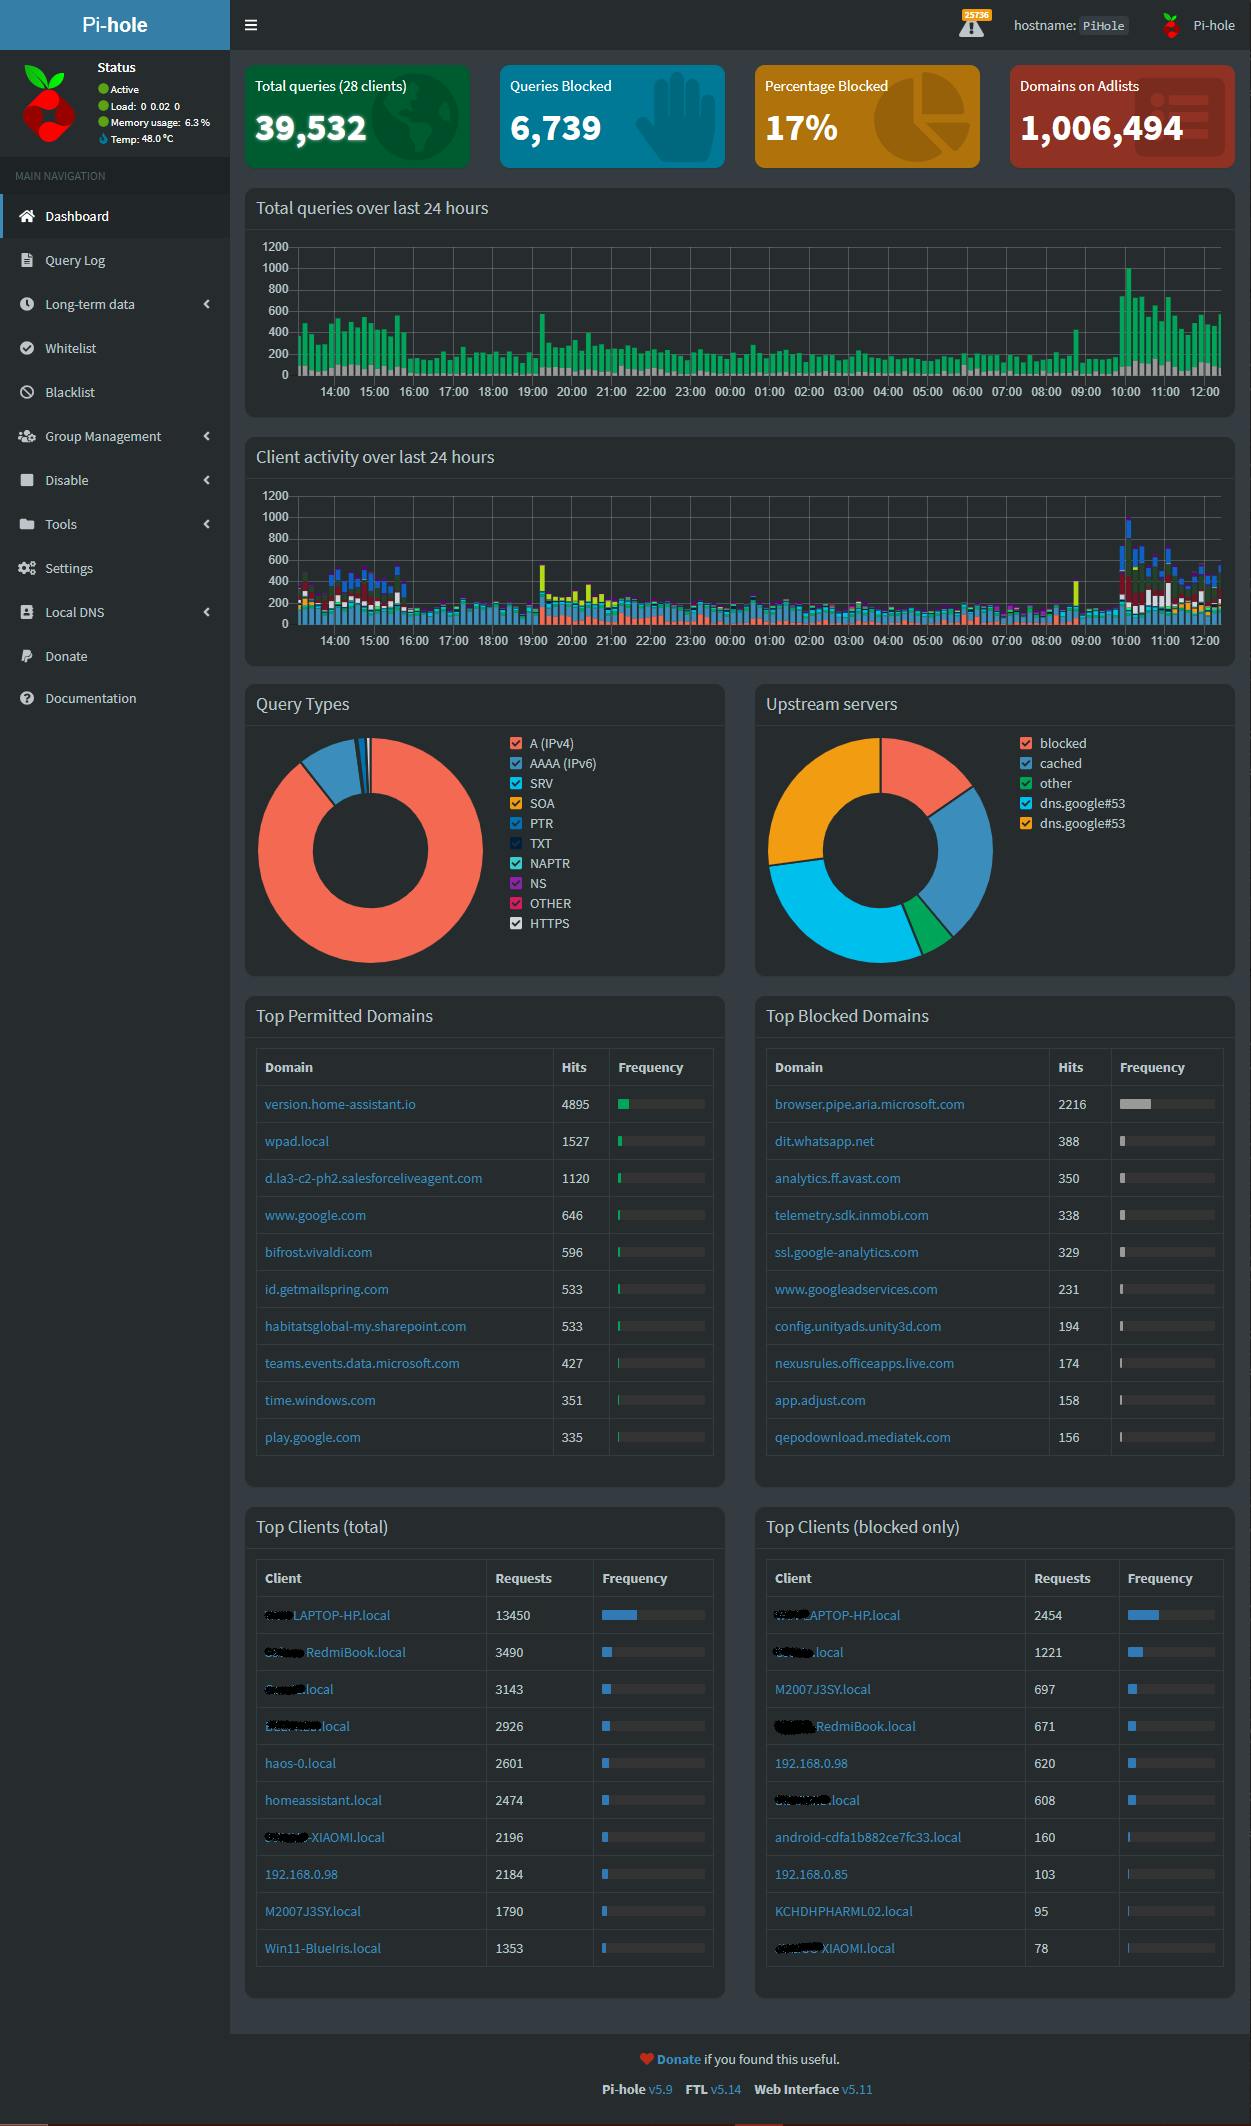
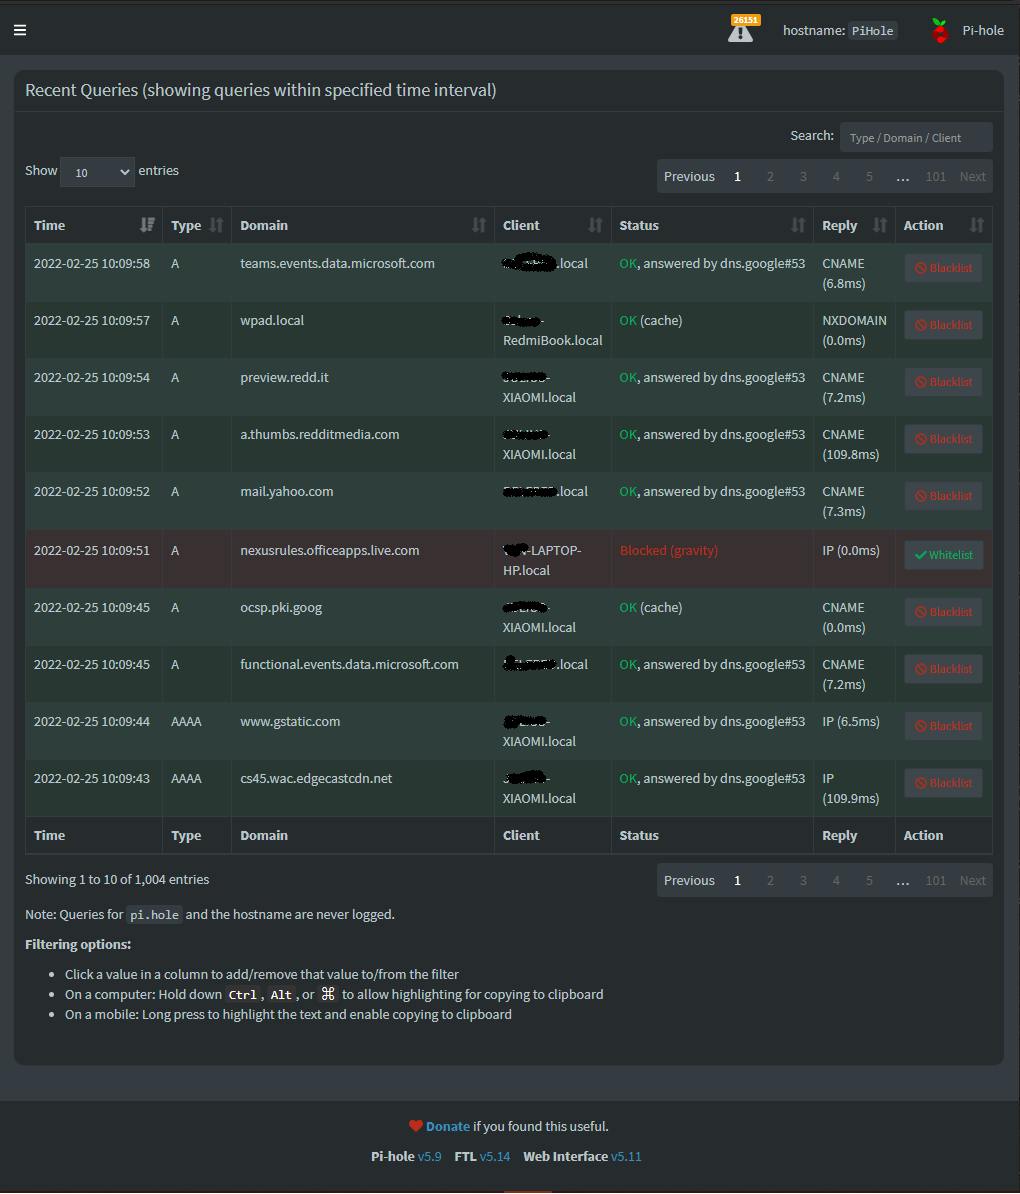
The following screenshot is from one of our test systems, in case you are wondering what a real life PiH dashboard looks like (stats are over 24hr period and are realtime).
If you decide to hover your mouse over any of the Client activity bars, you will get a breakdown of the client use at the specific time period.
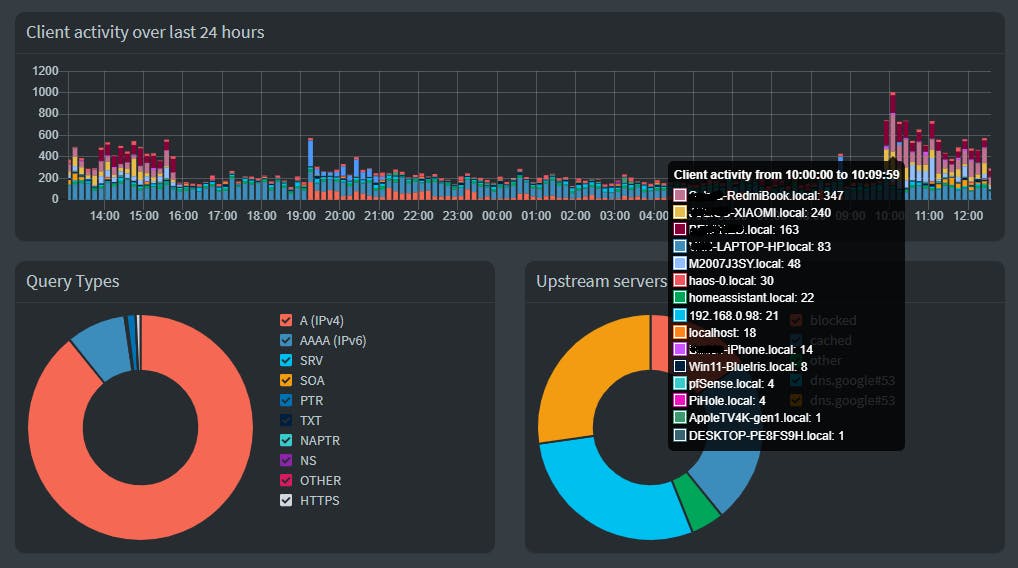
If you click on any of the bars you will be able to see full query analytics.
Please consider subscribing to my blog, as you will only ever get quality content; no time wasting, advertising, spamming or other unproductive activities/practices.
Please also consider visiting and subscribing to our YouTube channel; we have recently started posting videos.
We are committed to improving and enhancing over time.
If there is something you would like us to cover in a future topic/guide please let us know.
Important Note: From time to time we enhance the content of our posts. It is therefore recommended you link to our original post in our blog.habitats.tech, by either subscribing to our blog.habitats.tech or visiting our subreddit reddit.com/r/HabitatsTech (our posts in Reddit link to our original posts).