HowTo install Home Assistant (HA) OS in Proxmox VE (PVE) 7.1
The definitive step-by-step guide to installing Home Assistant on a Proxmox VM

Passionate about science and technology and a strong believer the next big thing/think is yet to be discovered.
I would like to thank everyone who has visited my blog on hashnode.
I am now moving all content to my portal - portal.habitats.tech - where I have complete control of the content presentation.
Having tested almost all blogging and newslettering sites I have come to the conclusion they are all very limited in what can be accomplished.
I will be sunsetting this blog by summertime. Please follow me on my portal where I have started publishing new content.
I would like to thank everyone who has visited my blog on hashnode.
I am now moving all content to my portal - https://portal.habitats.tech - where I have complete control of the content presentation.
Having tested almost all blogging and newslettering sites I have come to the conclusion they are all very limited in what can be accomplished.
I will be sunsetting this blog by summertime. Please follow me on my portal where I have started publishing new content.
In our past posts we covered PVE installation options. In this post we will explore the most effective installation option for Home Assistant. Home Assistant OS (HAOS) is possibly the best automation platform, especially for residential projects of any size, but also for any scale commercial projects as well.
If you are coming from relatively old-hat last-century automation platforms, like Control4, Crestron, Elan, Savant, etc you might be surprised to be informed we can design a system which has no single point of failure and can also self-heal (try that with any other system). Contact me if you would like to discover how we do things 21st-century style, open source, imagination is the limit.
Hopefully this should be the ultimate guide of installing HAOS in PVE.
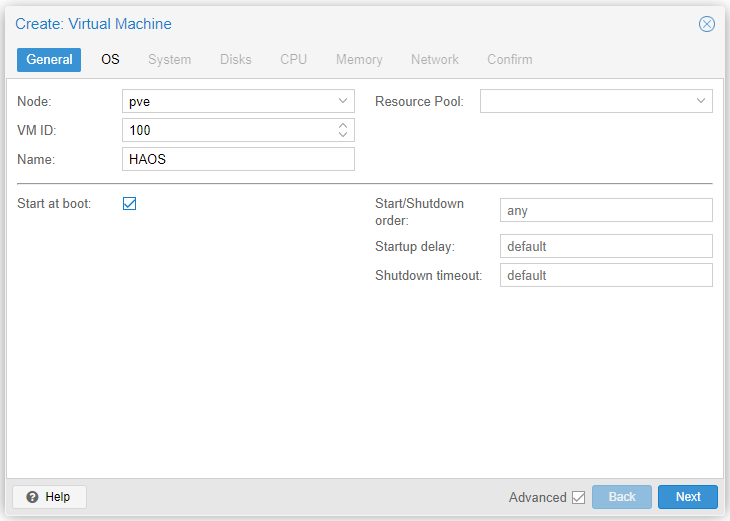
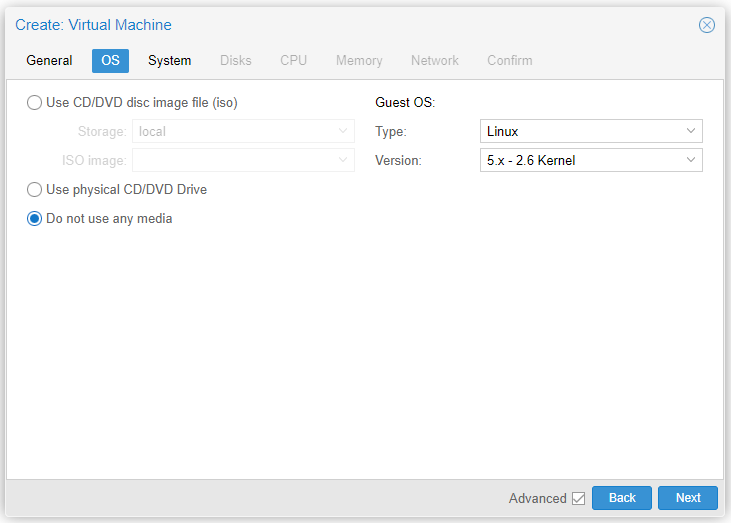
So, let's dive into installing HAOS on PVE 7.1. Let's create the VM first. I assume you have already bare-metal installed PVE. If not, read my superguide prior to following the steps below.
Note: During a bare-matel install of PVE we can have the default filesystem as one of the following 4 options:
ext4 (the default)
xfs
zfs (if a robust filesystem is needed and have the necessary HW resources)
btrfs (technology preview stage)
local-lvm (FS=ext4) or local-zfs (FS=zfs).
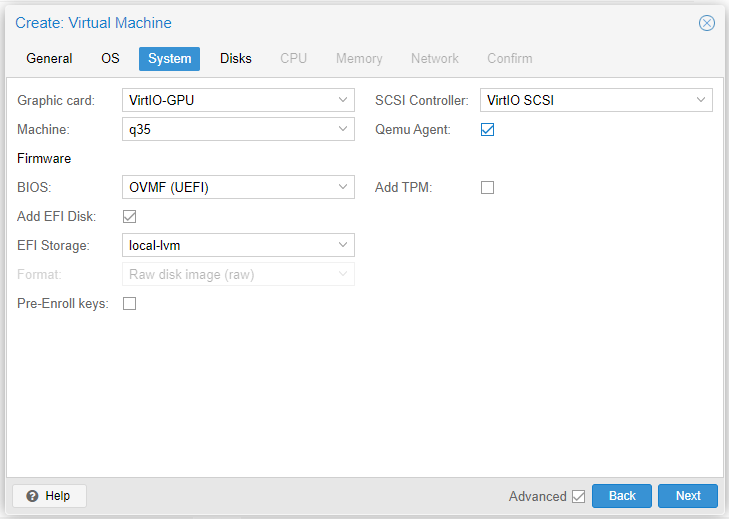
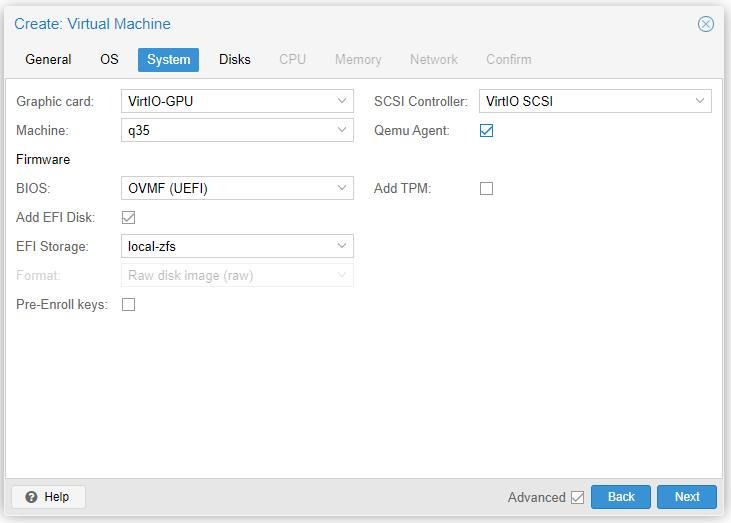
From this point we assume PVE was installed with FS = zfs. If you install PVE with the default settings then when you see local-zfs from now on, you substitute with local-lvm. Therefore, you will only have one of two options: either local-lvm or local-zfs depending on filesystem installed during PVE bare-metal install.
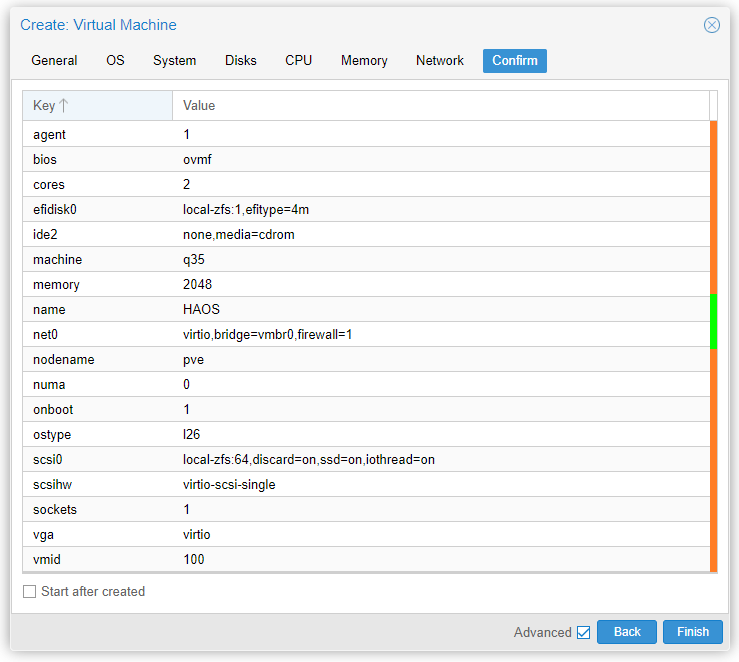
DO NOT start after created.
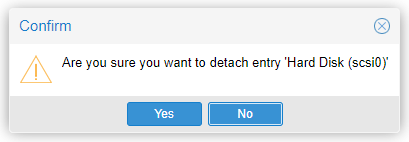
Click Detach, as per screenshot below.

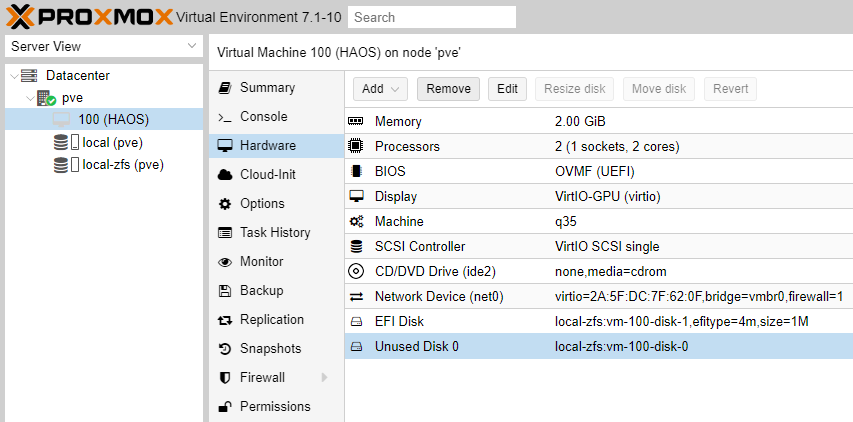
Click Remove, as per screenshot below.

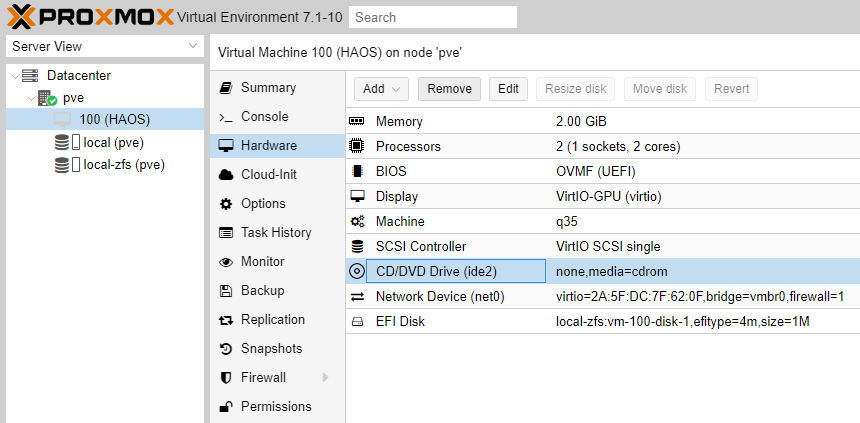
Click Remove, as per screenshot below.

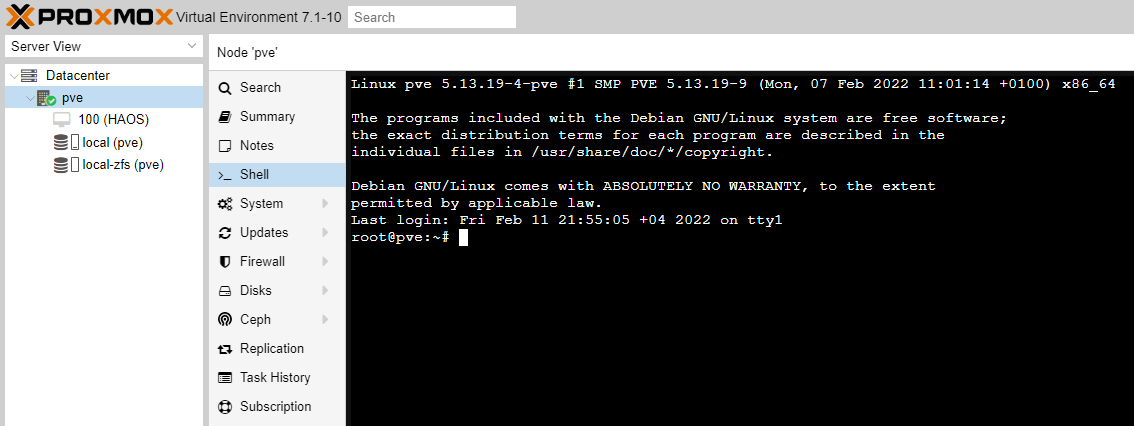
Select \>_ Shell, as per screenshot below.
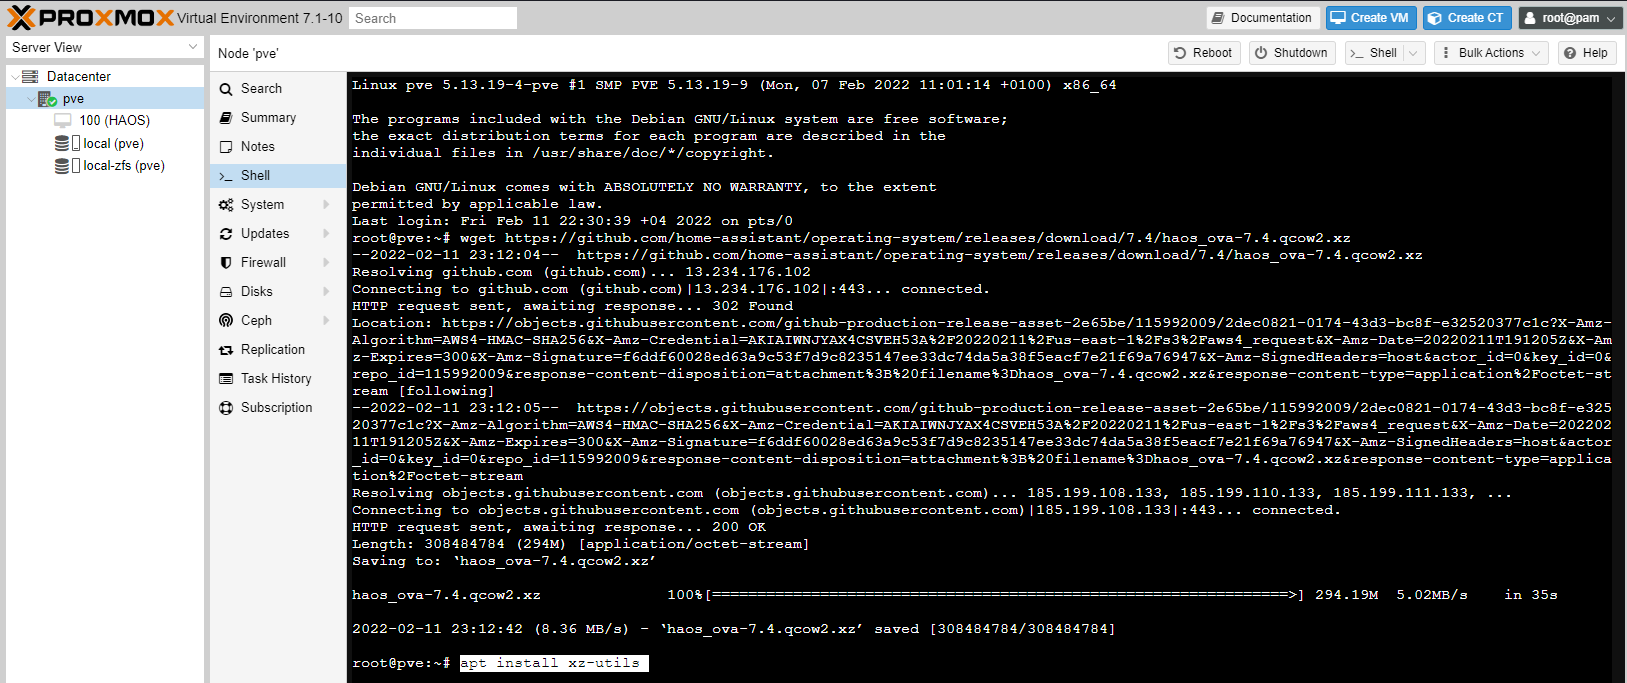
Before we carry on with the installation we need to find the latest HAOS download file for a KVM virtual machine, which has an extension .qcow2. Visit the HAOS GitHub page, go down the list of files and try to find a file named haos_ova-x.x.qcow2.xz (e.g. haos_ova-7.4.qcow2.xz). Make a note of the version number; in our example 7.4.
Once you have identified the version number, go back to \>_ Shell and type the following commands.
Remember to substitute version number 7.4 below with the version number you have noted earlier.
wget https://github.com/home-assistant/operating-system/releases/download/7.4/haos_ova-7.4.qcow2.xz

The file haos_ova-7.4.qcow2.xz will start downloading. When download complete type the following two commands.
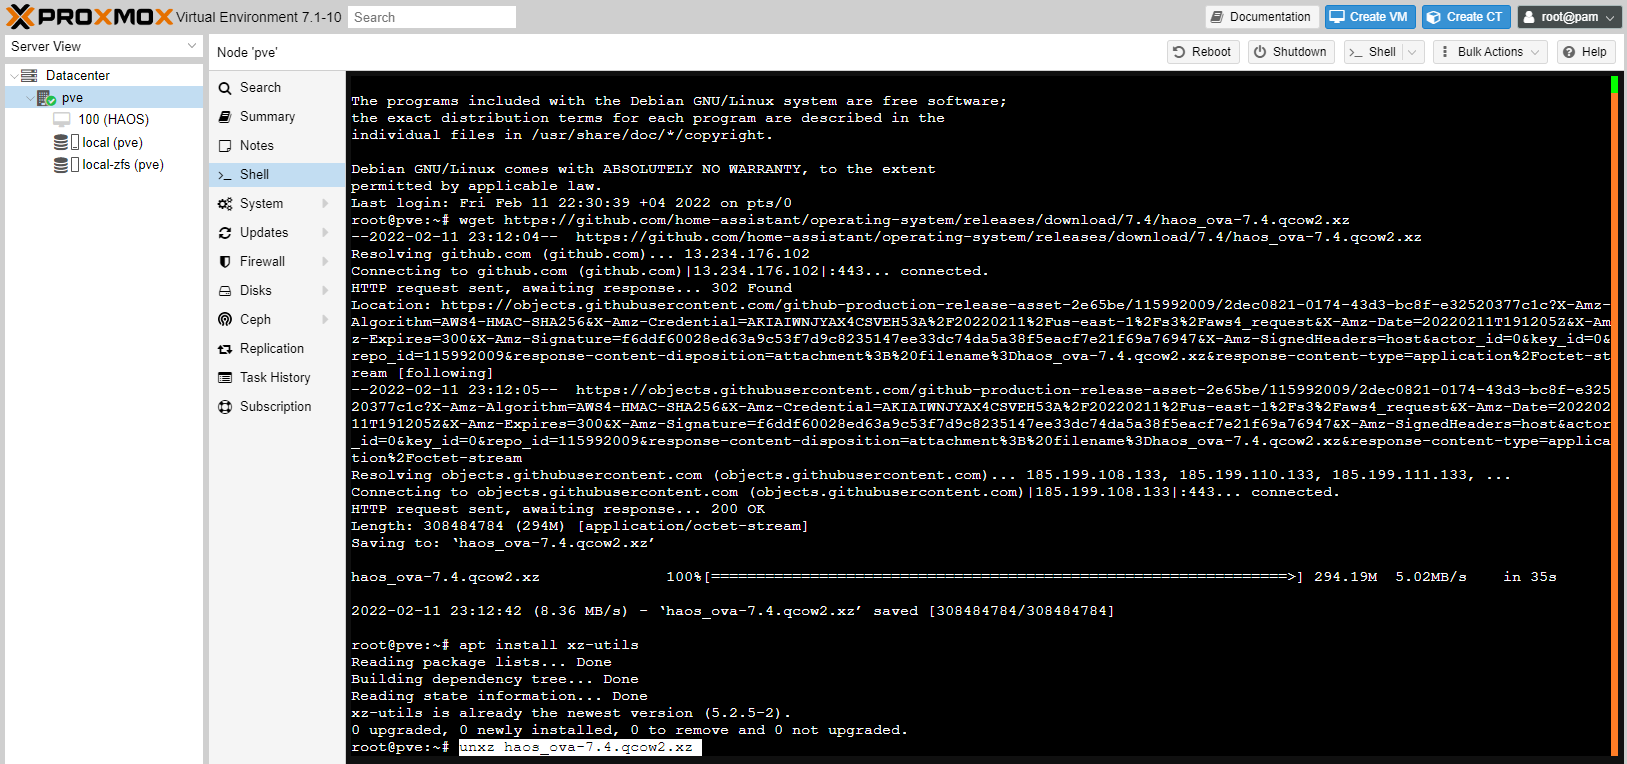
apt install xz-utils
unxz haos_ova-7.4.qcow2.xz
The above command will uncompress the qcow2 file, which we then have to attach to the VM (created above), with the below command. We assume the VMID created above is 100 and remember to change the HAOS version number if different from our example command below. As a reminder, if you have installed PVE with the defaults, filesystem = ext4, the storage pool name will be local-lvm. If, however, you installed with filesystem = zfs the storage pool name will be local-zfs. The command syntax is:
qm importdisk "VM-ID" "haos-image-name.qcow2" "storage-pool-name"
qm importdisk 100 haos_ova-7.4.qcow2 local-lvm
or
qm importdisk 100 haos_ova-7.4.qcow2 local-zfs

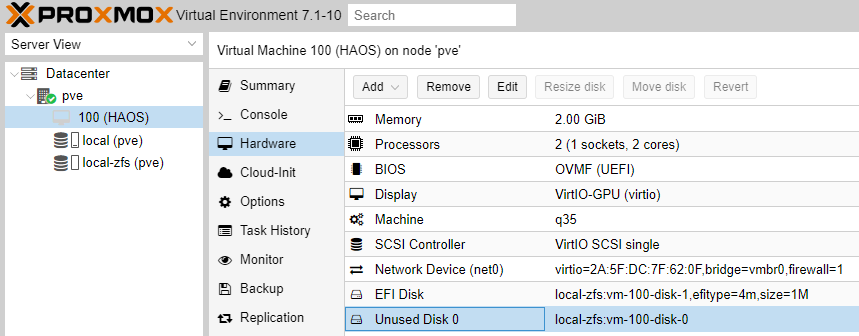
The last command will create a VM disk named vm-100-disk-0 under local-lvm/local-zfs,

which can also be found under
100 (HAOS) -> Hardware -> Unused Disk 0 (local-zfs:vm-100-disk-0)
We now have to attach the newly created disk to the VM 100 (HAOS). Highlight Unused Disk and click Edit, as per screenshot below.
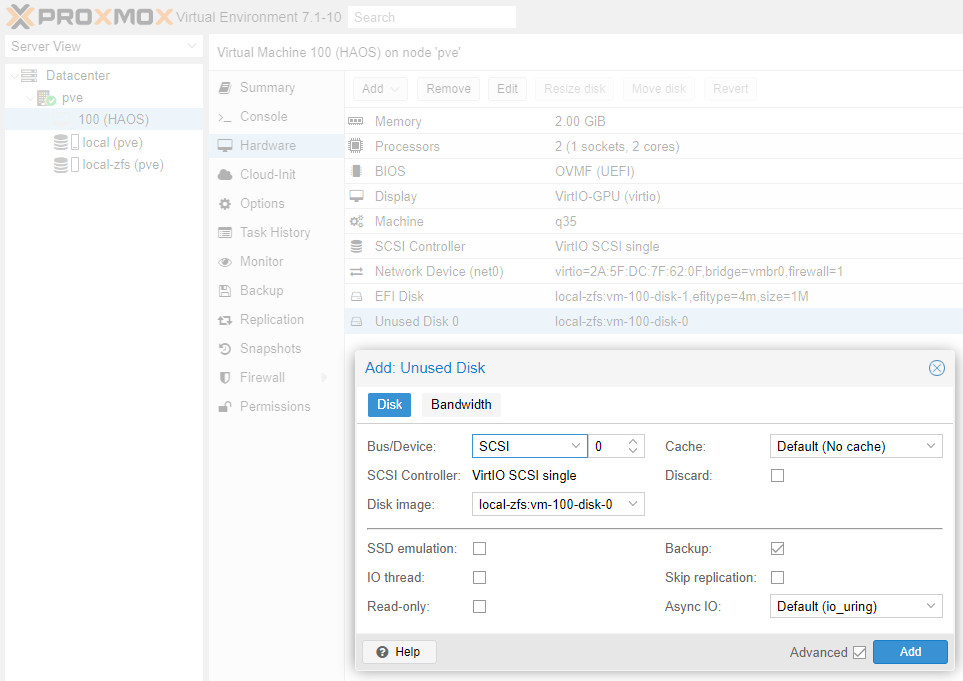
Tick all necessary options and click Add, as per screenshot below.

Select 100 (HAOS) -> Options -> Boot Order and then click Edit., as per screenshot below.
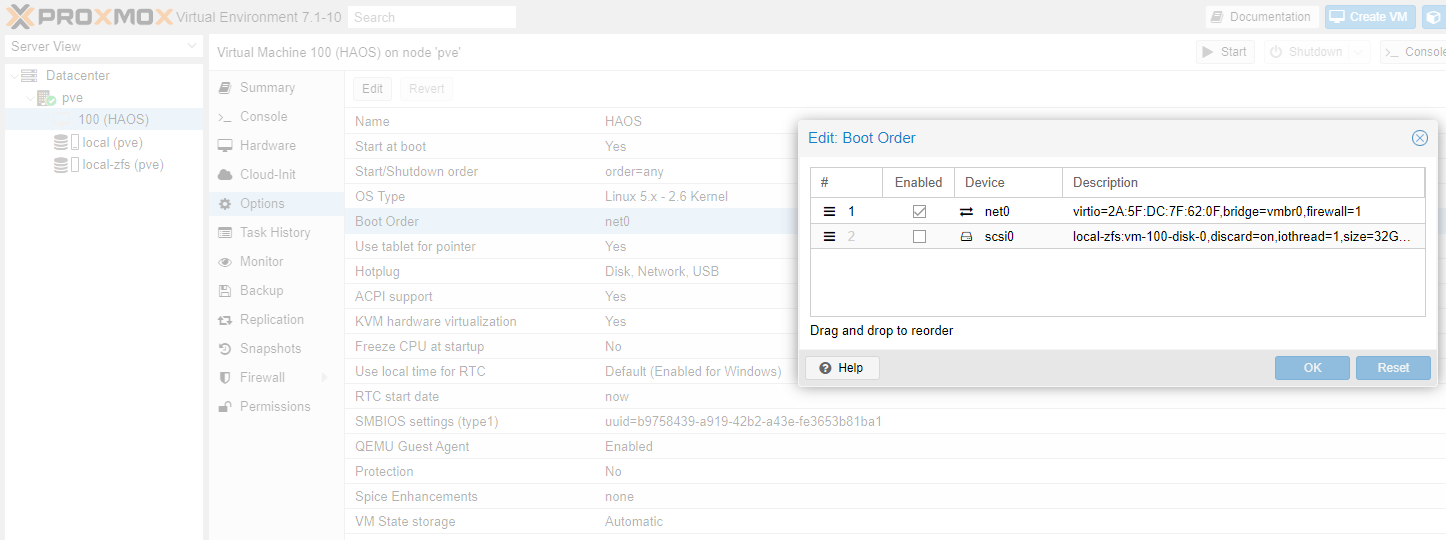
Untick net0, tick scsi0 and click OK, as per screenshot below.
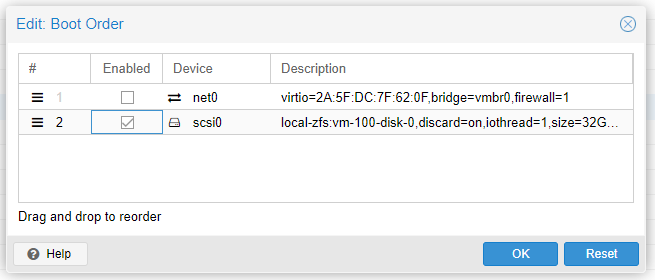
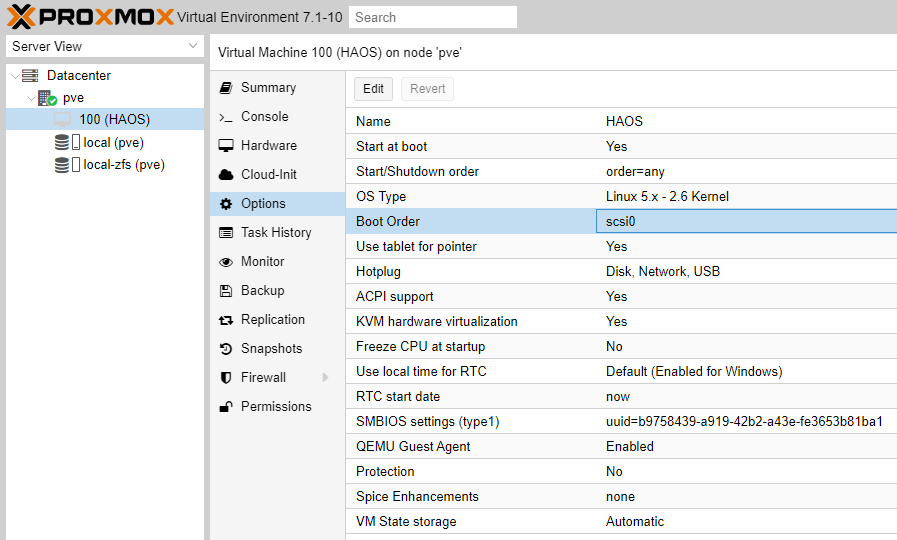
The boot order now is set to scsi0, which means the VM will start from the disk we created and attached earlier.
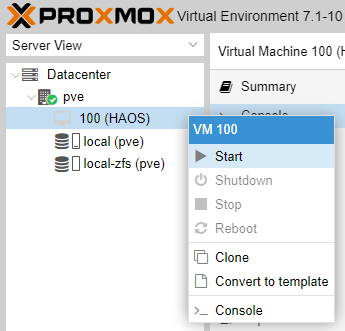
Our HAOS is ready to be activated. Right click on 100 (HAOS) and select Start, as per screenshot below.
Select Console and see HAOS being installed automatically. Wait until you see the login prompt as per below screenshot. You system has been setup as DHCP, something we will need to change when we explore HAOS configuration in our next post.
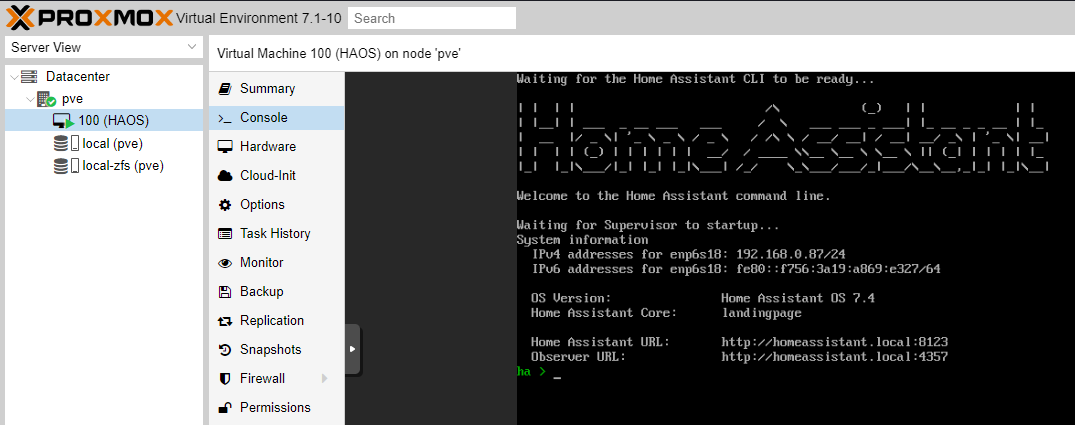
Note: HAOS provides the IPv4 address and hostname you have to use to access the web admin console of HAOS; in our example http://192.168.0.87:8123 and http://homeassistant.local:8123
Go to your browser and type any of the above two URLs to access the HAOS web admin console. My next posts will take you through the full process to successfully configure HAOS.
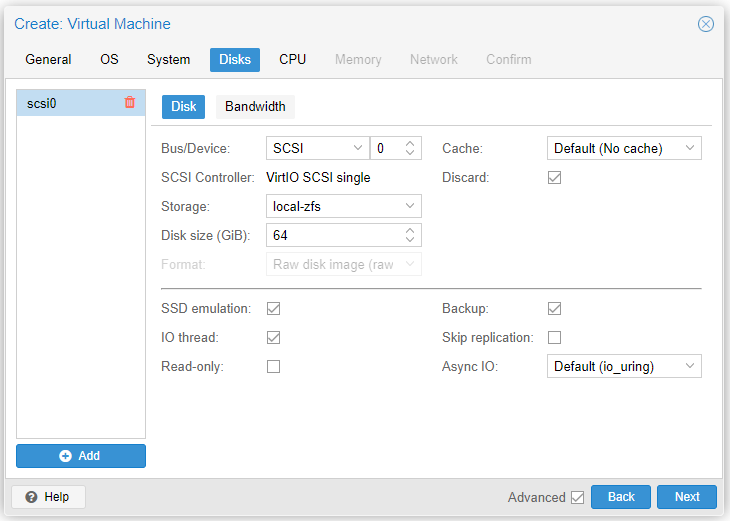
Note: our PVE installation above was on an SSD, which influences the best settings to use when setting up storage parameters. If you are installing on a HDD or slower than SSD medium you should not select when creating the VM:
Discard
SSD emulation
IO thread
Please consider subscribing to my blog, as you will only ever get quality content; no time wasting, advertising, spamming or other unproductive activities/practices.
Please also consider visiting and subscribing to our YouTube channel; we have recently started posting videos.
We are committed to improving and enhancing over time.
If there is something you would like us to cover in a future topic/guide please let us know.
Important Note: From time to time we enhance the content of our posts. It is therefore recommended you link to our original post in our https://blog.habitats.tech, by either subscribing to our https://blog.habitats.tech or visiting our subreddit https://www.reddit.com/r/HabitatsTech/ (our posts in Reddit link to our original posts).