HowTo install Tailscale on Debian, Linux, Proxmox, Ubuntu, Windows
a practical and comprehensive guide installing Tailscale zero-config VPN

Passionate about science and technology and a strong believer the next big thing/think is yet to be discovered.
As discussed in a previous article Tailscale is a zero-config VPN, a new breed of VPN which makes possible the creation of virtual overlay networks to connect hosts and LANs together in your own private cloud, using the Internet in a secure way (all traffic is encrypted).
This guide focuses on the scenario of a single administrator who wants to connect to multiple remote systems (servers and/or desktops), using a Windows desktop as the administrative vehicle. The free plan allows up to 20 hosts.
Before you can install and use Tailscale you need to create an account with them. The only information they host (all information is encrypted and you are the only person who can decrypt it) is the topology of the network (hosts + LANs) you want to create.
Head to Tailscale, click on the Get Started button and you will land on the following screen:
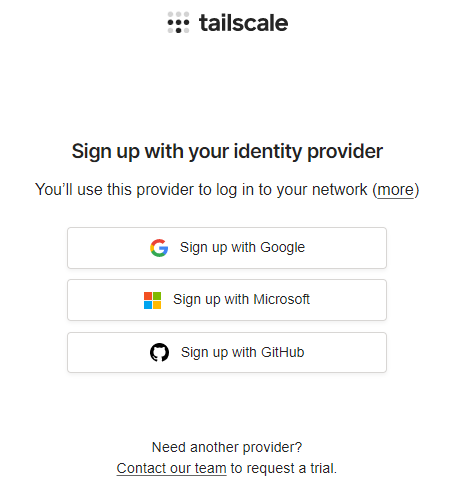
Signup using whichever authentication method you wish (Google, Microsoft, GitHub). If you are a dev I suggest GitHub. Why not be able to use email and password? Because only the above providers have authentication which is considered secure, for example 2FA/MFA options (read more about OAuth). There are other providers but they are not as commonplace as the above, however, you can read this guide with full details.
Following completion of the new account creation, you then need to download Tailscale for all the hosts you need to remotely connect.
Let's assume you have the following hosts:
- Your Windows desktop, which will be used to administer every other host
- One or more Proxmox VE servers
- One or more Debian servers & desktops
- One or more Ubuntu servers & desktops
- One or more Windows servers & desktops
On every host, you need to physically install Tailscale.
For all downloads go to this link and select the OS of interest.
Download the Windows executable (e.g. tailscale-ipn-setup-1.20.2) on your primary Windows desktop (the one you use for admin tasks). Tailscale is a 32bit install.
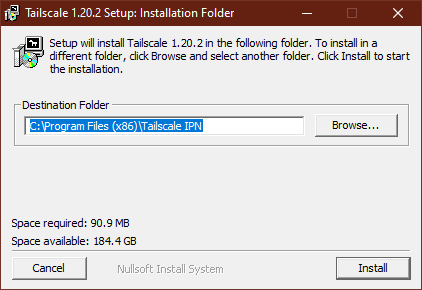
Install the app, which will then place its icon in the system tray.

Right click on the Tailscale icon and you get the following menu:
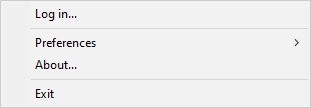
Click on Log in... and you will be taken to a browser tab for authentication.
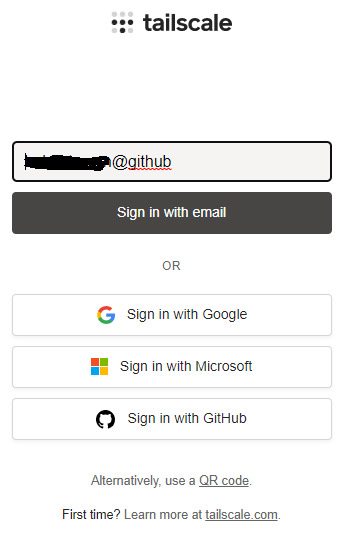
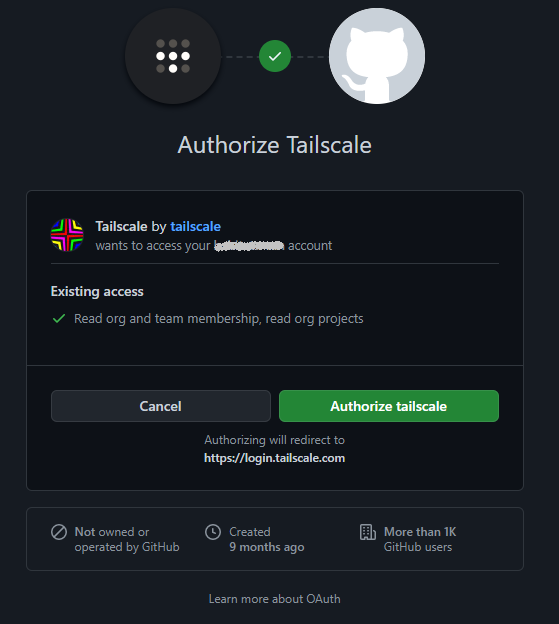
Select the authentication method you used when you signed up with Tailscale at the beginning. You are then taken to another browser tab for final authentication. GitHub is illustrated below and you can hopefully see the reason Tailscale is using OAuth authentication.

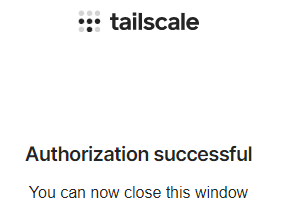
Finally if everything went well you will see the following in a browser tab.

At this point if you were to right click on the Tailscale icon in the system tray you will see the following.
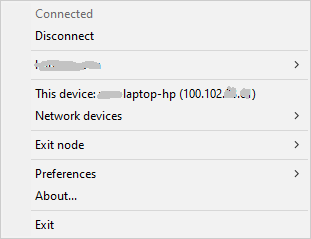
Your login name will be displayed on the third line and your Windows system gets a fixed IP address which you can use to access this system. Let's assume the IP address assigned to this host is 100.102.123.234.
At this point we have our Windows Desktop has been added on the Tailscale node network.
Now let's install Tailscale on our Proxmox node/server.
You will need to have network access to your Proxmox from your Windows desktop. Let's assume the LAN IP address of our Proxmox is 192.168.0.36. Open your browser and type:
https://192.168.0.36:8006
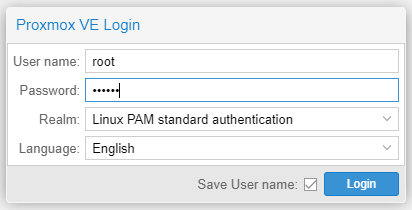
You are presented with the Proxmox login. Type the password to login as root.
Head to the >_ Shell as per below illustration.
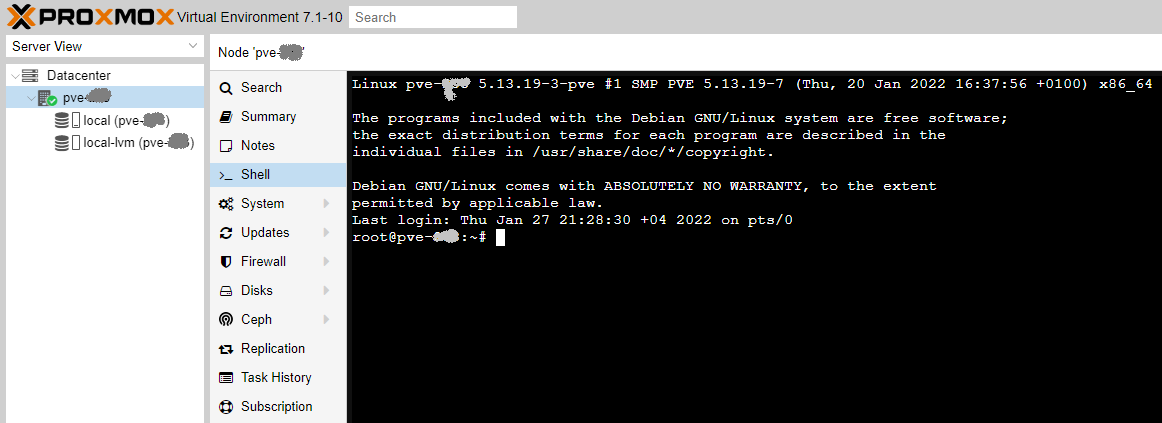
Type the below commands in the terminal window in the exact order you see them below.
curl -fsSL https://pkgs.tailscale.com/stable/debian/bullseye.noarmor.gpg | tee /usr/share/keyrings/tailscale-archive-keyring.gpg >/dev/null
curl -fsSL https://pkgs.tailscale.com/stable/debian/bullseye.tailscale-keyring.list | tee /etc/apt/sources.list.d/tailscale.list
apt update
apt install tailscale
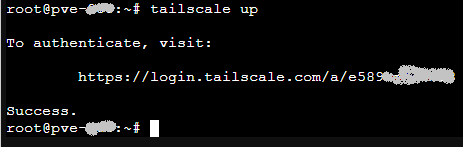
tailscale up
The up command above will display the following instructions, which you need to follow to add this machine into your Tailscale node network.
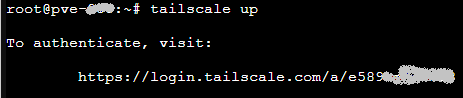
Copy the URL after visit: (https://login.tailscale.com/a/e........) and paste it in your browser in a new tab. You get the same sign in process, you need to follow, as you got for Windows above.

At this point if you go back to your Proxmox tab you should see Success.
At this point your second host has been added to your Tailscale network. To find the IP address use the following command:
tailscale ip
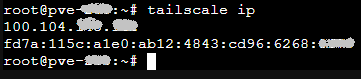
Let's assume your IPv4 address, allocated by Tailscale, for Proxmox is 100.104.12.24
At this point you can type in a browser tab on your Windows desktop this IP address
https://100.104.12.24:8006
and it should take you to your Proxmox node even it is on the same LAN as your Windows desktop (the magic of Tailscale). If you move the Proxmox server anywhere in the world you can still access it using the IP address assigned by Tailscale, in our example case 100.104.12.24.
I hope you agree with me everything is easy and powerful.
Proxmox is based on Debian, so same commands apply to install Tailscale in Debian and Ubuntu or any Debian derived distro. The only difference is if you sign in as non root you just need to add sudo to certain commands. To make it easy I provide them for you below; you just need to copy and paste or retype if you do not have remote access to these systems.
curl -fsSL https://pkgs.tailscale.com/stable/debian/bullseye.noarmor.gpg | sudo tee /usr/share/keyrings/tailscale-archive-keyring.gpg >/dev/null
curl -fsSL https://pkgs.tailscale.com/stable/debian/bullseye.tailscale-keyring.list | sudo tee /etc/apt/sources.list.d/tailscale.list
sudo apt update
sudo apt install tailscale
sudo tailscale up
In any Linux distro you can also use one command install (a shell script).
curl -fsSL https://tailscale.com/install.sh | sh
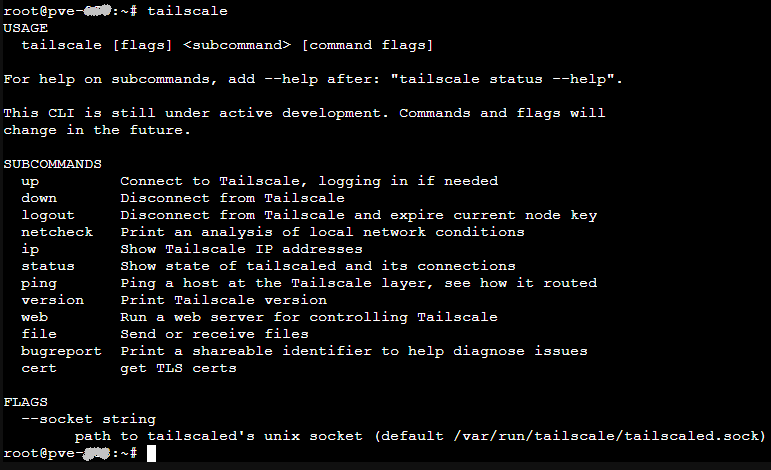
In Linux to find out what commands Tailscale supports just type:
tailscale
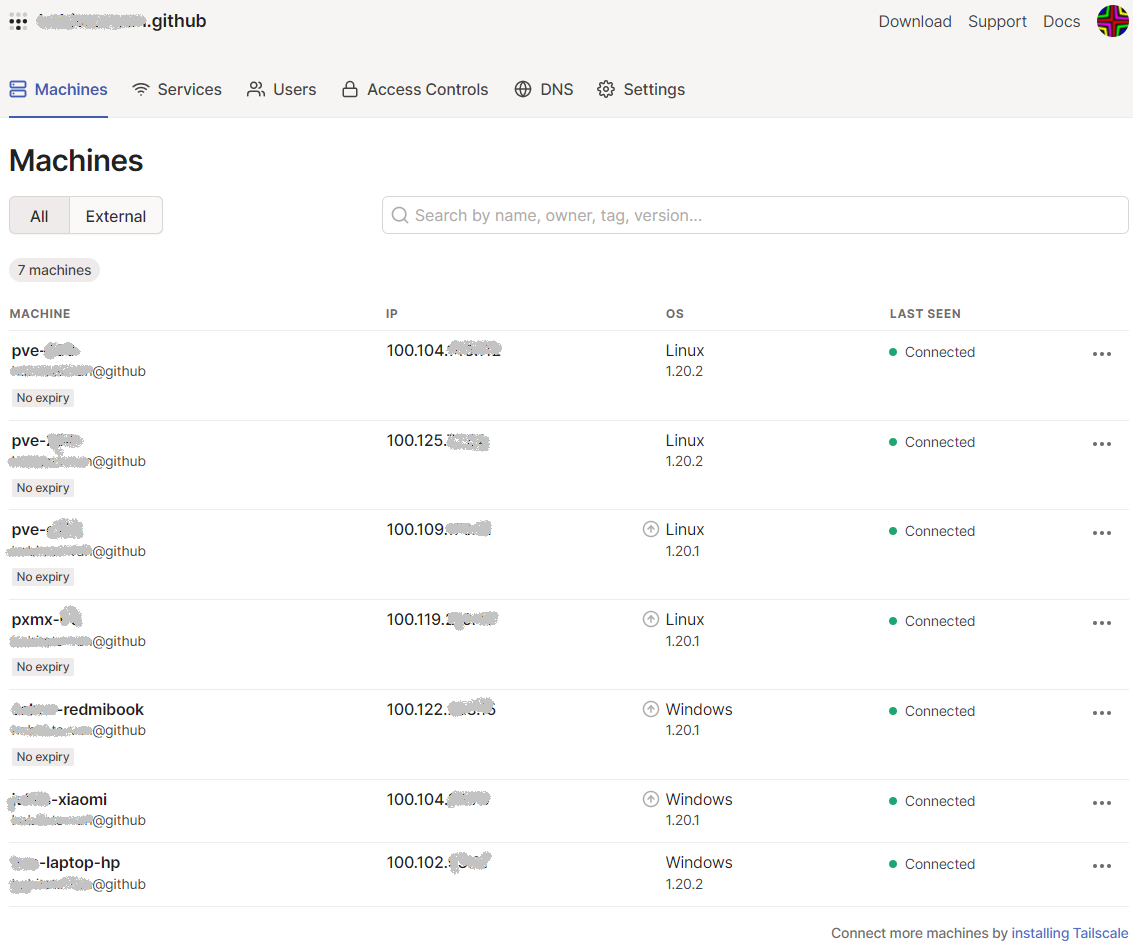
Finally, Tailscale provides a GUI web based admin console where you can see all your network nodes (hosts). The URL to access the admin GUI console is:
https://login.tailscale.com/admin
A couple of notes:
When a new host joins the network its authentication will expire in 6 months by default, as per below illustration (it is missing the No expiry tag).

To enable no-expiry click on the menu at the right of the host (the three ...) and click on Disable key expiry. This way you will not be asked to re-authenticate the host in the future. Use as per your requirements.
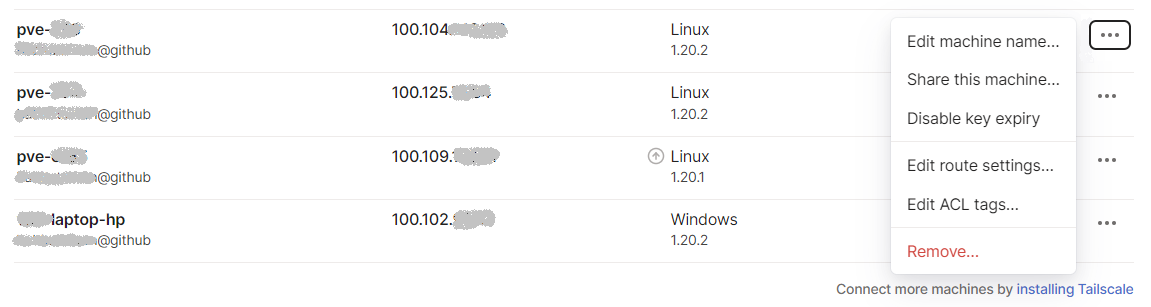
If a machine is offline you see it as pointed by the red arrow below:

In future articles I will explain a bit more about other configuration options which might be of interest to some people and use case scenarios.
If you have found this article helpful please give it a thumbs up and please consider subscribing to our blog. It helps us get the right information out and with our future expansion plans, as we only just started.
PS: Tailscale can also be installed in phones, but for me any meaningful and secure administration requires something more serious and secure than a phone.
Please consider subscribing to my blog, as you will only ever get quality content; no time wasting, advertising, spamming or other unproductive activities/practices.
Please also consider visiting and subscribing to our YouTube channel; we have recently started posting videos.
We are committed to improving and enhancing over time.
If there is something you would like us to cover in a future topic/guide please let us know.
Important Note: From time to time we enhance the content of our posts. It is therefore recommended you link to our original post in our https://blog.habitats.tech, by either subscribing to our https://blog.habitats.tech or visiting our subreddit https://www.reddit.com/r/HabitatsTech/ (our posts in Reddit link to our original posts).