HowTo bare-metal install Proxmox Virtual Environment (PVE)
possibly the best hypervisor for most people and companies

Passionate about science and technology and a strong believer the next big thing/think is yet to be discovered.
I would like to thank everyone who has visited my blog on hashnode.
I am now moving all content to my portal - portal.habitats.tech - where I have complete control of the content presentation.
Having tested almost all blogging and newslettering sites I have come to the conclusion they are all very limited in what can be accomplished.
I will be sunsetting this blog by summertime. Please follow me on my portal where I have started publishing new content.
Before you start make certain you meet the minimum installation requirements.
Download the latest ISO (official link) - e.g. Proxmox VE 7.1 ISO Installer
We will use Ventoy for installation. Copy the PVE ISO on the Ventoy USB drive (where you keep all ISO images). If not familiar with Ventoy, read my installation guide.
Go to the target system, plug the Ventoy USB Disk (VUD) and boot the system to access the BIOS settings. Disable secure boot and enable all virtualisation settings, if not enabled by default. Do not forget to enable boot from USB, as well as configure the USB memory stick to be the first boot device.
Save the BIOS settings and boot. Ventoy will display all ISO images, just select the one for PVE (e.g. proxmox-ve_7.1-2.iso).
I suggest your system has at least 4GB RAM, uses an SSD as the storage device (NVMe preferable but SATA III will be OK as well) and has a 1 GbE network interface (100 MbE is OK but not desirable).
You then follow the Proxmox installation instructions, which is an excellent source of information.
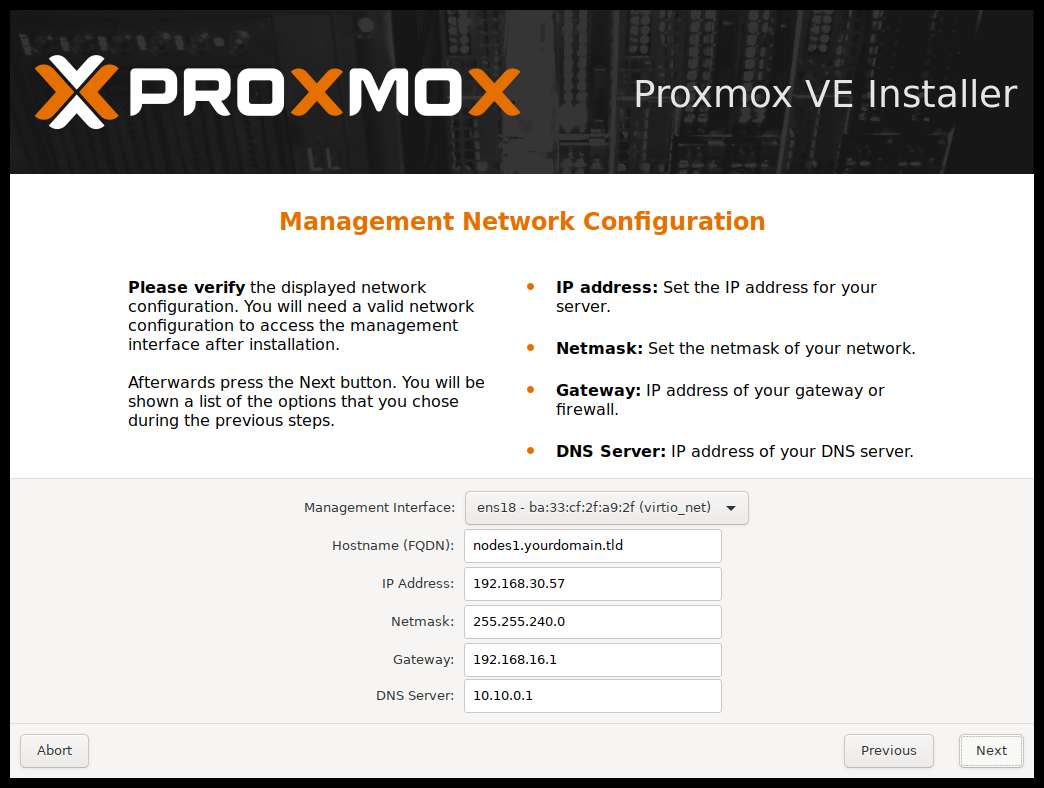
Important Note: If your system has more than one Network Interface Card (NIC) you can select which interface you want to use to manage the PVE node/server. Note the NIC selection states "Management Interface" on the screen below. This NIC must be connected to the network at all times in order to manage PVE (you cannot manage PVE from the system you are installing it on - well, you can, but you need to have deep skills using command line - using the GUI is the recommended method administering PVE). A PVE node is running as a headless server (keyboard, mouse and display are not required following a bare-metal install of Proxmox).
If you are performing a home lab, residential or a small self contained SME installation (one PVE node only) you can consider the following guide:
For hostname use: pve-xxx.local (xxx = the location name, and .local as the domain name denoting it is a non cloud hosted system - exists only on the LAN). One of the reasons I suggest this naming convention is because we will be installing Tailscale on the PVE system to allow us to manage it from any remote location anywhere in the world (it makes it very easy to identify which host you are connecting to).
For IP Address use: an IPv4 address and make certain this address is outside the DHCP address range, plus it is always the same in case you are the type of person who installs this for other people (e.g. assuming your network address is 192.168.0.0 you could standardise on your PVE node being always on IP 11 (i.e. 192.168.0.11) ; even if your network changes say to 192.168.1.0 you will know you PVE will be sitting on 192.168.1.11).
Netmask will usually be 255.255.255.0 to allow up to 254 network nodes.
Gateway will usually be 192.168.0.1 (or 192.168.1.1)
For DNS server I suggest you use the public Google DNS server 8.8.8.8 or 8.8.4.4 - it is fast and accessible from anywhere on the planet, bypassing your ISP DNS sever which most times is the least desirable option to choose.
In my opinion, for any installation I suggest you also install the following as part of the standard installation. I will cover these in follow up HowTo guides.
Tailscale enables zero-config VPN on steroids to facilitate remote administration of PVE nodes. Connecting remotely feels like being there when administering or monitoring a remote system. Read my article on overlay networks.
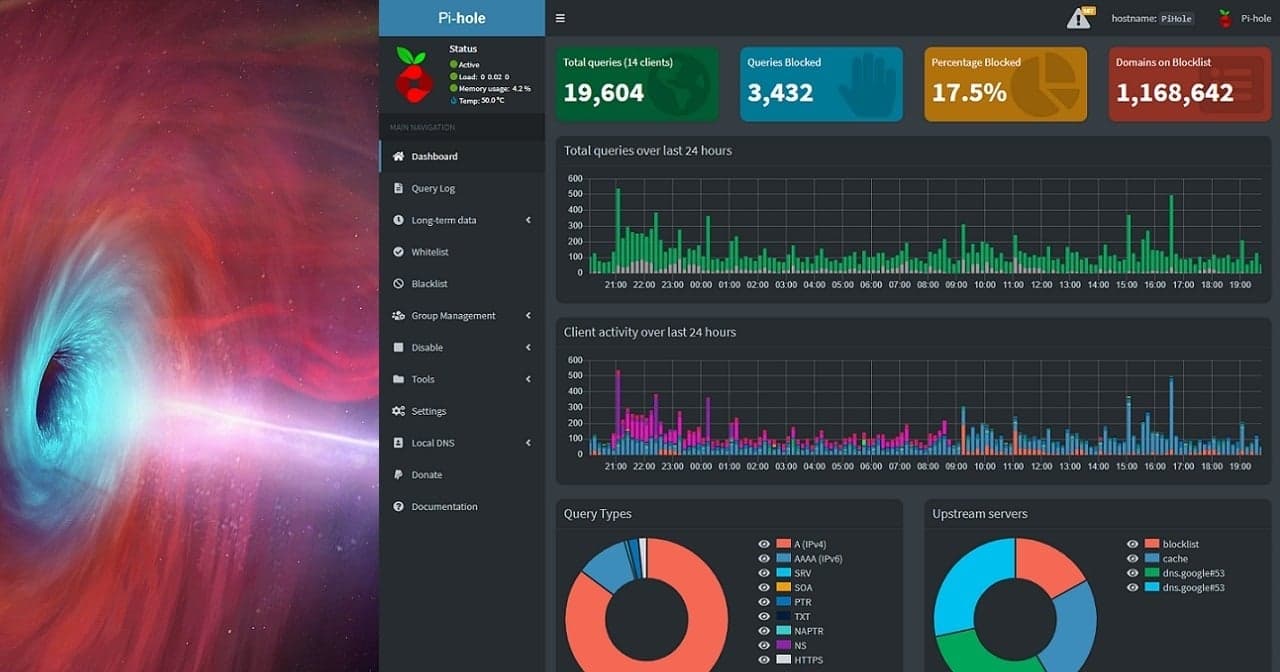
Pi-Hole is an ad-blocker and privacy preserving system. However, it can also act as a local DNS server (DNS resolver for the local network), a DNS forwarder (connecting you to the rest of the world) and a DHCP server. For me this is one project we should all support to keep it alive. Fast with absolutely minuscule resource requirements.
Other systems I will be discussing in future HowTo guides are:
pfSense (this requires at least three NICs to work properly)
Home Assistant (smart home)
ZoneMinder (DVR)
Docker (application container system)
Mosquito (an MQTT broker)
For anyone interested in this tech, but do not have the skills to pull this together on their own, please get in touch with us as we offer some amazing palm-sized systems which can run the entire business of an SME (up to 500 employees) and also are fantastic for home labs, development environments CI/CD and residential installs.
We are an Open Systems advocate, and passionately believe the future of humanity is dependent on technology and science moving forward.