HowTo install & configure Windows 11 in a VM on Proxmox VE 7.1 - step-by-step
The definitive step-by-step setup guide of Windows 11 Pro in a Proxmox VE 7.1 VM

Passionate about science and technology and a strong believer the next big thing/think is yet to be discovered.
Following the PVE installation superguide and Windows 10 PVE guide, in this guide we will cover the Windows 11 Pro installation in a VM on PVE.
FW = Firewall
VM = Virtual Machine (KVM)
PVE = Proxmox Virtual Environment (VE)
WAC = Web Admin Console (the web browser GUI to administer PVE nodes & clusters or HA hosts)
Download the Windows 11 ISO image
Visit Microsoft WIndows 11 Download.
Go down the options and select Windows 11 (multi-edition ISO) and the product language, then click Confirm.

Click 64-bit Download.
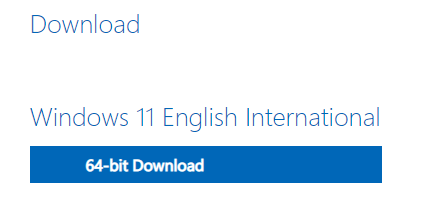
The ISO should start downloading to the Downloads folder on your PC.
Upload Windows 10 ISO image to PVE
We now need to upload this ISO into PVE, by visiting the PVE WAC - https://192.168.0.253:8006.
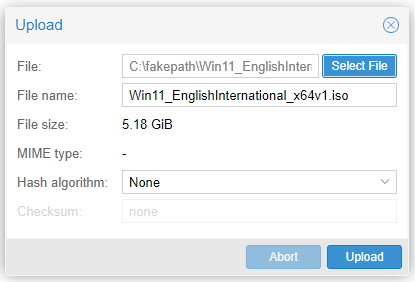
Click Upload.
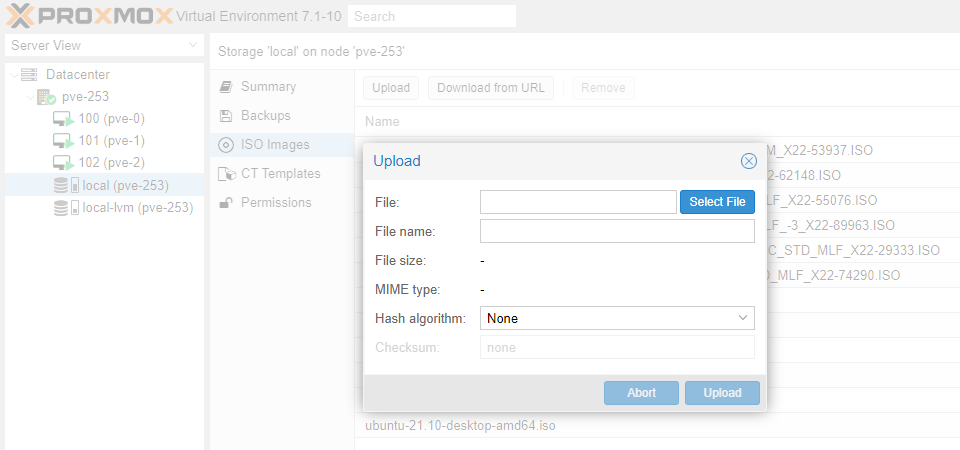
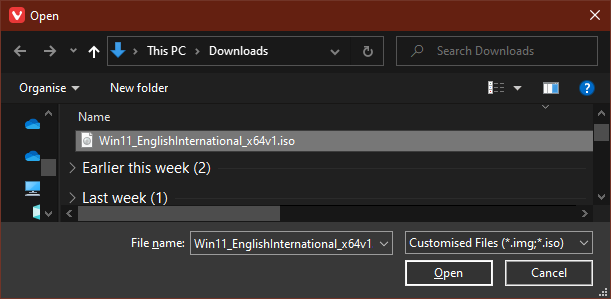
Click Select File, select the earlier downloaded Win11_EnglishInternational_x64v1.iso or similar file name from the Downloads folder and click Open.
Click Upload.
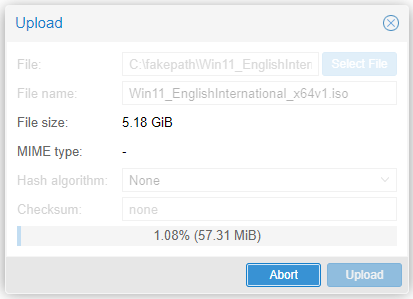
Uploading commences.
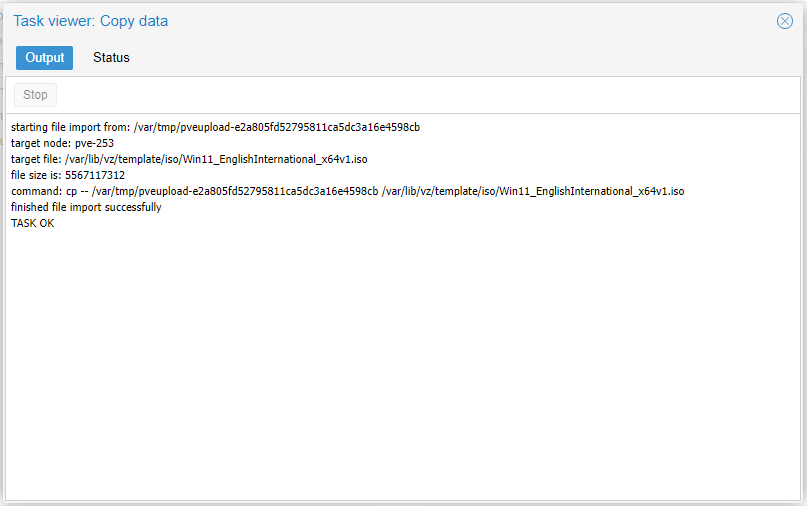
If everything completed with no errors, close the Task viewer.
Create the Windows 11 VM
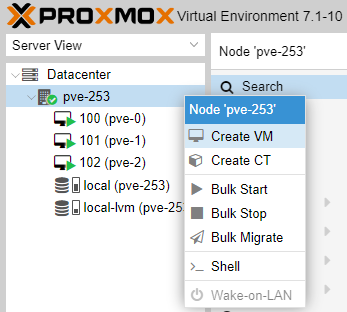
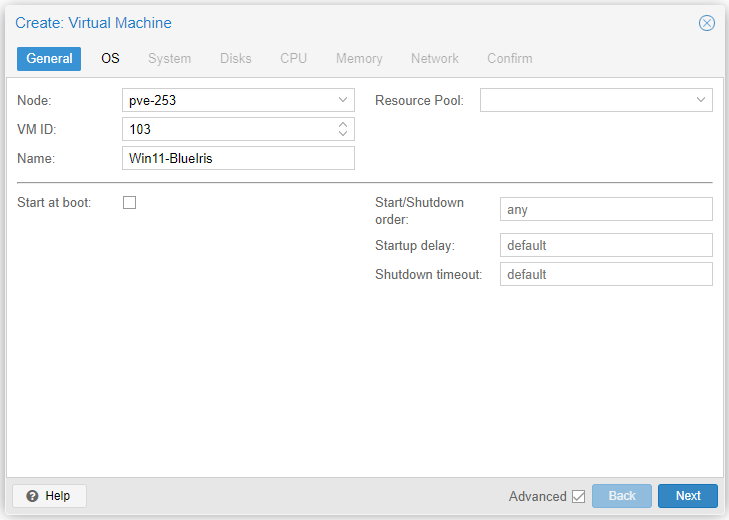
Right click on the Node (pve-253) and select Create VM.
I assume you are installing Windows to run an app or for a specific purpose. I suggest you provide a short descriptive name to the VM you are creating, like in our example below (Win11-BlueIris). Tick Start at boot if you want this VM to automatically start when PVE is started.
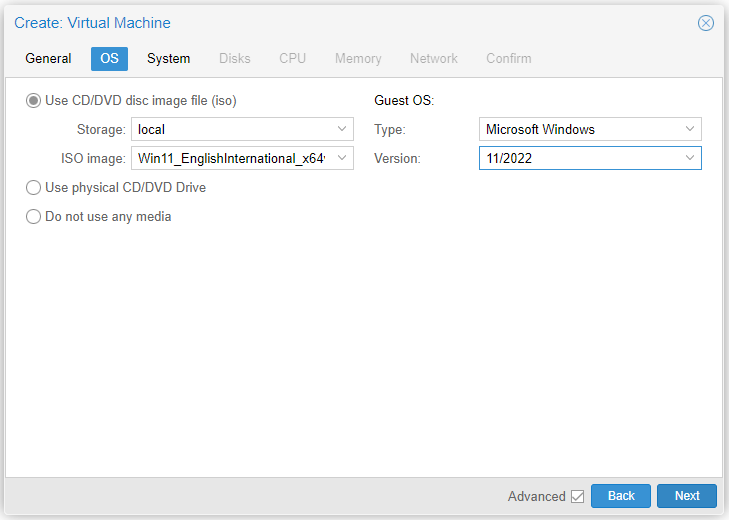
Select the Windows ISO image and the rest of the options as you see them in the screenshot below.
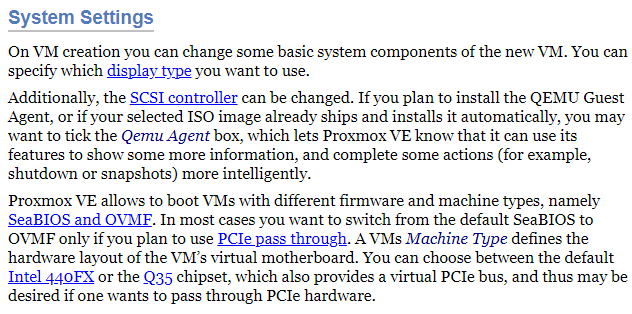
Select System options as you see them below.
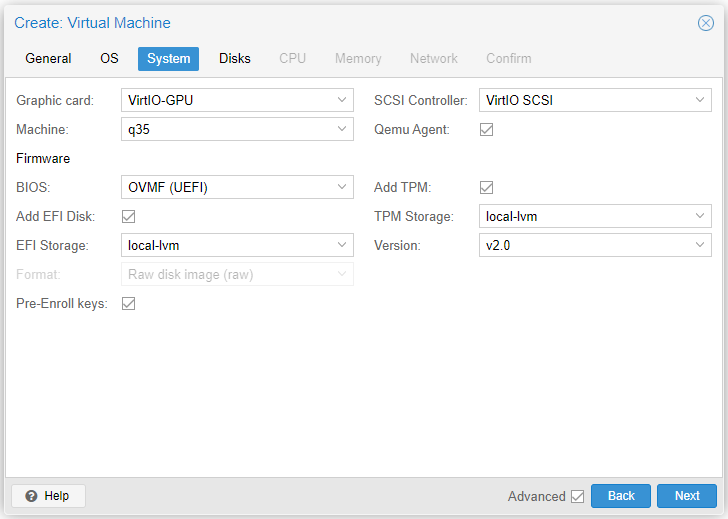
Reason for above choices stated below:
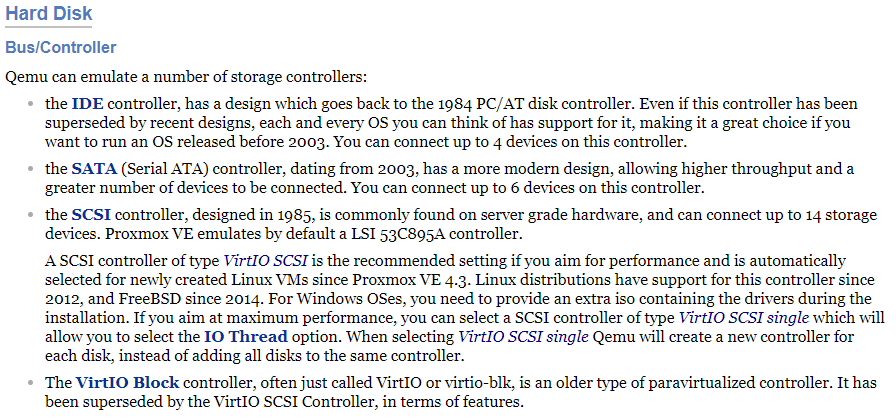
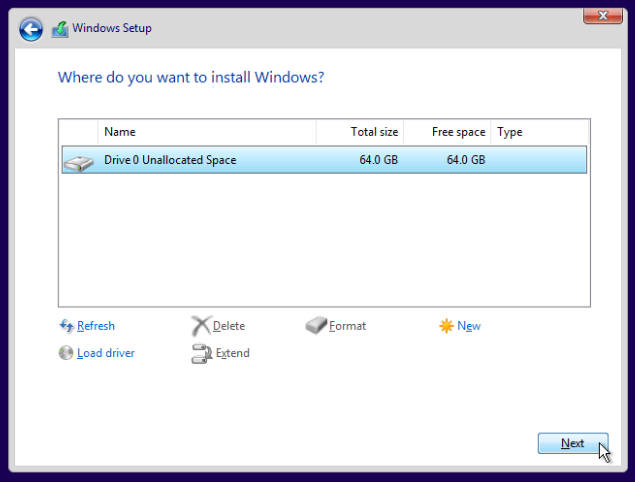
Select Disk options as per below screenshot. Select IDE or SATA for the Bus/Device (IDE might have slightly better compatibility, while SATA might have slightly better performance depending on underpinning hardware), then change the Disk size to suit your needs.
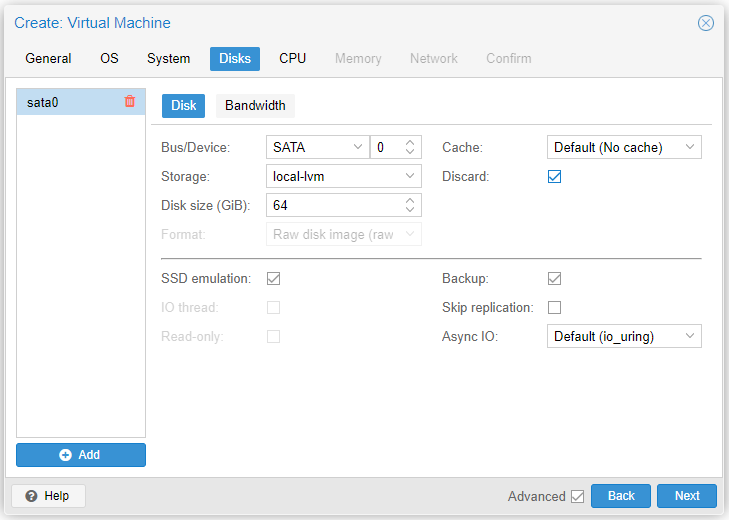
Reason for above choices stated below:
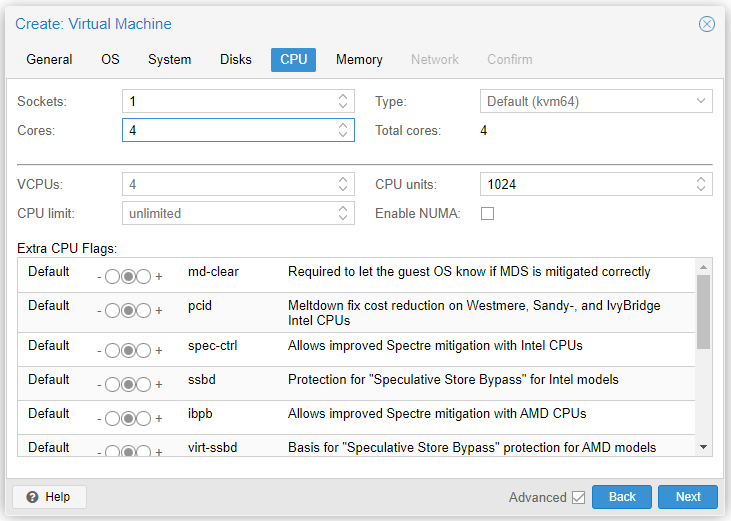
Select CPU options as per screenshot below. Blue Iris requires at least 4 CPU Cores, while Windows 11 with no apps installed can run on 2 CPU Cores only.
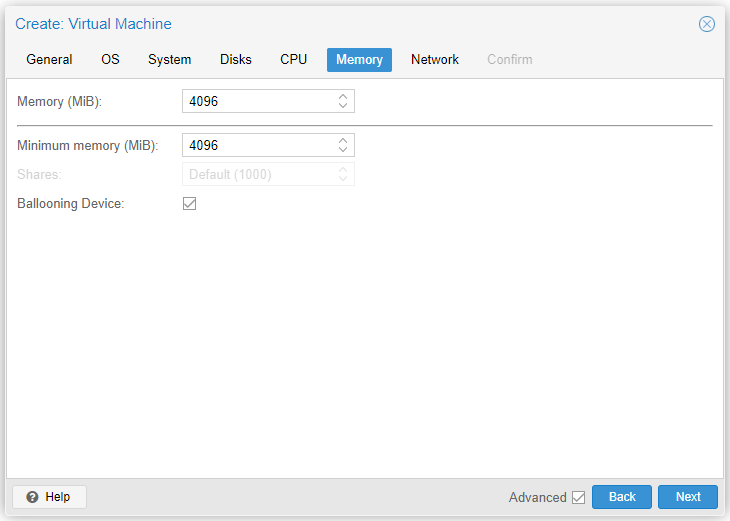
Select Memory options as per screenshot below. Blue Iris requires at least 4 GB, while Windows 11 with no or "lite" apps installed can run on 2 GB only.
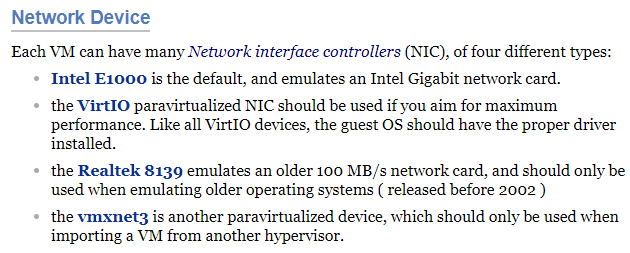
Select Network options. You can disable Firewall as Windows has its own FW, although the PVE Firewall option is good to have active as it applies cascaded FW rules from Cluster -> Node -> Guest each providing its own ring fencing.
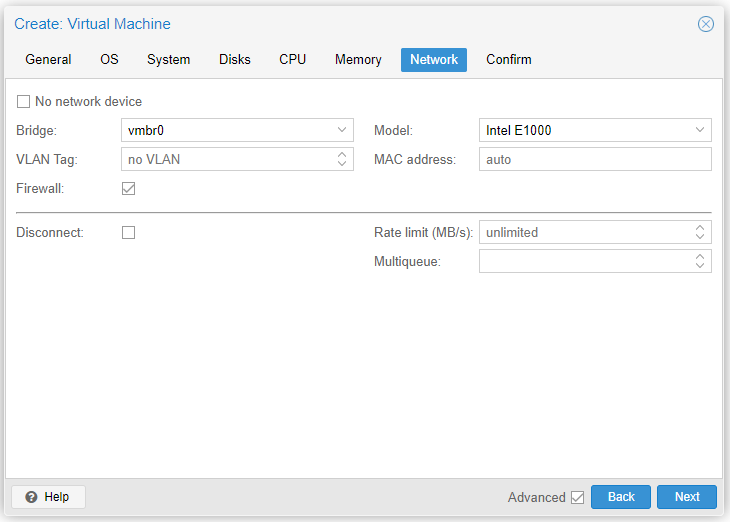
Reason for above choices stated below:
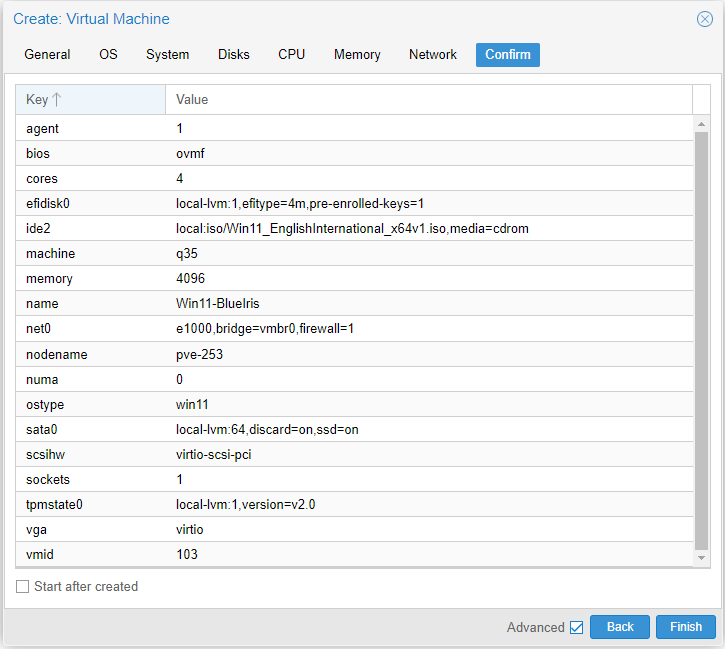
If satisfied with the selections, DO NOT tick Start after created and click Finish.
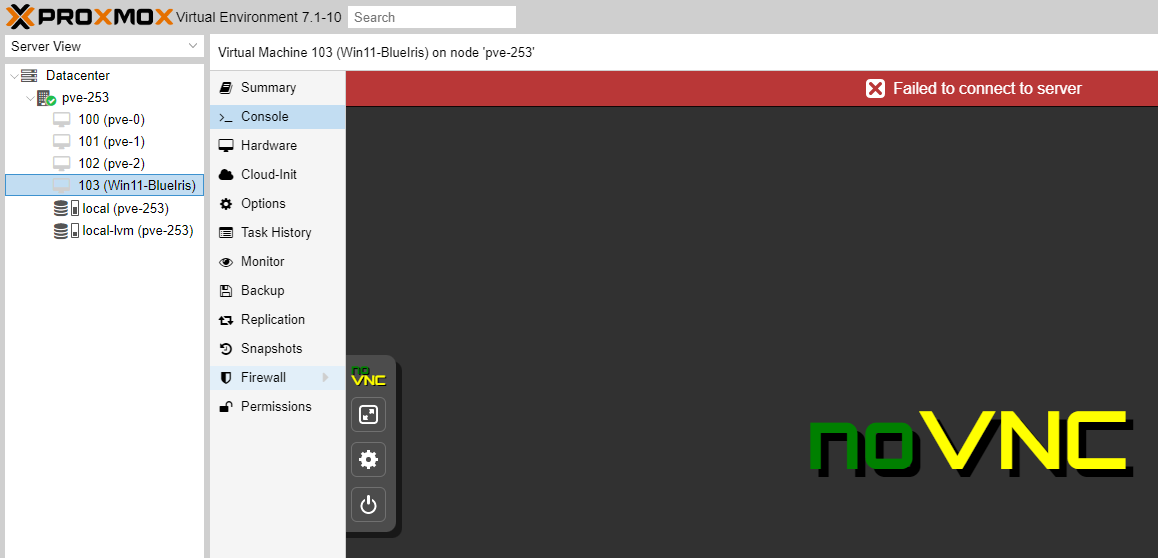
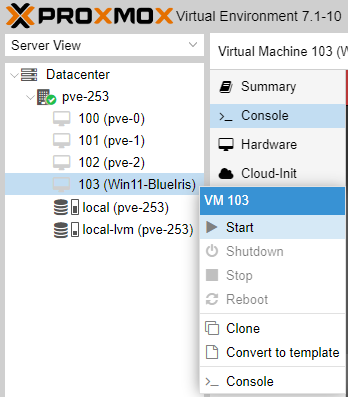
Wait until the VM (Win11-BlueIris) has been created, then go to VM >_ Console.
Install Windows 11 into the VM
Right click on the Guest VM 103 (Win11-BlueIris) and select Start.
The system will start and very quickly you need to press any key on the keyboard so the installation starts, otherwise installation will timeout and fail, and the only way to recover is by Stopping the VM (DO NOT use any other option like Shutdown).

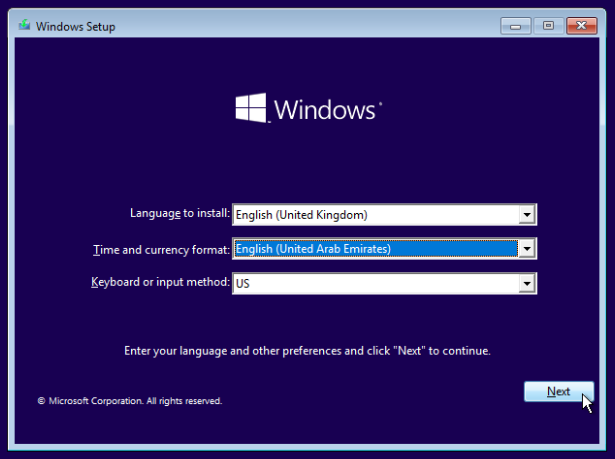
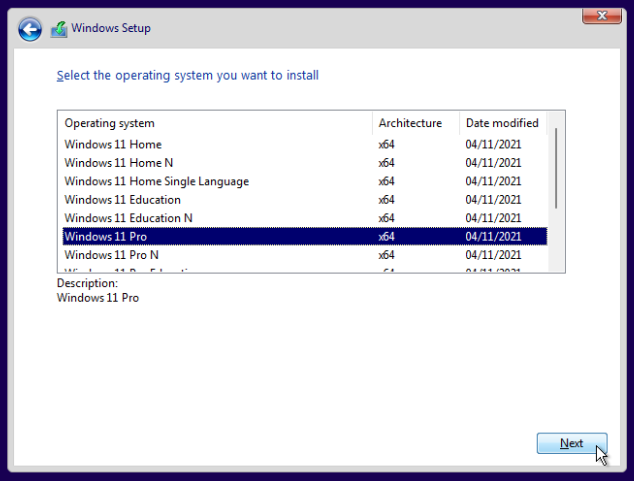
If you were fast you should get the Windows Setup screen. Select you preferences and click Next.
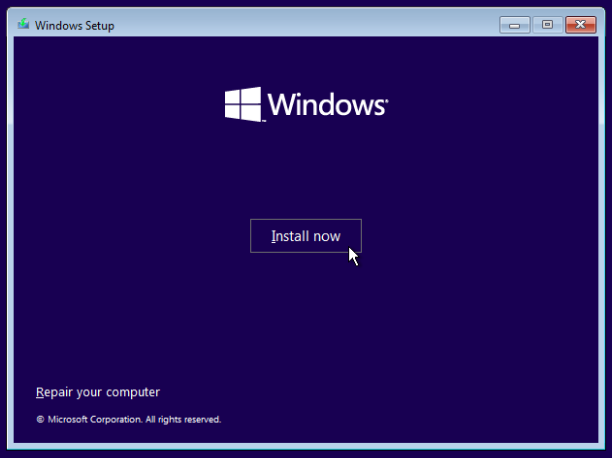
Install Now.
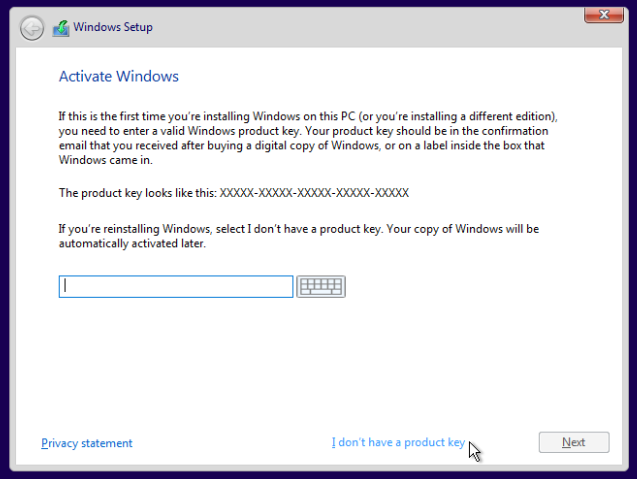
Click I don't have a product key.
Windows 11 Pro -> Next

Select Custom.
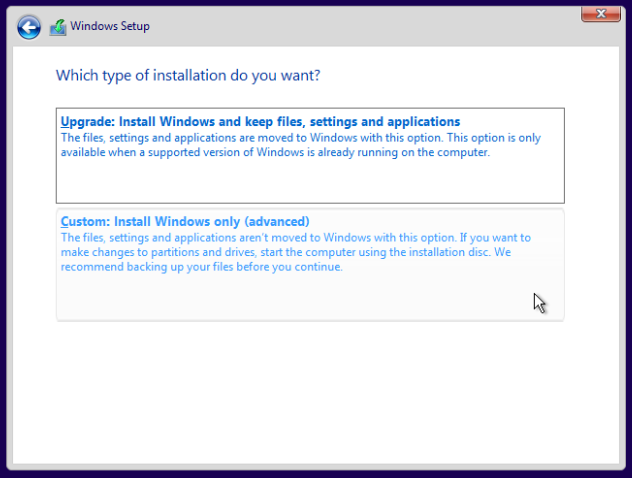
Click Next.
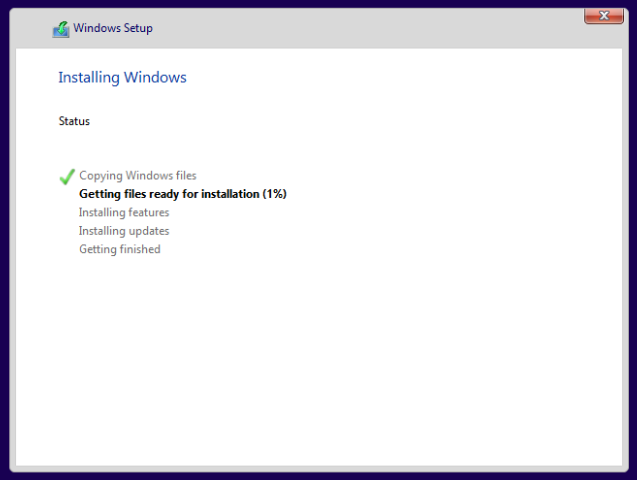
Windows installation starts. Once finished it will restart automatically. Wait patiently while Windows does its thing.
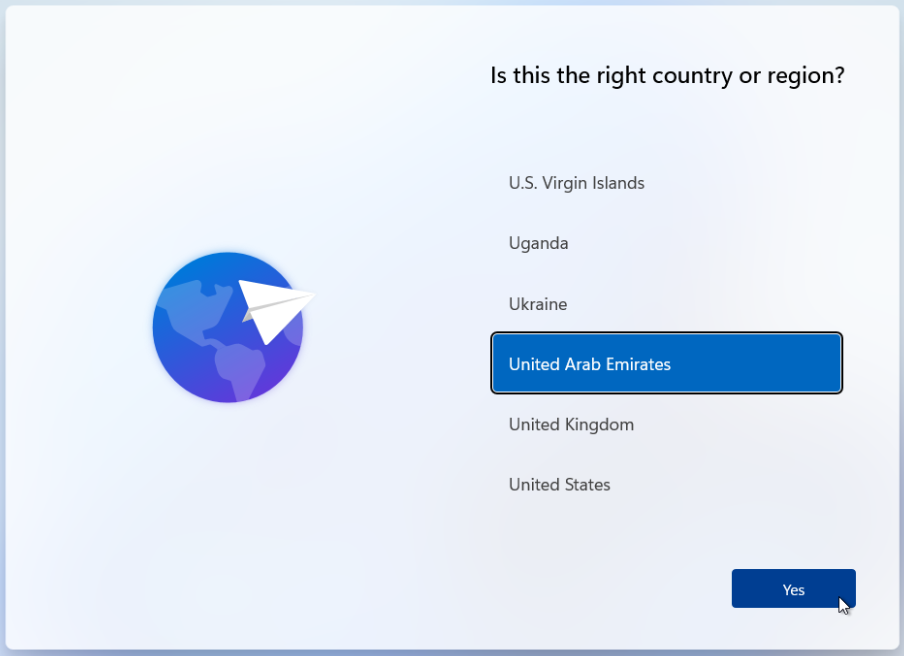
Select your region.
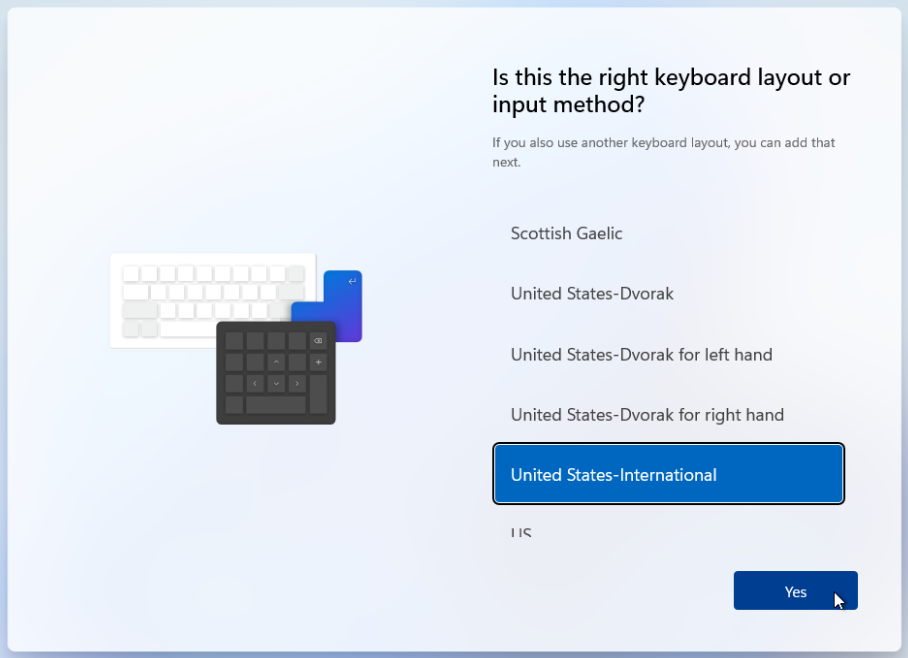
Select keyboard layout.
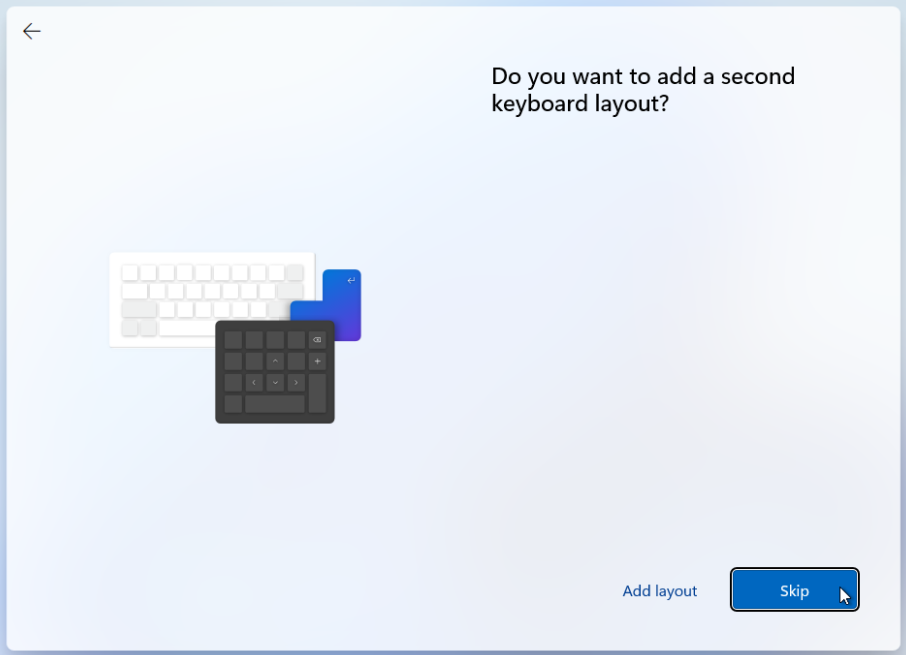
Skip or add keyboard layout.
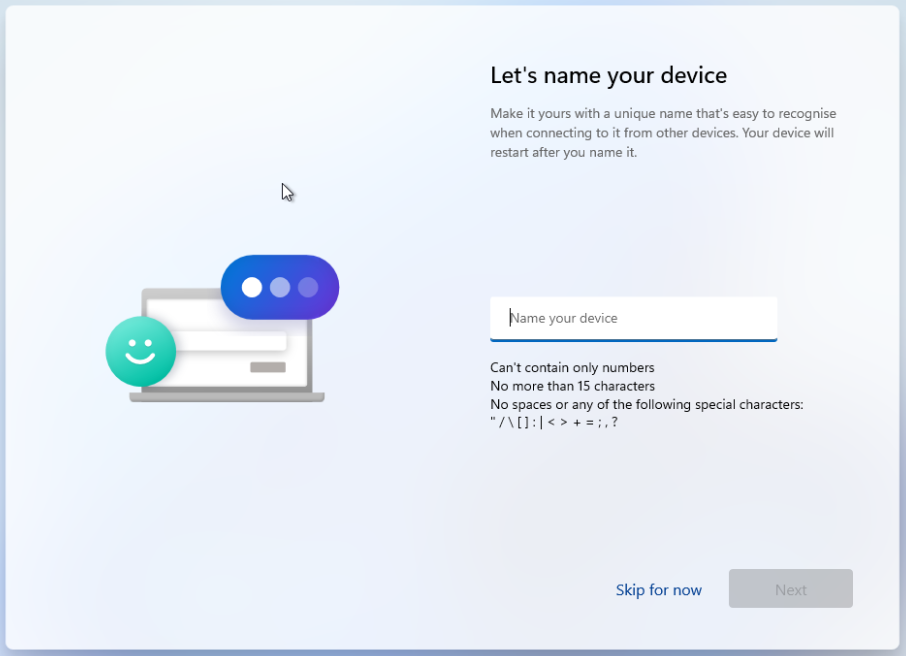
Name your device. Suggestion same name as the VM (Win11-BlueIris).
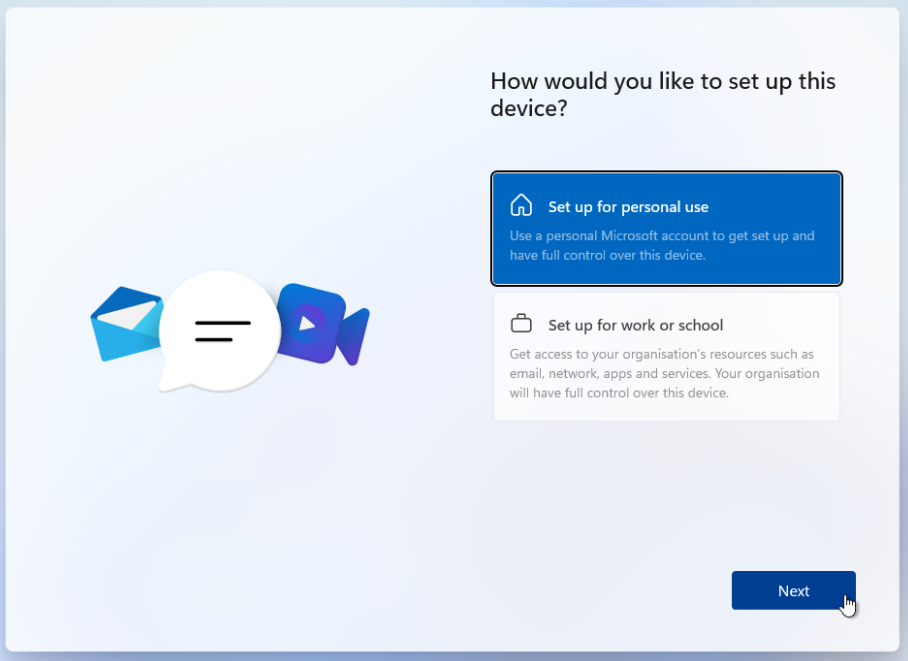
Select Set up for personal use.
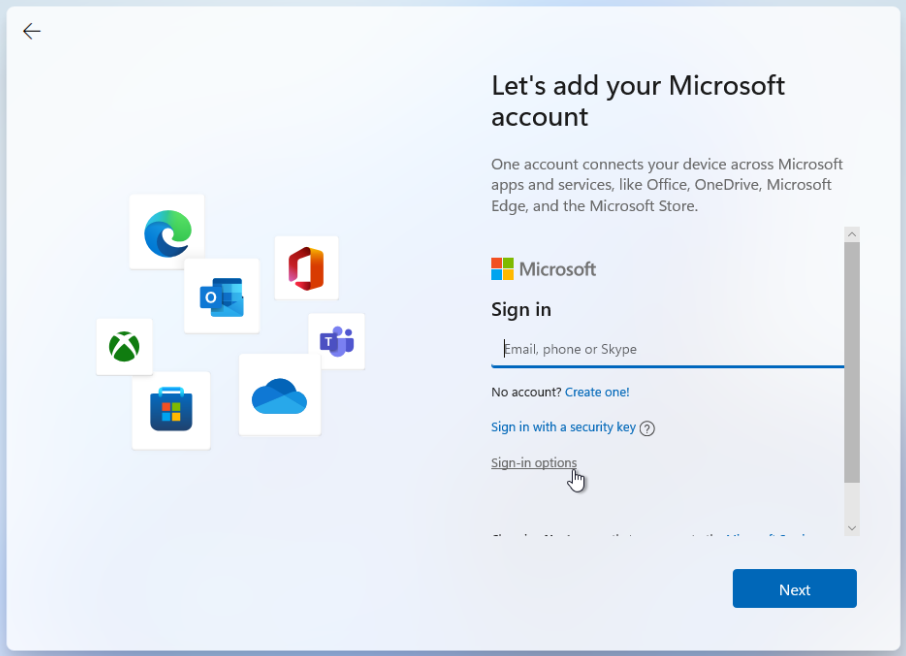
Click Sign-in options.
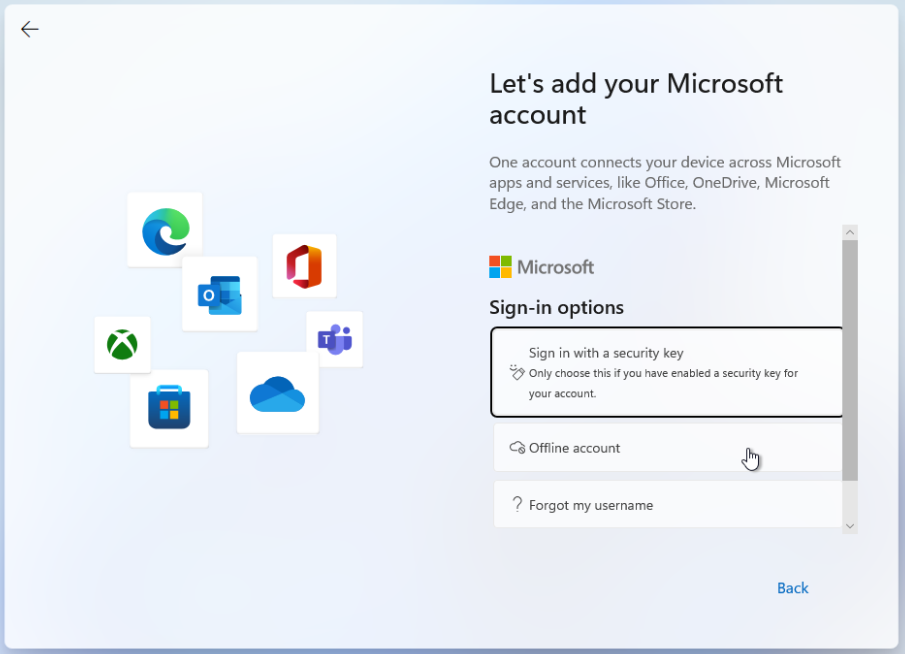
Select Offline account.
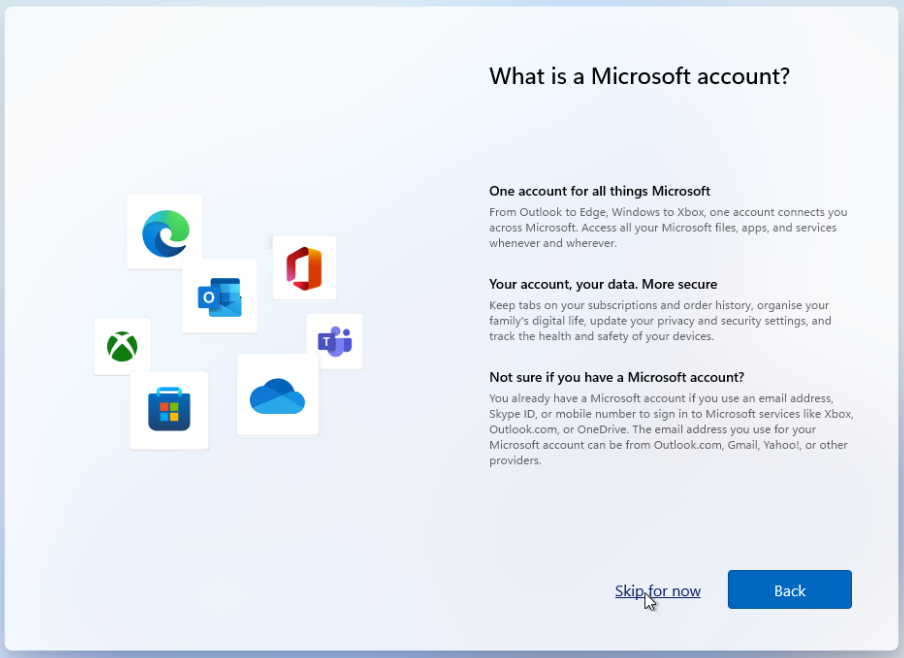
Skip for now.
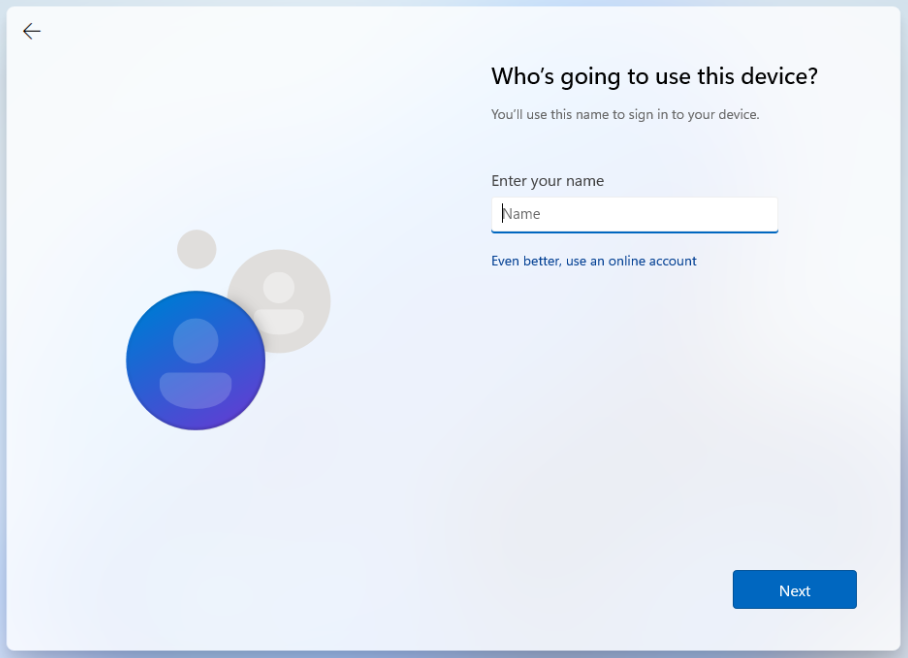
Select a local account name.
Choose password.
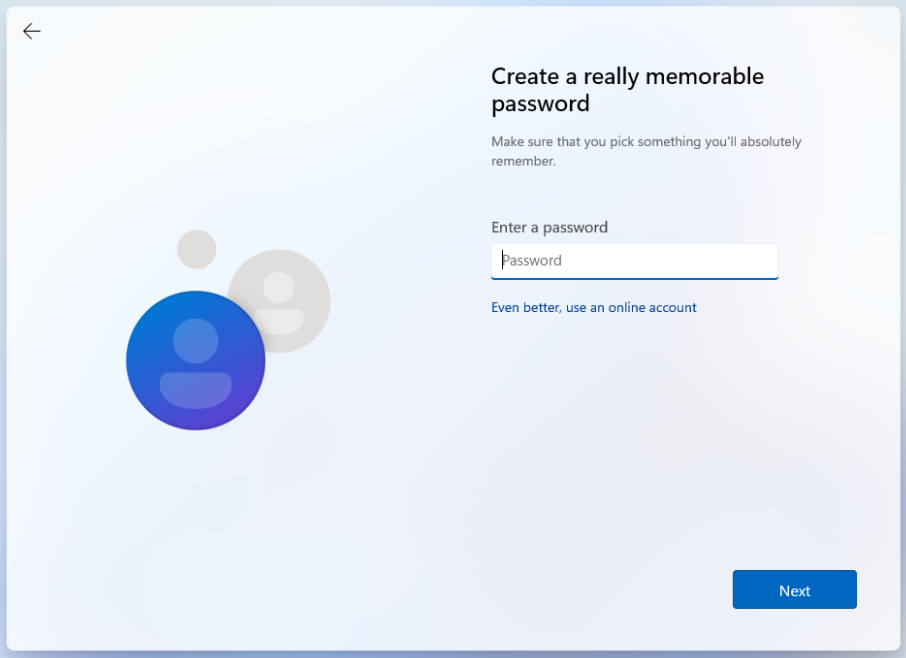
Confirm password.

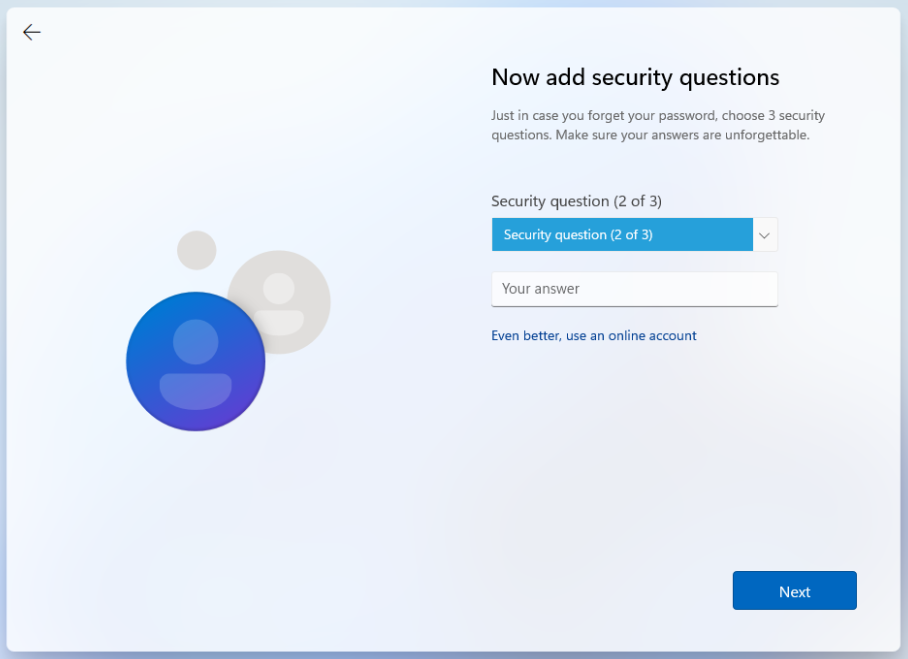
You will be asked 3 times to answer a different security question each time. Type something you can remember in case you forget the password.


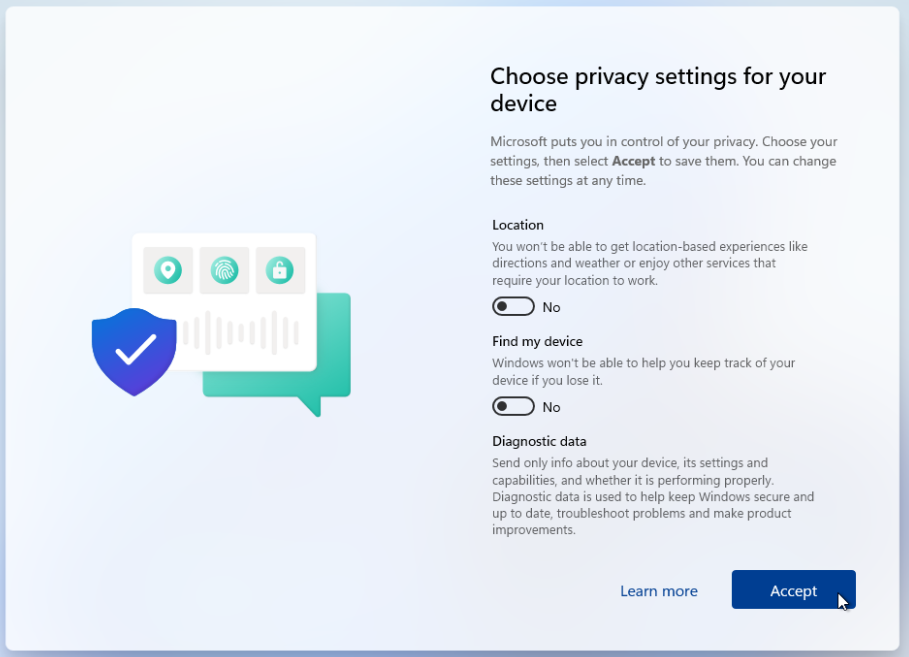
Disable all options.
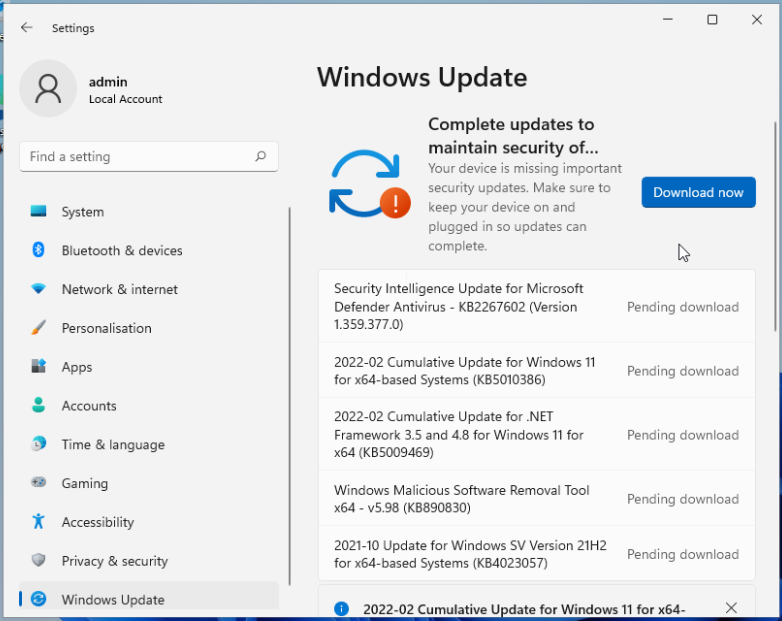
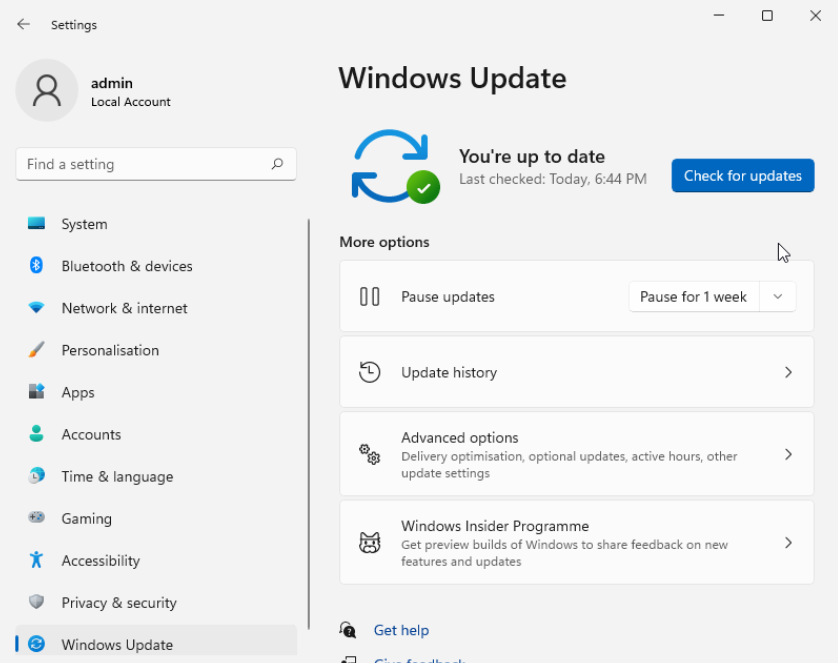
Once you logged into Windows, apply all updates until no more updates available. Reboot as many times as necessary. How many and what type of updates you get is dependent on region and language.
You might have noticed your display area is small (resolution is low). Let's fix that. For our purposes I will assume the PC you are running on is capable of 1920x1080@60Hz (1080p).
Restart Windows.
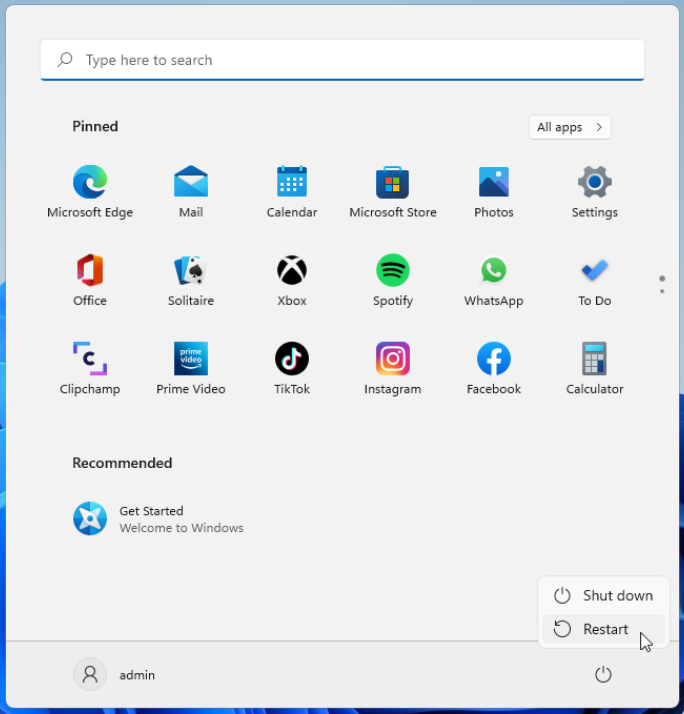
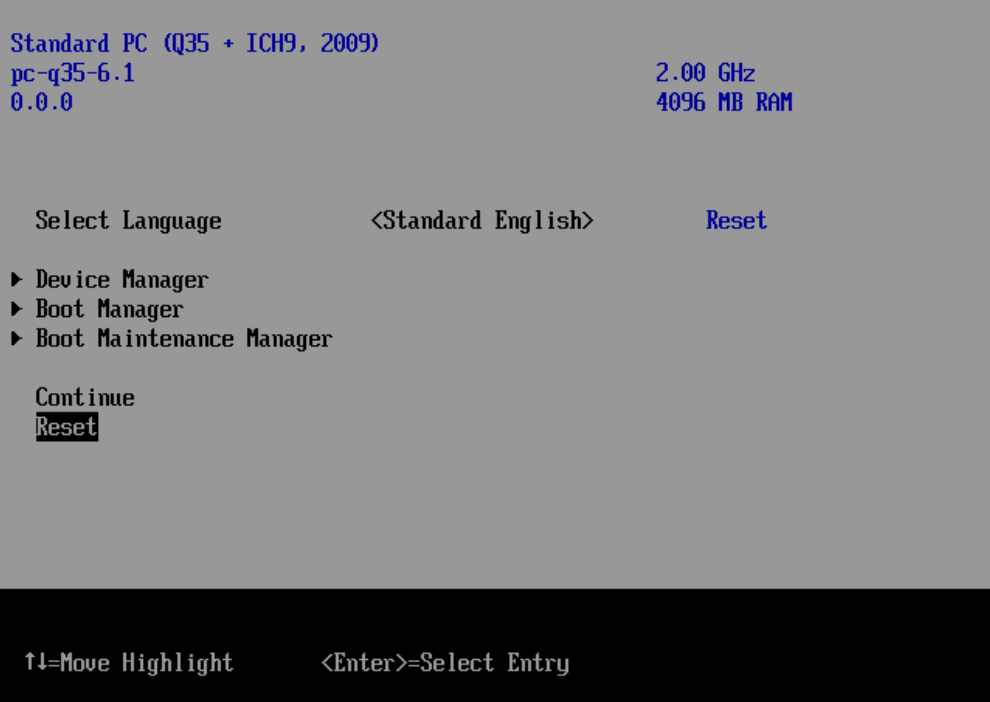
When you see the below screen press the Esc key on your keyboard to access the UEFI BIOS.

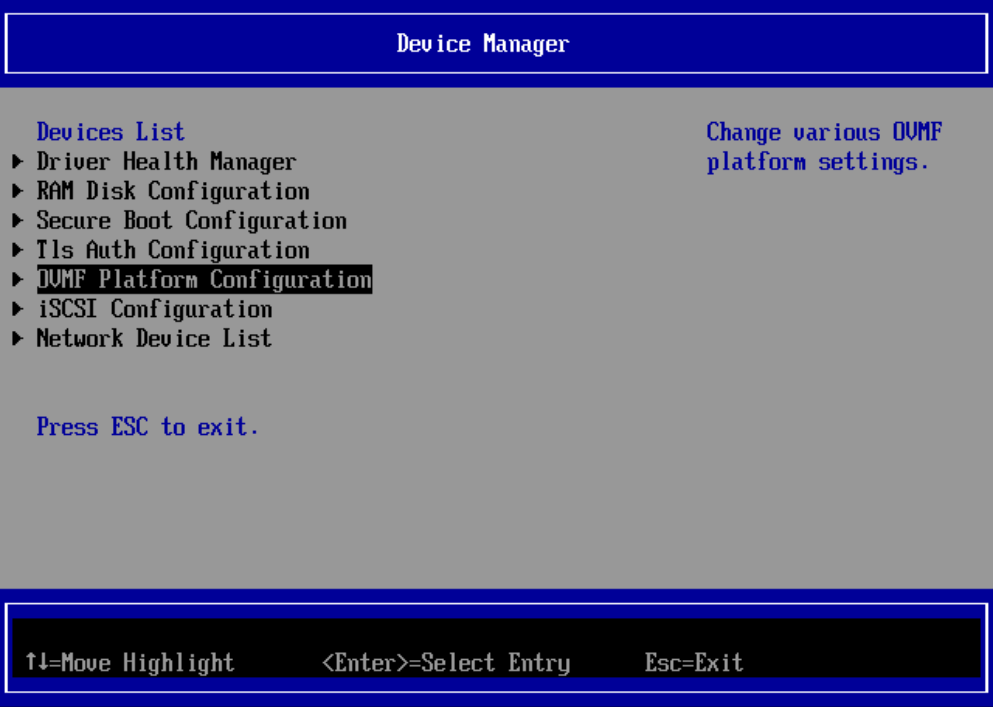
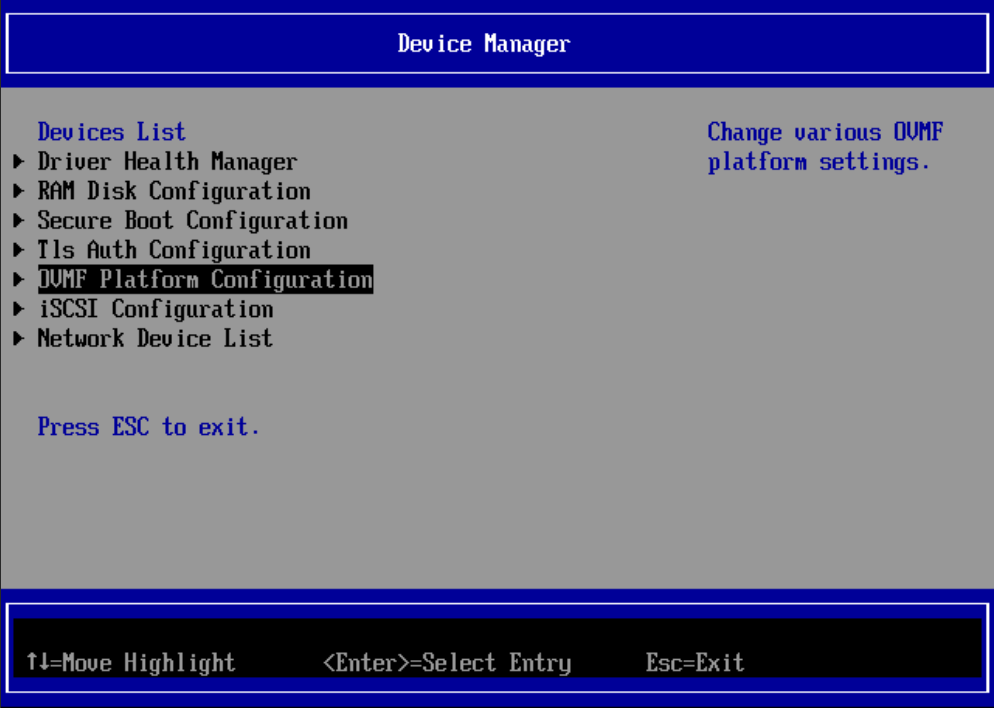
Select Device Manager.
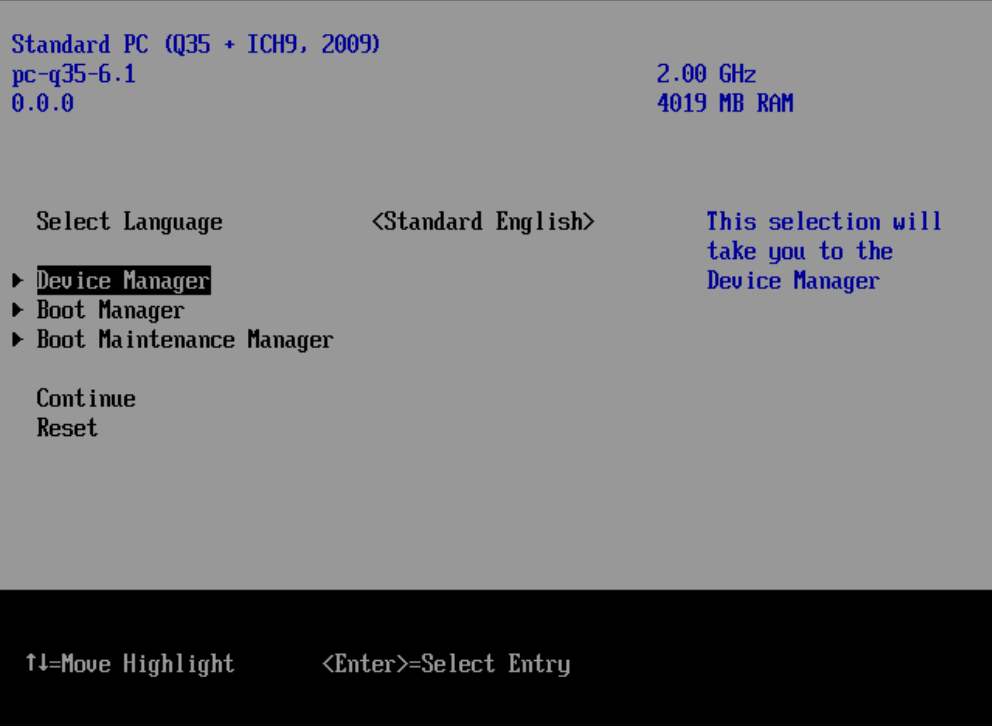
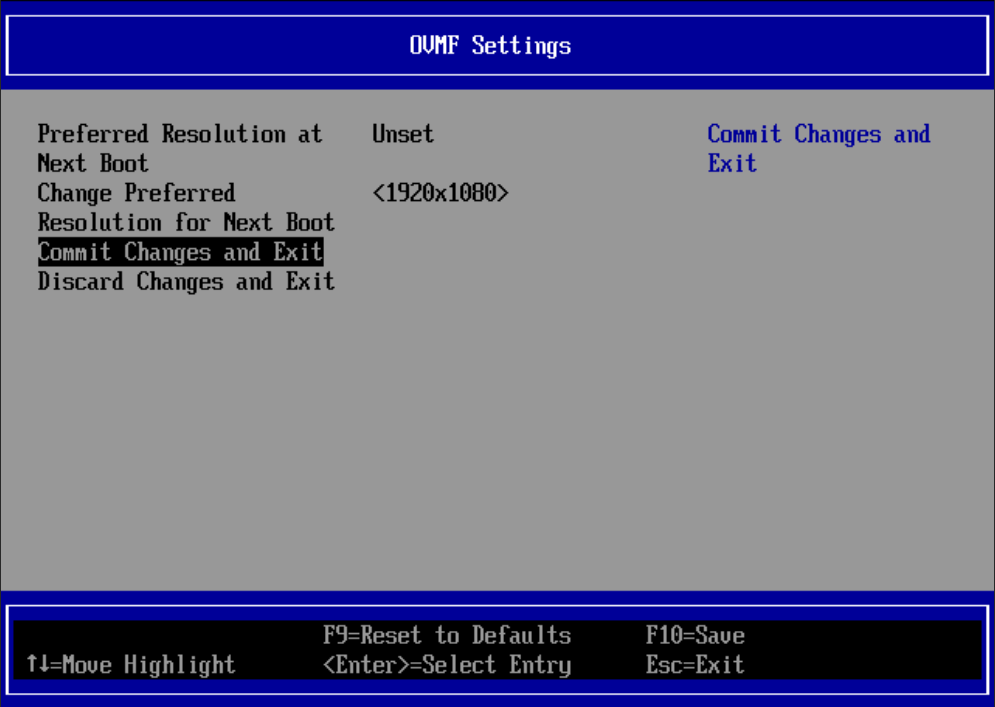
Select OVMF Platform Configuration.
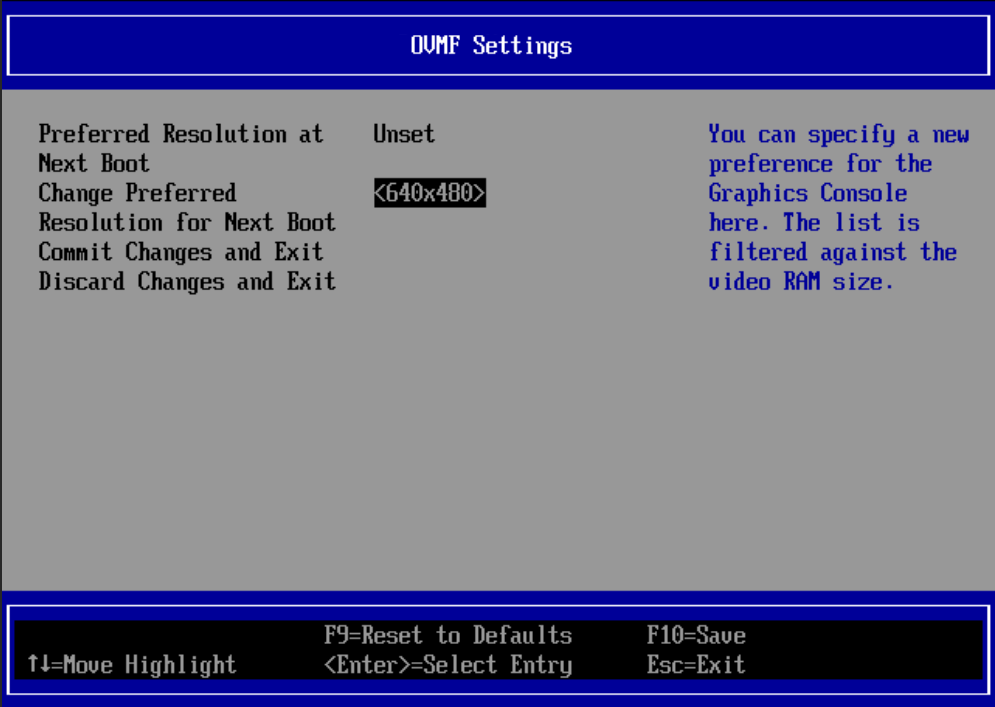
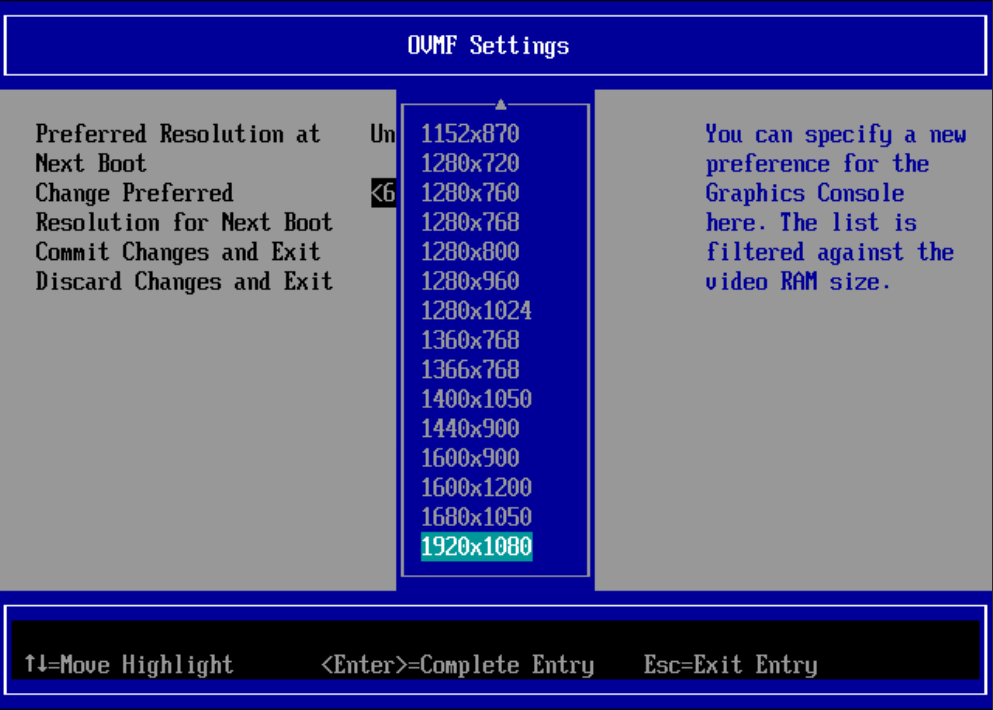
Change Preferred from 640x480 to 1920x1080.
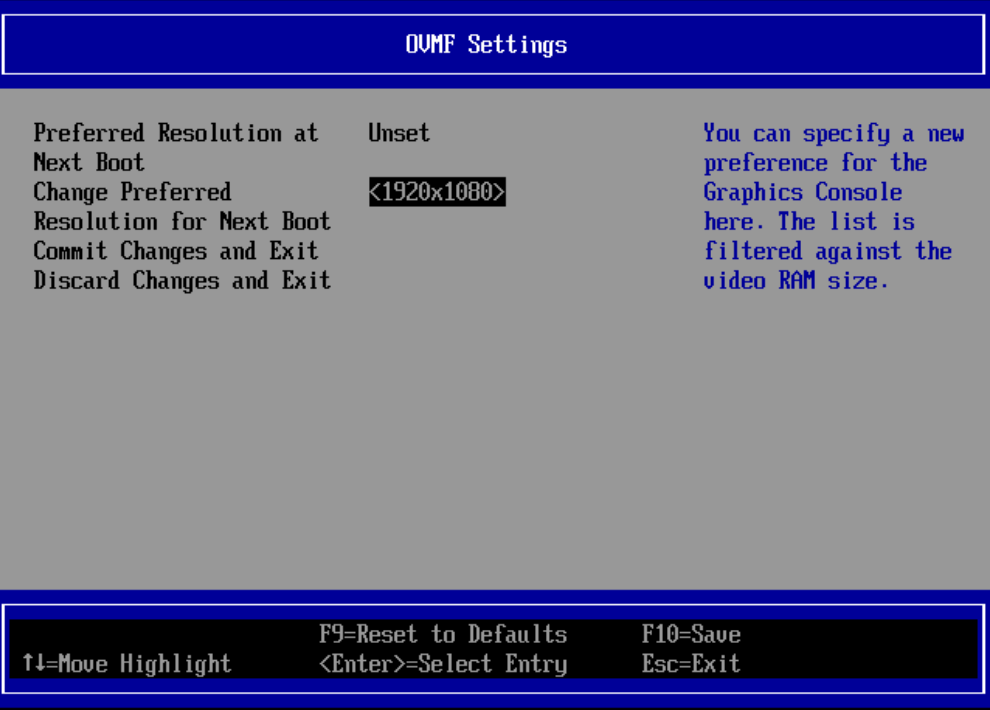
Commit Changes and Exit
Press ESC to exit.
Select Reset. VM will reboot with 1080p resolution.
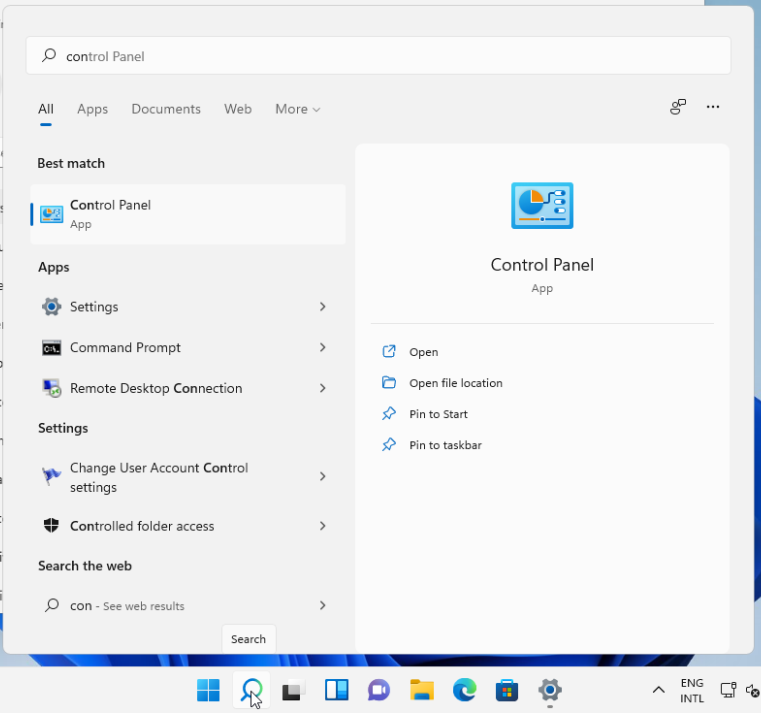
If there is interest I might create a guide how to configure Windows. Some options to consider uninstalling follow.
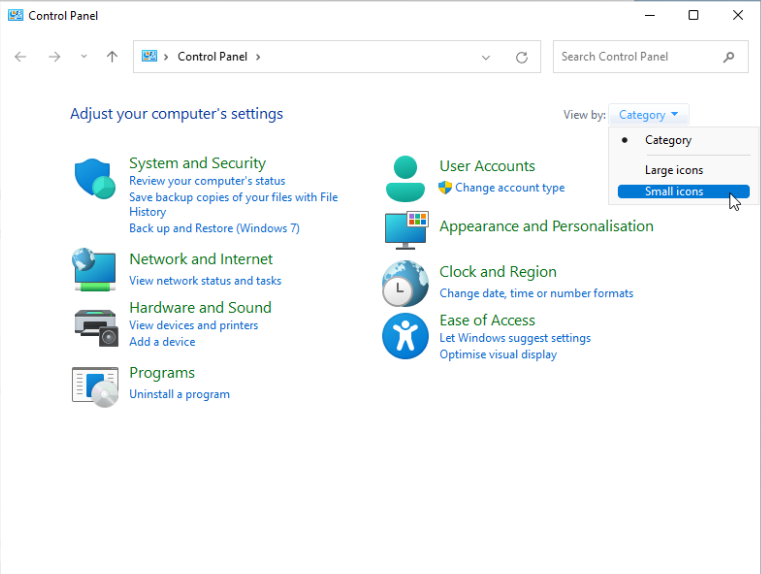
Go to Control Panel.
Select Small Icons.
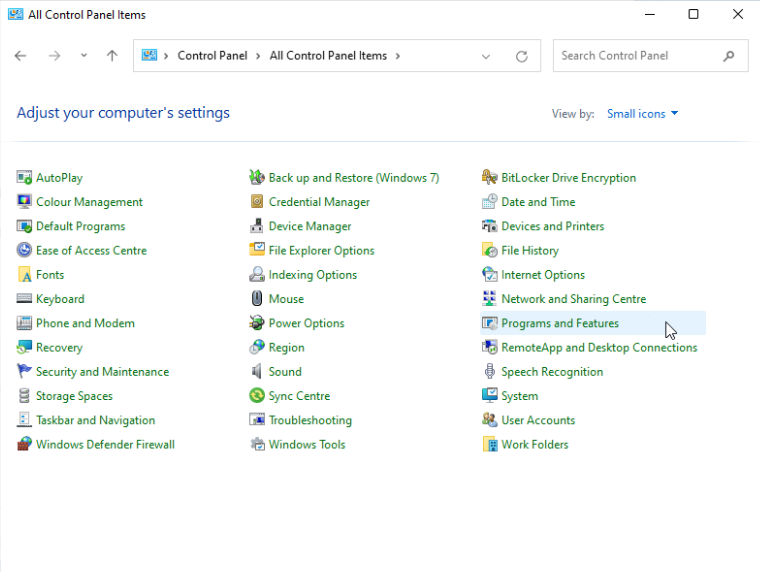
Click Programs and Features.
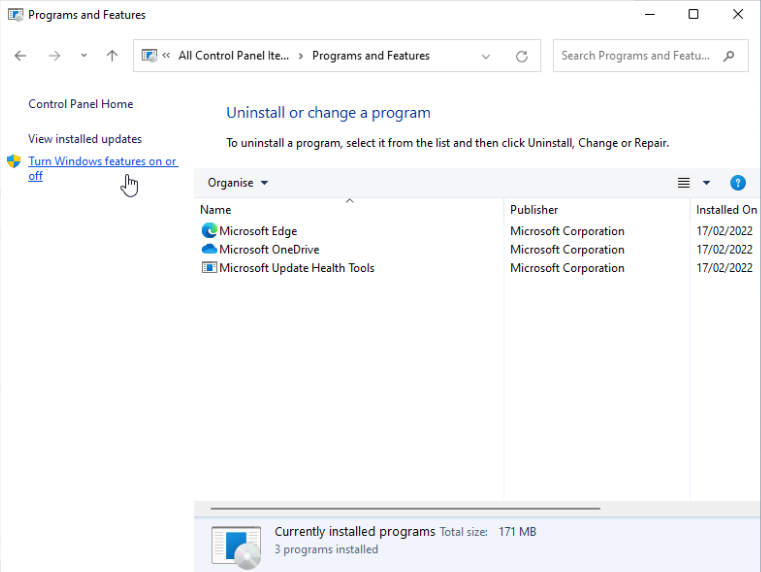
Click Turn Windows features on or off.
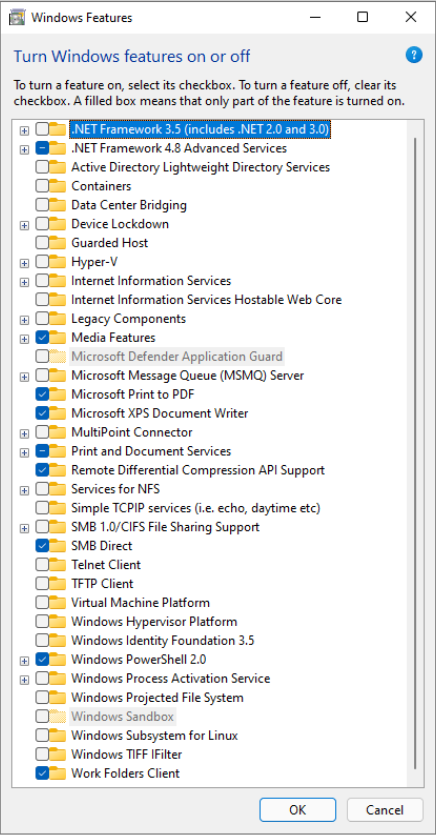
- Untick Media Features (only if you will not use the system for Multimedia Services).
- Untick Microsoft Print to PDF.
- Untick Microsoft XPS Document Writer.
- Untick Print and Document Services.

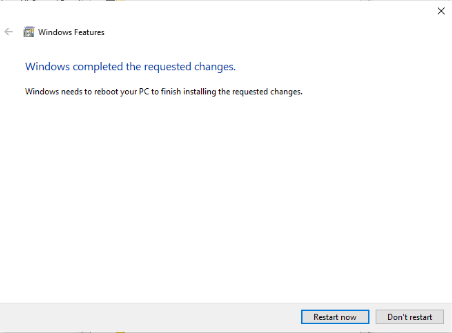
Restart.
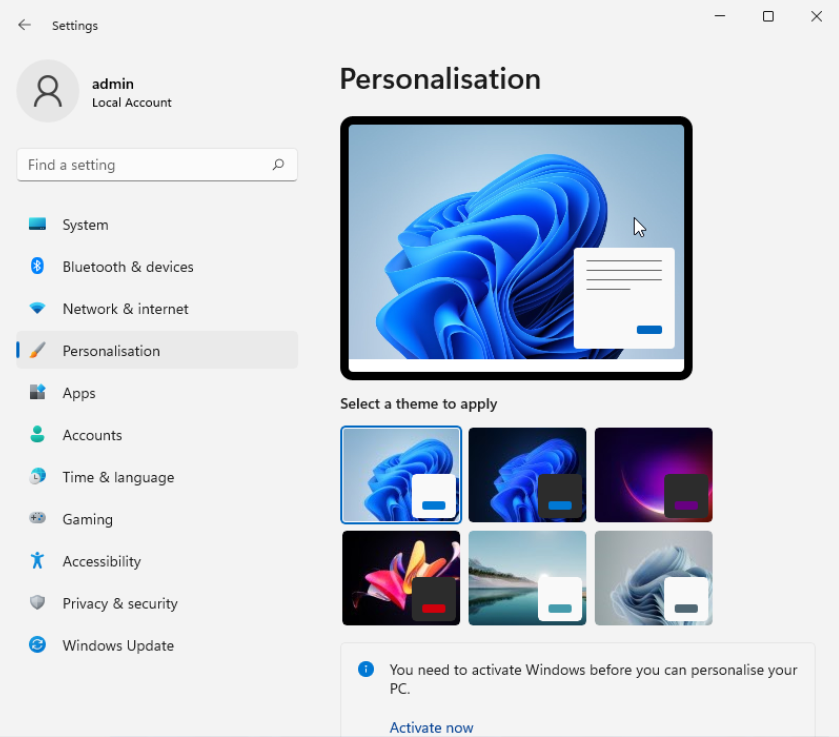
You can run Windows without issues even if it is not activated. The one thing you will not be able to configure is Personalisation. I assume you will not be running Windows in a VM as your primary desktop and therefore activation should not matter much.
Please consider subscribing to my blog, as you will only ever get quality content; no time wasting, advertising, spamming or other unproductive activities/practices.
Please also consider visiting and subscribing to our YouTube channel; we have recently started posting videos.
We are committed to improving and enhancing over time.
If there is something you would like us to cover in a future topic/guide please let us know.
Important Note: From time to time we enhance the content of our posts. It is therefore recommended you link to our original post in our https://blog.habitats.tech, by either subscribing to our https://blog.habitats.tech or visiting our subreddit https://www.reddit.com/r/HabitatsTech/ (our posts in Reddit link to our original posts).