HowTo setup a 3-node Proxmox VE 7.1 cluster and configure it for High Availability on a single machine - Part 6 - for learning & testing purposes only
Host a 3-node Proxmox VE 7.1 cluster on a single PC and configure for High Availability (HA) - Guest VM/CT automated failover (HA)

Passionate about science and technology and a strong believer the next big thing/think is yet to be discovered.
In our earlier Part 5 article we summarised the 3-node PVE cluster operations to organise our thoughts prior to going fully automated High Availability.
In this guide we will explore the automated Guest failover mechanism. For a detailed understanding read the official PVE Clustering Guide.
Guest = a CT or VM allocated virtualised hardware resources to run
GID = Guest ID (CTID or VMID) - a unique number > 100 across a cluster
CT = Container (LXC)
VM = Virtual Machine (KVM)
FS = FileSystem
HA = High Availability
PVE = Proxmox VE
WAC = Web Admin Console (the web browser GUI to administer PVE nodes & clusters)
In order for Guests to automatically failover from a failed node to a running node we must setup HA.
Replication
As a preamble, read the PVE Storage Replication Guide.
Let's setup replication for a number of Guests as follows:
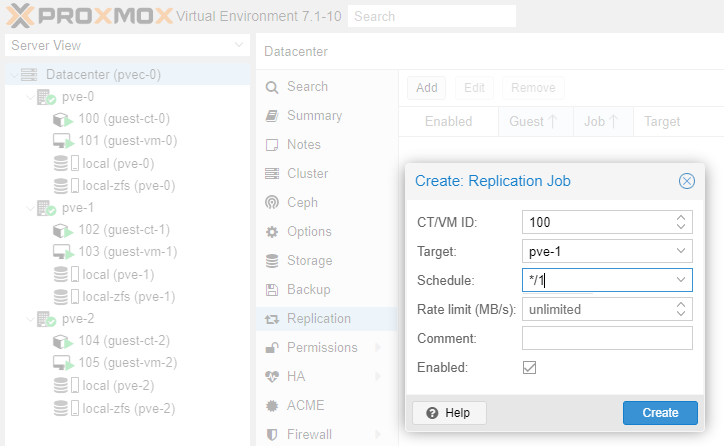
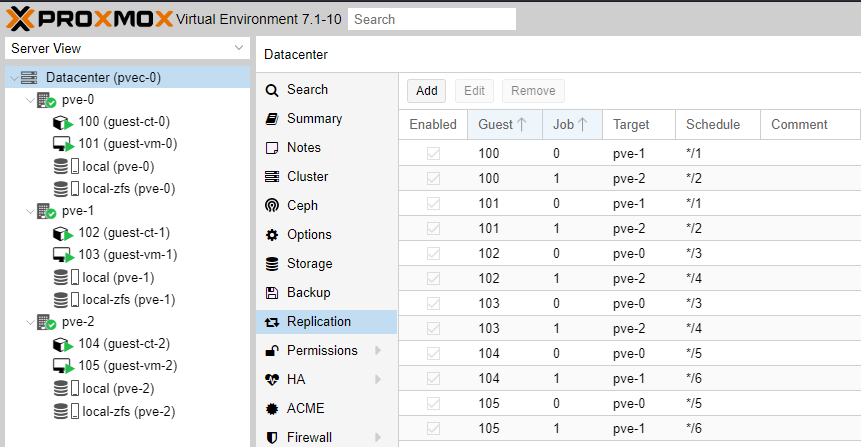
A Guest cannot be replicated on the Node it is running on.
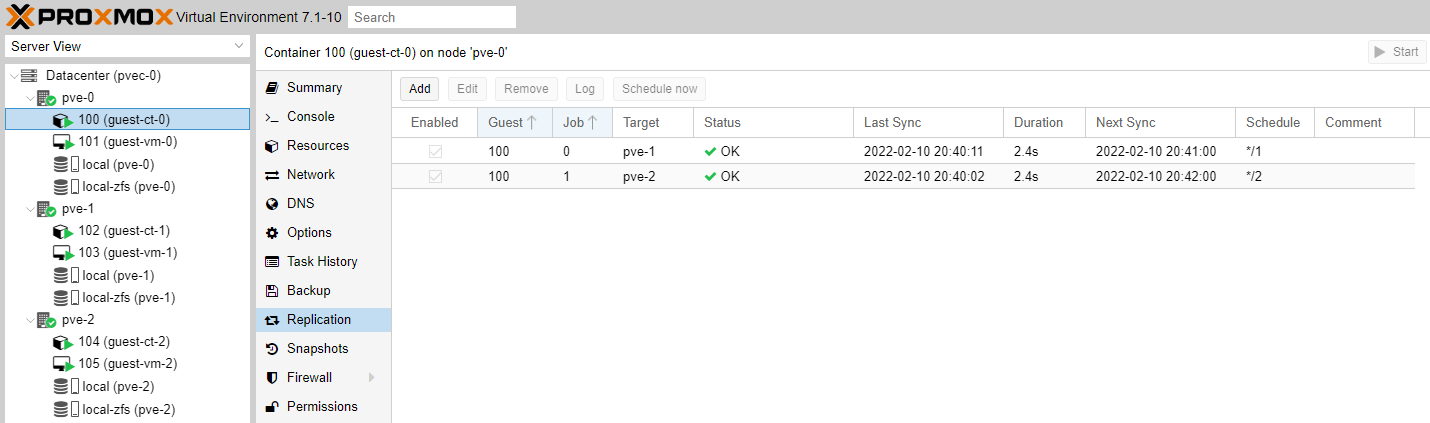
Replication Schedule status, can be listed per Node and per Guest.

High Availability (HA)
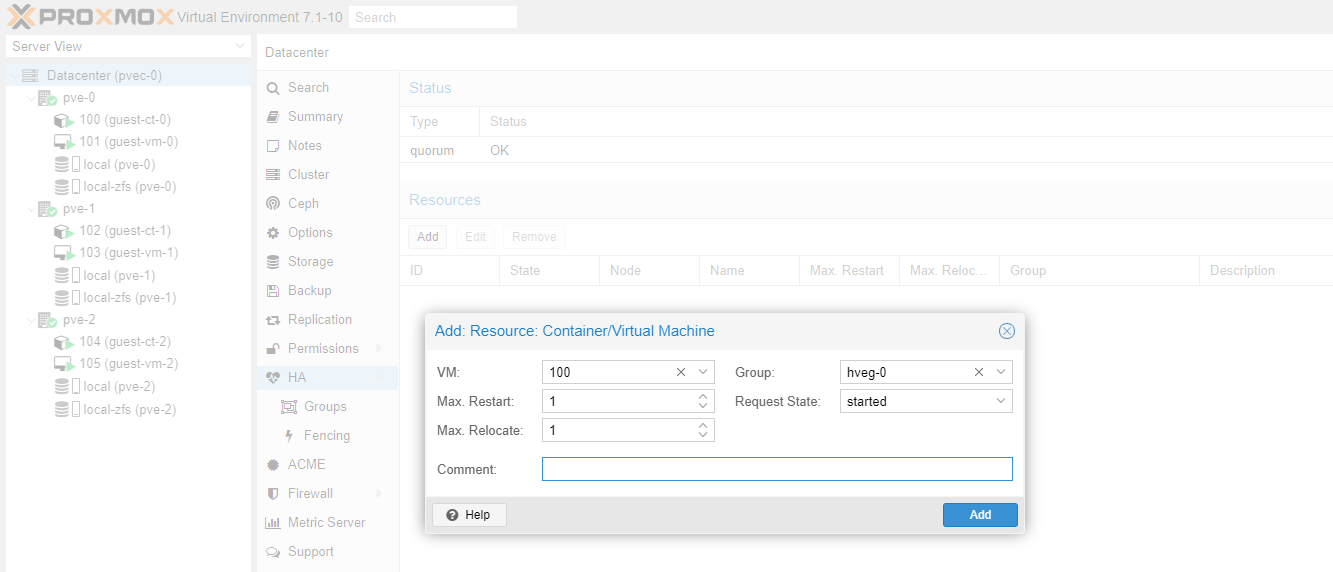
The first thing to consider is if we require HA Groups. A Group is a collection of cluster nodes. A Guest can be restricted to run only on the members of such group.
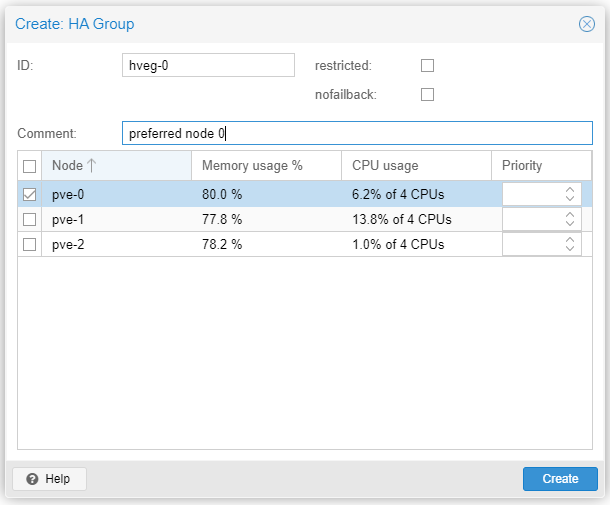
To setup automated failover for Guest with GID 100 create the following resource. We assign this Guest to HA Group hveg-0 because if Node pve-0 fails the Guest will automatically failover to the remaining Nodes in the Cluster; however when Node pve-0 comes back again, the Guest will automatically failover back to pve-0 because it has been assigned to the HA Group hveg-0 which has only one Node pve-0 assigned.
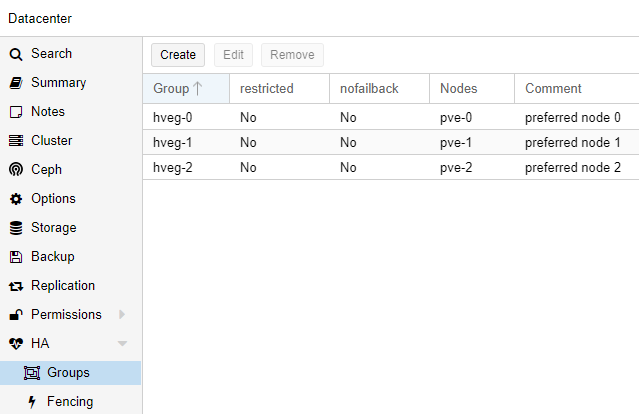
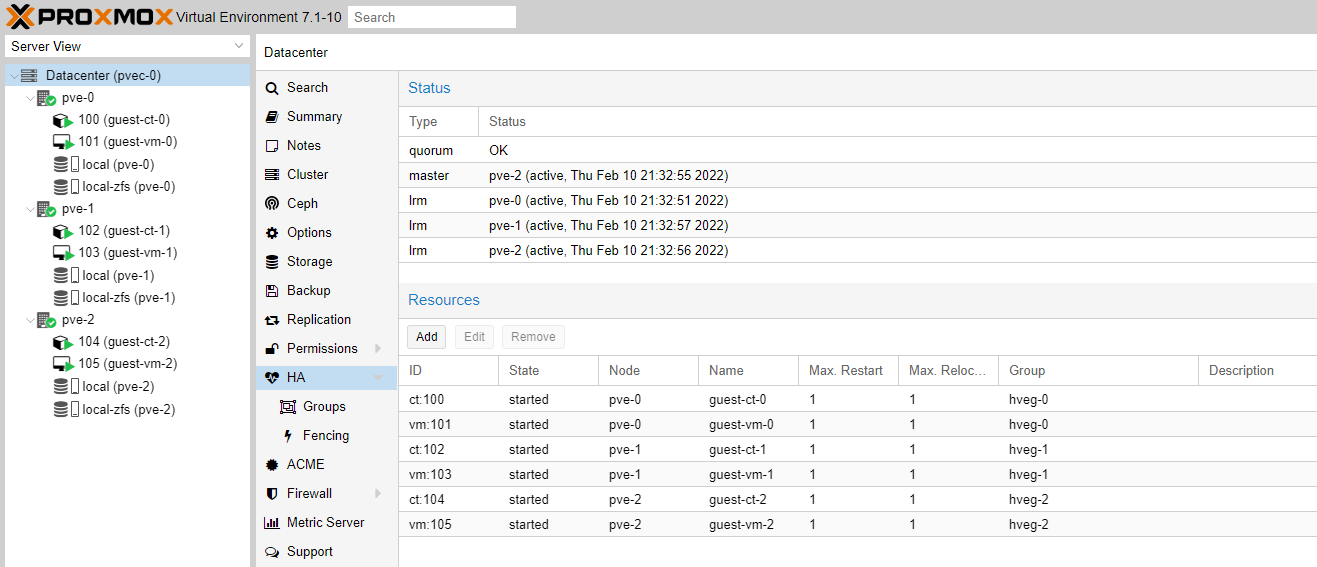
We assign all other Guests as follows:
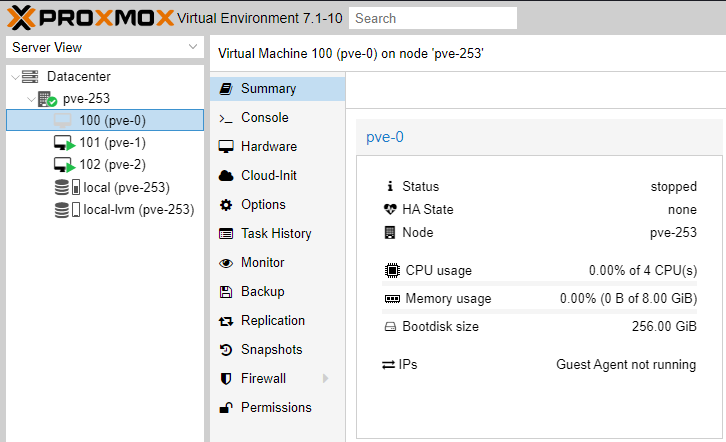
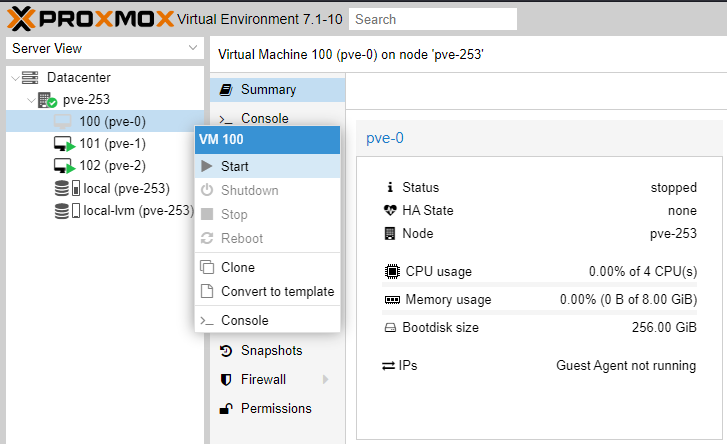
Let's test HA. We will stop VM 100 (pve-0) on pve-253. This action will take offline Cluster Node pve-0.
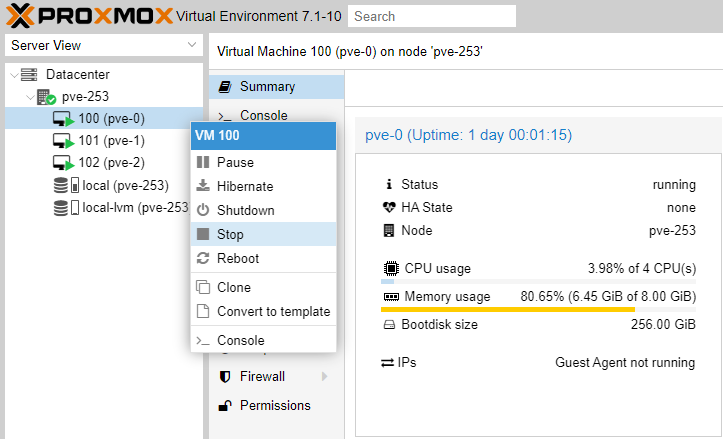
Because we have stopped Cluster Node pve-0, the WAC for pve-0 will stop as well. We now must use the WAC of pve-1 or pve-2 (https://192.168.0.11:8006 or https://192.168.0.12:8006) to access the Cluster.
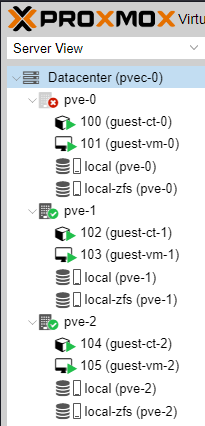
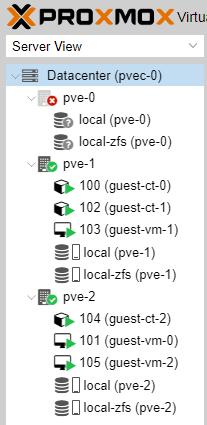
After a while the Guests of pve-0 should have migrated and spread evenly to the other nodes in the cluster.
Let's start VM 100 (pve-0) on Node pve-253. This action will bring back online Cluster Node pve-0.
Let's go back to our Cluster WAC pvec-0 and see if 100 (guest-ct-0) and 101 (guest-vm-0) migrate back to Cluster Node pve-0.

After a while, almost there:

A while longer, there are issues. The CT migrated, but the VM failed to migrate to pve-0.
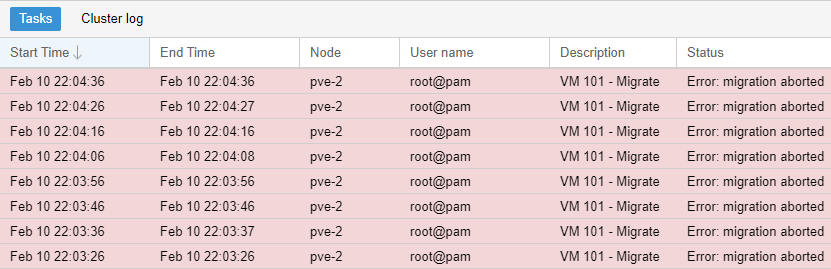
It seems the reason is there are VM Snapshots on pve-0.

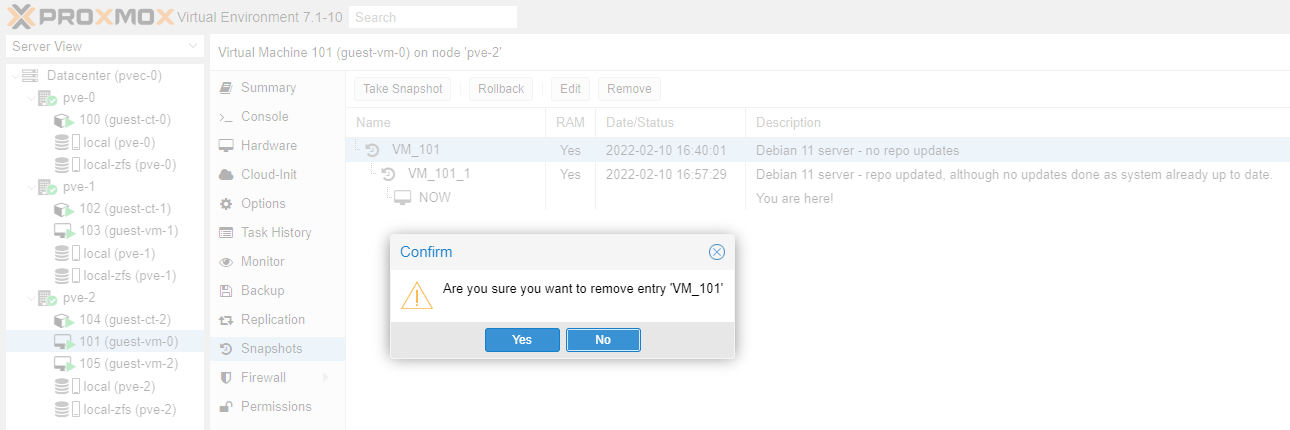
Let's delete the VM 101 (guest-vm-0) snapshots:
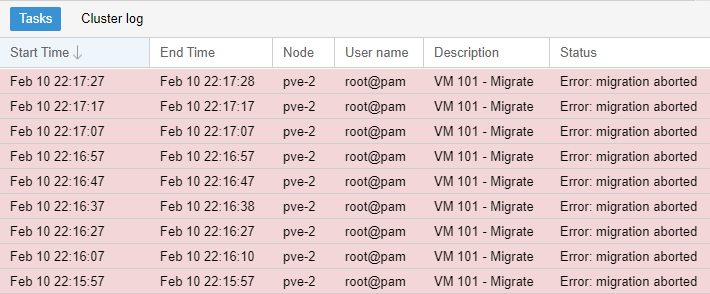
Still migration fails (pve will attempt to automatically migrate 101 (guest-vm-0) to pve-0 until it succeeds):
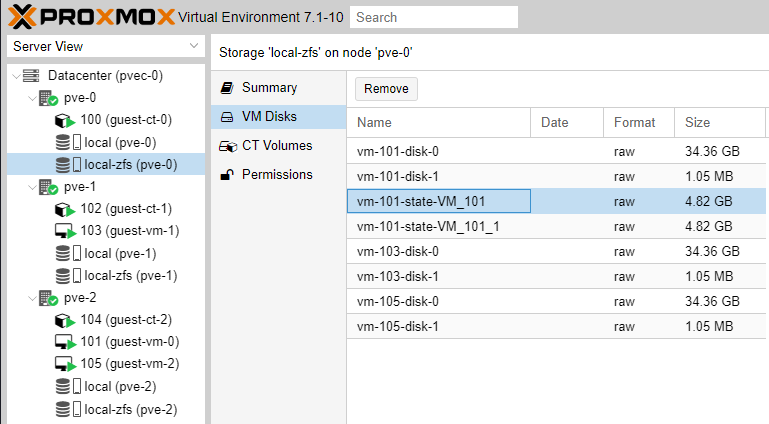
Let's remove the snapshot volumes for VM 101 (guest-vm-0).
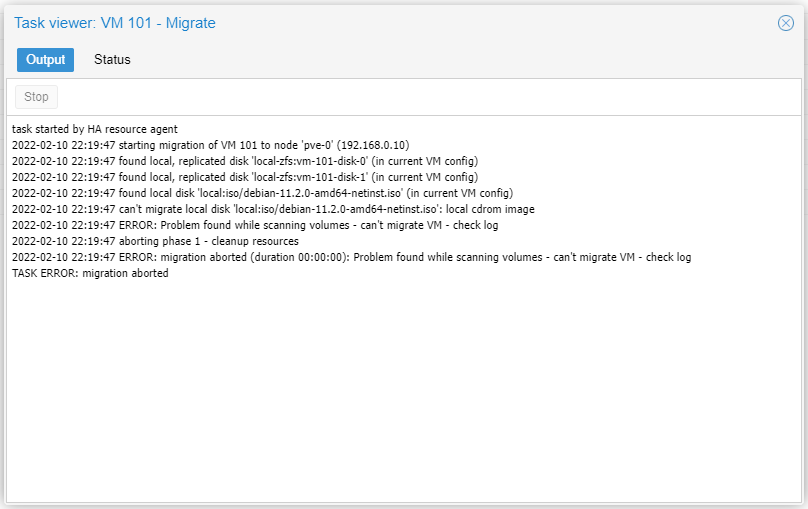
We need to shutdown VM 101 (guest-vm-0) and then remove the CD/DVD drive attached to it.
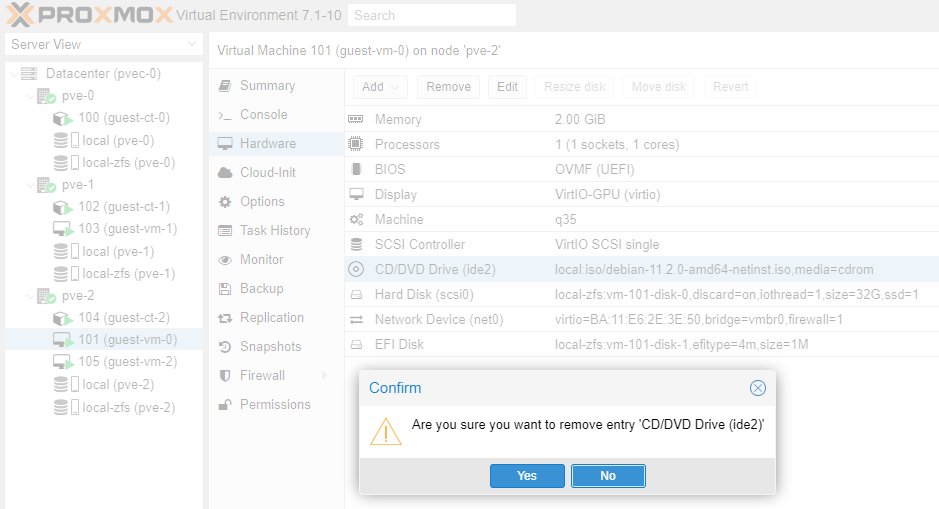
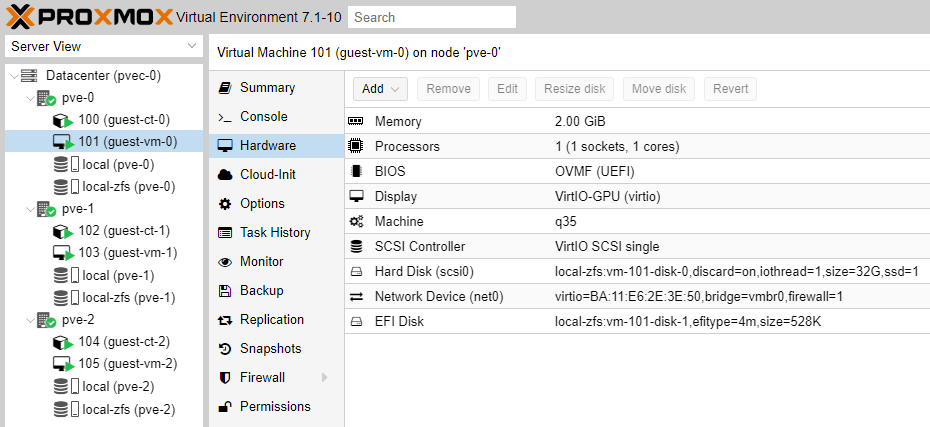
VM 101 (guest-vm-0) will now migrate instantly and automatically start.
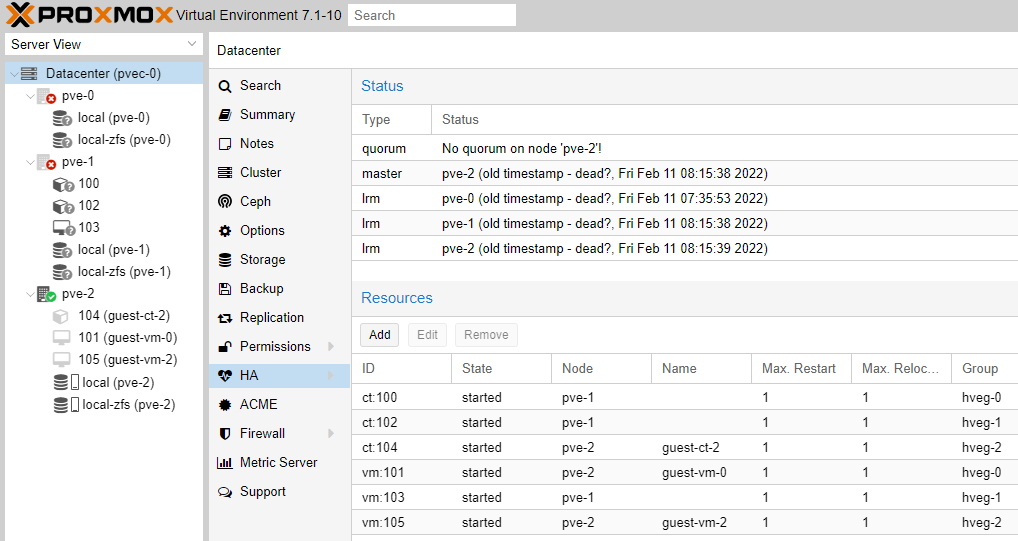
Let's try to take down 2 cluster nodes, pve-0 and pve-1. Go to the WAC of pve-253 and first stop VM 100 (pve-2). Wait a few mins and then stop VM 101 (pve-1). Do you think the cluster will manage to migrate everything to pve-2? Unfortunately no, because the cluster has lost QUORUM. We need at least 2 members to achieve quorum. Therefore, if we want to sustain up to 2 node failures our cluster must be 4-node.
What will happen if pve-0 comes up, while pve-1 is down. Let's see.
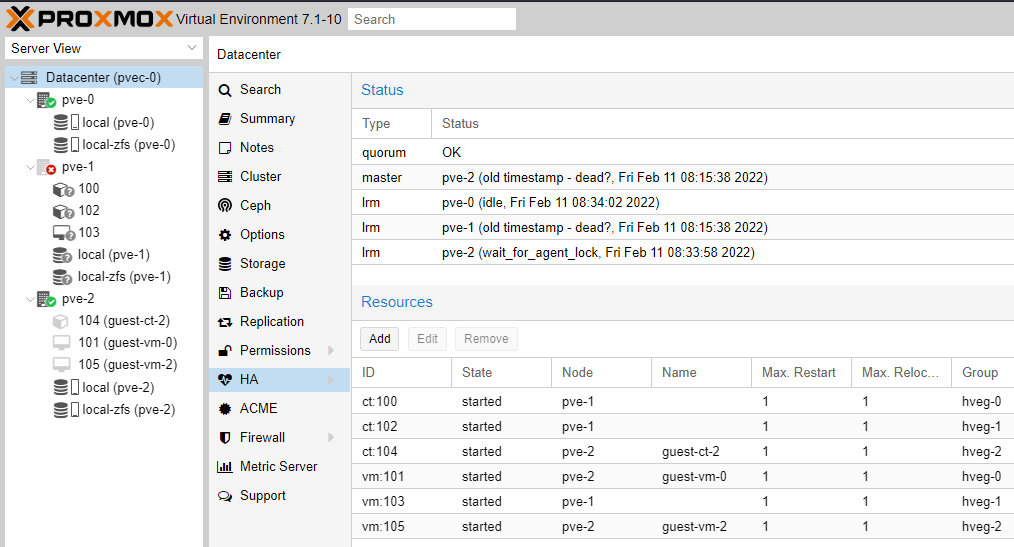
It might take a while, but assuming QUORUM is OK, everything should start going live automatically.

Now bring pve-1 into a running state and see what happens. Try to resolve the migration issues on your own.
Note: Once you have completed VM installation from media CD/DVD ISO, you should always remove the associated drive from the VM as it is no longer needed, to avoid failover issues during automated migration.
In a future guide we will cover HA using CEPH. We will now take a break and cover other technology topics in our next posts.
Please consider subscribing to my blog, as you will only ever get quality content; no time wasting, advertising, spamming or other unproductive activities/practices.
Please also consider visiting and subscribing to our YouTube channel; we have recently started posting videos.
We are committed to improving and enhancing over time.
If there is something you would like us to cover in a future topic/guide please let us know.
Important Note: From time to time we enhance the content of our posts. It is therefore recommended you link to our original post in our https://blog.habitats.tech, by either subscribing to our https://blog.habitats.tech or visiting our subreddit https://www.reddit.com/r/HabitatsTech/ (our posts in Reddit link to our original posts).